Did you know it only takes three ingredients to make caramel sauce?
This caramel sauce is easy to make and can be used as a topping for any dessert, including ice cream, apples, and more! A delicious treat!

Yes, that’s right. Sugar, Butter, and Heavy Cream are the only ingredients to make a buttery rich, velvety smooth caramel sauce with decadent robust flavor, a slight smokiness, and a hint of salt.
I remembered a blog post I wrote in 2014 about making caramel sauce for the first time. My first attempt at making this sauce was quite challenging. I had never used a candy thermometer before, and as with anything, the whole process was rather intimidating.
I am much more experienced in the kitchen now than I was then, so I revisited the caramel sauce recipe. Today, I have refreshed this old blog post to share with you. I have much more information to offer on making the caramel sauce. It is not that hard to make when you know the steps.
This is the perfect time to reshare this recipe, especially with the fast approaching of fall and the holiday season. You can use this caramel sauce to finish almost any dessert. Top cheesecakes, pies, and cakes; pour it over ice cream; stir it into popcorn. Just imagine how good your fall apples will be dipped into it!
This recipe makes quite a bit of caramel sauce, but don’t worry; you can refrigerate it for up to 3 to 4 weeks or freeze it for later use.
To me, this sauce tastes much like a Werther’s Original candy. It’s so good! Caramel sauce tastes so much better when it is homemade. Let me show you how to make it!
What Is Caramel Sauce?
Basically, caramel is just melted sugar. Butter and cream are then added to turn the caramel into a sauce.
You can make caramel in two ways: the dry method and the wet method.
The Dry Method: Sugar is heated slowly until it melts.
The Wet Method: Sugar is dissolved in water, then boiled until the water evaporates.
There are tons of caramel sauce recipes out there. Some recipes use brown sugar and/or corn syrup when making caramel. You should never use brown sugar or corn syrup! Rich and nutty, caramel is a substance produced by cooking sugar until it breaks down. True caramel is made using granulated sugar. Brown sugar contains fructose and other organic compounds that will smoke and burn long before it can turn into a nutty amber-colored caramel.
The same goes for corn syrup. Adding it has no obvious benefit, so it’s useless and an unnecessary ingredient.
Use a Digital Thermometer!
When you think about making candy, you probably think about your grandma’s big metal candy thermometer clipped onto the side of a saucepan. That’s exactly what I used the first time I made this caramel sauce. I purchased a cheap analog candy thermometer from the store. It did a fairly decent job, but it was pretty tricky.
I do not recommend using an analog thermometer to make caramel or candy. An analog thermometer is slow to come to temperature, meaning that while waiting for the mercury to rise to the desired temperature, the candy could have already reached and risen past it! It also can fall out of calibration. Not to mention they are so hard to read!
I recommend getting a digital thermometer such as a Thermapen® digital thermometer by Thermoworks. A Thermapen is super fast and extremely accurate. This thermometer can read temperatures within 2 to 3 seconds, which sure beats the heck out of waiting for that mercury to rise on an analog one! The best part about using a digital thermometer is that you can better understand where the temperature is throughout the mixture instead of reading the temperature in one place on the side of the saucepan.
Caramel Temperature References
340°F (170°C) – Light Brown Caramel
This is when the sugar liquefies and starts to turn brown due to caramelization. The sugar is just beginning to break down, and the flavor becomes rich. This caramelized sugar is good for dessert decorations like nuts.
345°F (174°C) – Medium Caramel
For spun sugar and sugar cages.
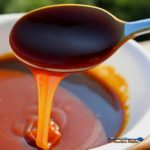
350°F (177°C) – Dark Caramel
THIS IS IDEAL! The caramel sauce is the perfect coloring agent for sauces at this temperature.
360°F to 375°F (182°C to 190°C) – Very Dark Caramel
The caramel darkens even further, becoming a little bitter.
400°F to 410°F (204°C to 210°C) – Black Jack
The liquefied sugar turns black and decomposes beyond 410°F (210°C)
How to Make Caramel Sauce
IMPORTANT: Before you begin, read and understand this recipe all the way through. Also, measure all ingredients and have each ready to go when needed.
Caramel is hotter than 40 hells! Be extra careful when preparing it. With temps up to 350 degrees, it can grab onto your skin and burn you. Use extreme caution when adding the butter and cream to the hot sugar. It’s almost like lava. Stand away from the stove, keep your face away from the pot, and slowly add the butter and cream.
I recommend using at least a 2 ½ quart saucepan or larger to ensure the saucepan is large enough to hold the caramel sauce. This allows plenty of room for the bubbling hot caramel and room to stir it. Also, you must ensure your utensil is heat-resistant enough to handle the job. A wooden spoon, a silicone spatula, or a metal whisk is best.
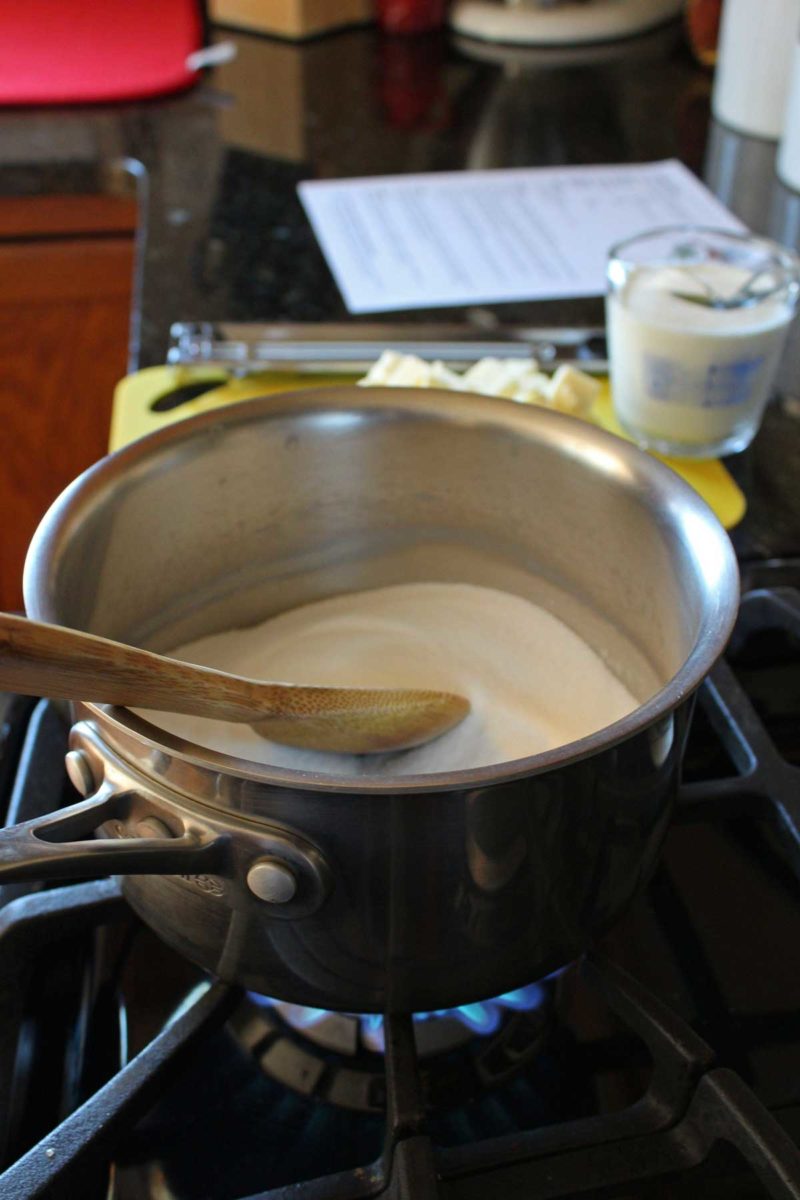
Begin by stirring the sugar in a medium saucepan over medium heat.
As the sugar heats up, it clumps together and starts to break into a liquid. Keep stirring! This will break down any clumps.
At 340°F (170°C), the sugar is in a liquid form. Continue stirring and heat the liquified sugar until the temperature rises to 350 degrees F (177°C).
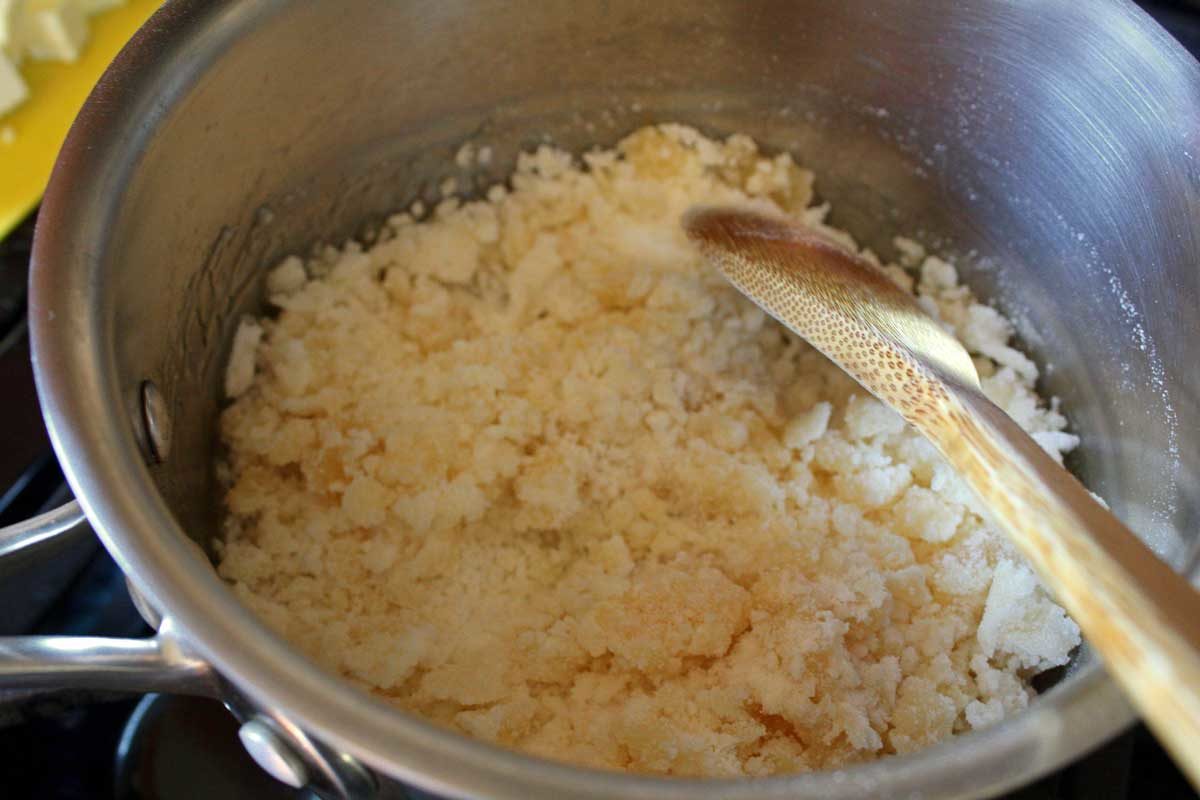
Once the liquefied sugar reaches 350 degrees F (177°C), carefully add the butter a few cubes at a time. BE CAREFUL! The mixture will hiss and splatter and act all kinds of cranky. Don’t worry; keep stirring in the butter until it has melted completely.
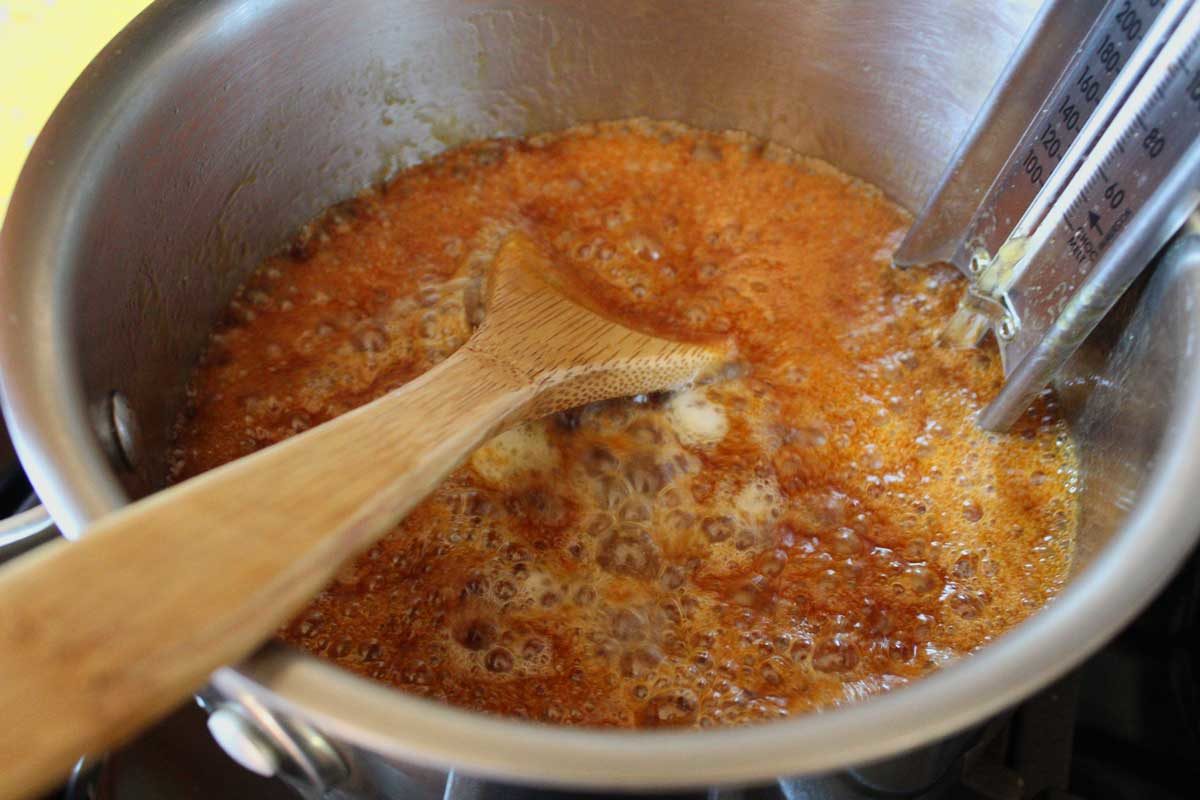
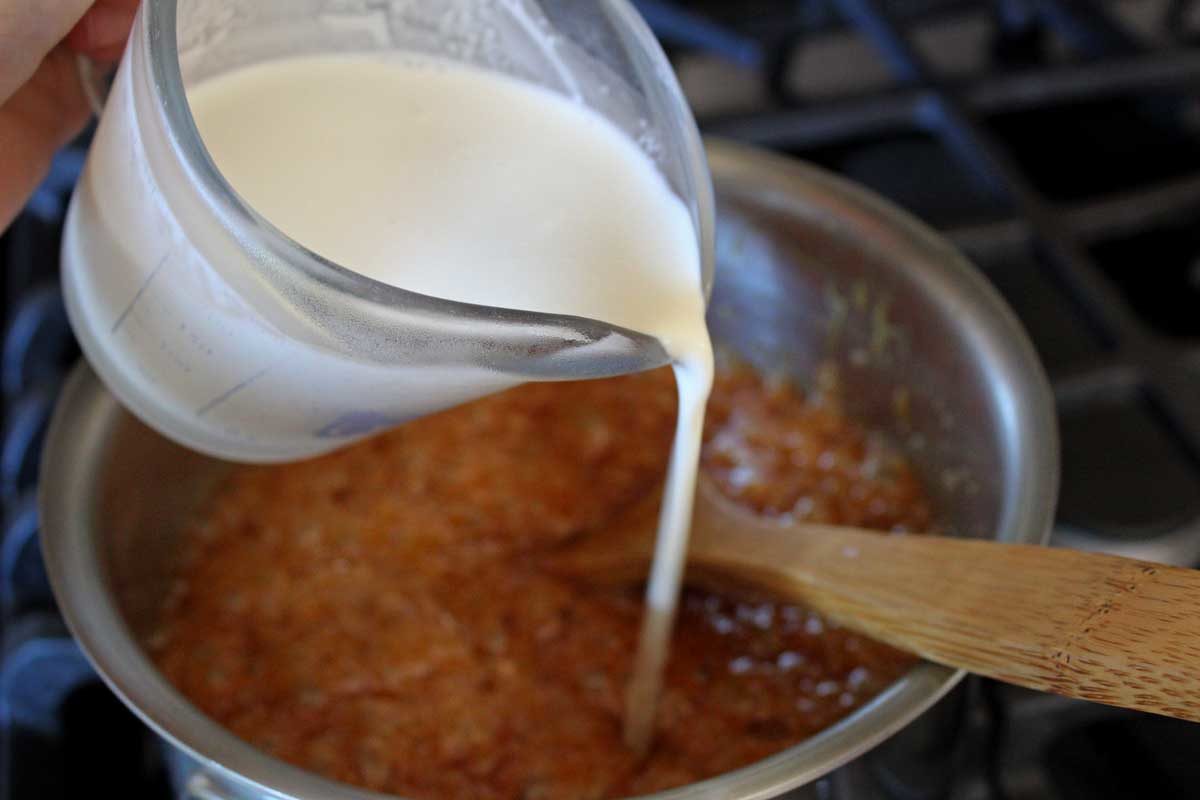
Once the butter has melted, CAREFULLY add in the heavy cream. Stir the mixture and let it boil for 3 minutes.
Remove the caramel sauce from the heat, and let the caramel cool for at least 15 minutes before pouring it into a container.
After the caramel sauce has cooled, use it directly or pour it into a jar or microwave-safe airtight container.
Reheating Caramel Sauce:
Spoon the desired amount of caramel into a bowl or remove the lid from the jar or container. Heat the sauce in a microwave oven on high heat for 15-second intervals until the caramel becomes warm and thin. Pour, drizzle, coat, and dip the caramel sauce.
Storing Caramel Sauce:
Store the caramel sauce in the refrigerator for about 3 to 4 weeks.
You can also pour the caramel sauce into a freezer-safe container and freeze it for up to 3 months.
To use the caramel sauce from the freezer, defrost overnight in the refrigerator.

Salted Caramel Sauce:
If you love salted caramel, you can sprinkle extra salt on top of your caramel sauce creations as a garnish or for desired taste. I recommend kosher, fleur de sel, Himalayan Pink, or sea salt for serving.
It’s important to remember you can always add, but you can never take it away, so add a little until you get the desired amount.
Uses For Caramel Sauce:
- Brownies
- Cheesecake
- Ice Cream
- Cookies
- Popcorn
- Cinnamon rolls
- Cakes
- Pretzels
- Cupcakes
- Muffins
- Pies
- Tarts
- Fruits: apples, peaches, bananas
- Breakfast: pancakes, French toast, waffles
Caramel also makes a great gift! Pour it into a fancy jar and tie a bow around the lid. Viola!
I hope you enjoy making this caramel sauce and have fun using it!
What will you put it on? Comment below!

Caramel Sauce
Useful Equipment:
Ingredients
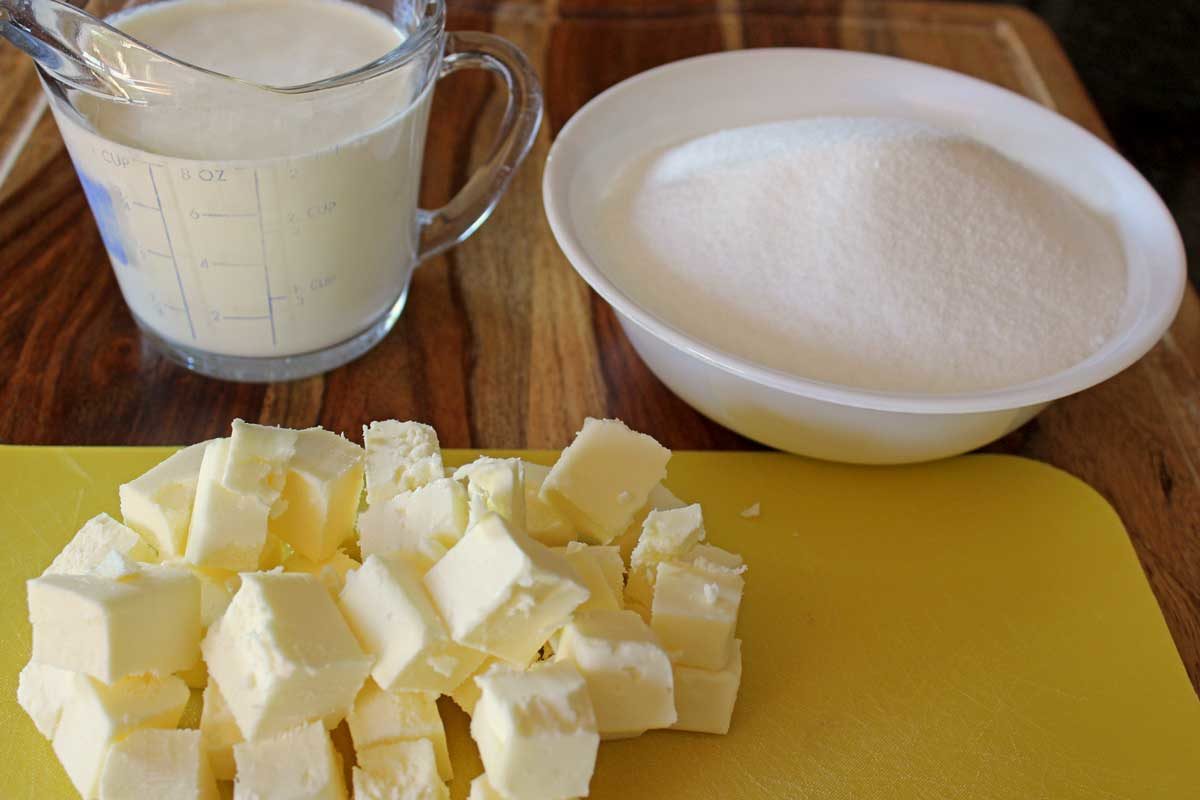
- 2 cups granulated sugar
- ¾ cup unsalted butter (1 ½ sticks) diced into ½-inch cubes
- 1 cup heavy cream
Instructions
- Begin by heating the sugar in a medium saucepan, over medium heat; stirring often.As the sugar heats up, it begins to clump together and starts to break down into a liquid. Keep stirring! This will break down any clumps.
- At 340°F (170°C) the sugar is in a liquid form. Continue stirring and heat the liquified sugar until the temperature rises to 350 degrees F (177°C).
- Once the liquefied sugar reaches 350 degrees F (177°C), carefully add the butter a few cubes at the time. BE CAREFUL! The mixture will hiss and splatter and act all kinds of cranky. Don’t worry, just keep stirring in the butter until it has melted completely.
- Once the butter has melted, CAREFULLY add in the heavy cream. Stir the mixture and let it boil for 3 minutes.
- Remove the caramel sauce from the heat, and let the caramel cool at least 15 minutes before pouring into a container.
- After the caramel sauce has cooled a bit, use directly or pour it into a jar or microwave-safe airtight container.


Colleen says
No matter how many times you hear to be careful when baking with sugar/candy, you will always burn yourself. It’s just how it works; I blame the Kitchen Goblins! Hope your finger doesn’t require amputation!
Debbie Spivey says
Just a dead tip. I’ll survive… 😉
Dana Fashina says
Phew, that’s a lot of sugah!
Looks successful though! Would you make it again?
Debbie Spivey says
Definitely! So much better than the jarred crap you buy at the store!
Dana Fashina says
Yeah, that is pretty processed crap
sophisticatedjerseygirl says
Yum! Sorry about your finger. Love the recipe and love your vacuum! Dysons are the best 🙂
Debbie Spivey says
You’re very observant! Yes, I like my Dyson, just wish my hose was more flexible… My finger is OK besides the numb spot. Hope it is just dead skin…
dogear6 says
Caramel is delicious and as you noted, not that hard to make. I used to make tons of peanut brittle, which is similar.
I love the sea salts! Himalayan Pink is my favorite too.
Nancy
Debbie Spivey says
Yum, Nancy! Haven’t had any peanut brittle in a long time. Wonder if my teeth could handle it?!?
"Cheffie Cooks" says
Glad it finally came out good for you. Sorry, about the finger! Dang kitchen mishaps! Cheryl
Debbie Spivey says
Thanks, Cheryl! 😉