Master charcoal setups like Direct Heat, Two-Zone, and Snake Method for perfect BBQ, searing, and slow smoking every time.
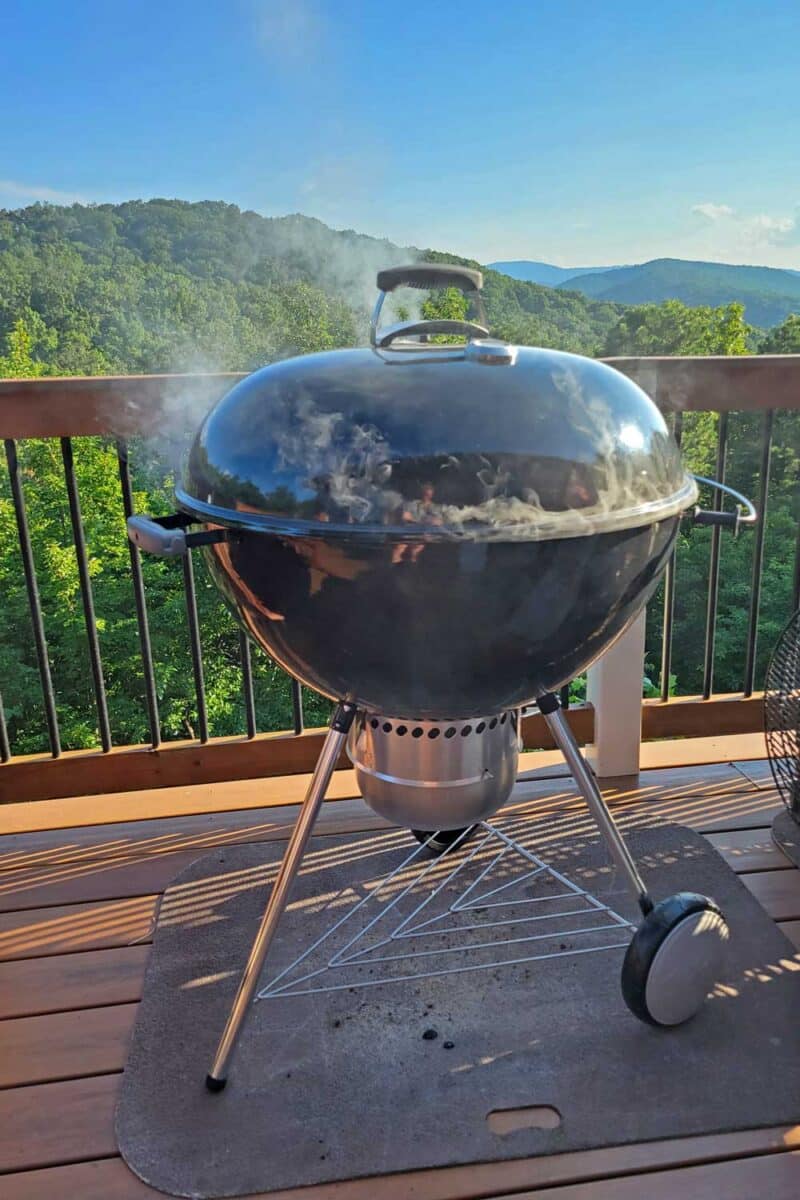
When I’m firing up my Weber, I use different charcoal setups depending on what I’m cooking. Me and Debbie figured it was time to talk charcoal configurations. Once you get the hang of controlling heat, grilling with charcoal gets a whole lot more fun—it might even make you forget about those fancy pellet smokers.
Here’s the deal: every grill has its quirks, so you’ve gotta spend some time learning yours. Your first few cooks might not win prizes, but that’s okay. Just keep at it—experiment, adjust, and you’ll get there.
Charcoal’s great for both high-heat searing and low and slow smoking, but it does need a little more attention than gas or electric grills. Mastering your setup means steady heat and the ability to cook at different temps for perfect results every time. Let’s dive into charcoal setups and see what works best for you.
Direct Heat: High heat: 450 degrees F to 550 degrees F.
Direct Heat is your go-to when you’re after that perfect sear and quick results. It’s the fastest and easiest way to grill—just toss your food directly over the hot coals and let the flames work their magic. This method is ideal for thinner cuts like steaks, chicken breasts, burgers, or veggies. The heat from the coals sears the outside while cooking the inside fast, giving you that delicious charred crust and smoky flavor that make grilling so irresistible.
With Direct Heat, you’ll get a crispy, charred finish in no time, but make sure to keep an eye on it to avoid burning. It’s all about getting that perfect sear, so stay close, flip when needed, and you’ll have a meal packed with flavor in no time!
Why It Works
Direct heat is great because it gives you a lot more control over the cook. The flames directly hit your food, searing it to lock in flavors while cooking it through quickly. It’s ideal for foods that cook fast and don’t require a long time on the grill. Plus, the high heat helps caramelize the outside, creating that crispy, smoky texture that makes firing up charcoal worth it.
How to Set It Up
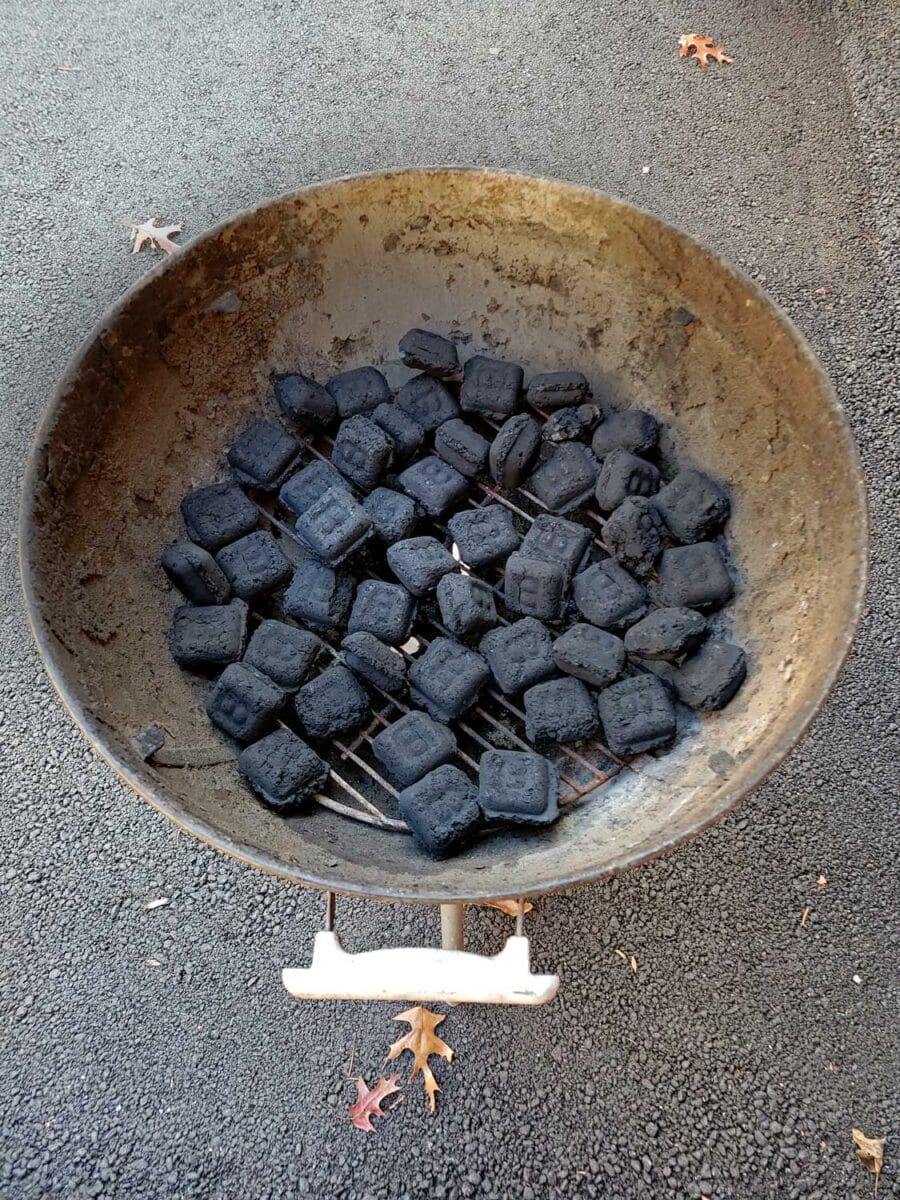
To set up Direct Heat, all you have to do is pile your coals into a single, even layer at the bottom of your grill. Light them up and let them burn until they’re hot, white, covered in ash, and ready to go. Place the food directly over the coals, and you’re set to grill away. You don’t have to make fancy arrangements—just direct high heat.
When to Use It
Direct Heat is best for foods that cook quickly and benefit from high, direct heat, like:
- Steaks
- Chicken
- Hamburgers
- Fish
- Vegetables – like when I made those awesome grilled brussels sprouts.
Pro Tips
- Keep an Eye on It: Foods cooked over direct heat can burn fast, so stay close and flip as needed to avoid overcooking.
- Don’t Overcrowd: Give each piece of food space to cook properly. Too many items on the grill can cause uneven cooking.
Advantages and Disadvantages
What’s Great:
- Fast and Efficient: Direct heat is quick, cooking food in a fraction of the time. It’s perfect when you’re in a hurry or cooking smaller cuts like steaks or burgers.
- Sear In Flavor: Direct contact with hot coals creates a beautiful, crispy sear, adding that smoky, charred flavor that grilling is known for.
- Simplicity: It’s easy to set up and doesn’t require much fuss. Just toss your food on the grill and watch it cook.
What’s Tricky:
- Risk of Overcooking or Burning: The intense heat can quickly char the outside of your food before it’s cooked through, so it requires constant attention.
- Not Ideal for Thick Cuts: Large or tough cuts like roasts or whole chickens can dry out or cook unevenly over direct heat.
- Requires Frequent Monitoring: You’ve got to keep a close eye on your food, flipping it at the right time to achieve that perfect sear without overcooking.
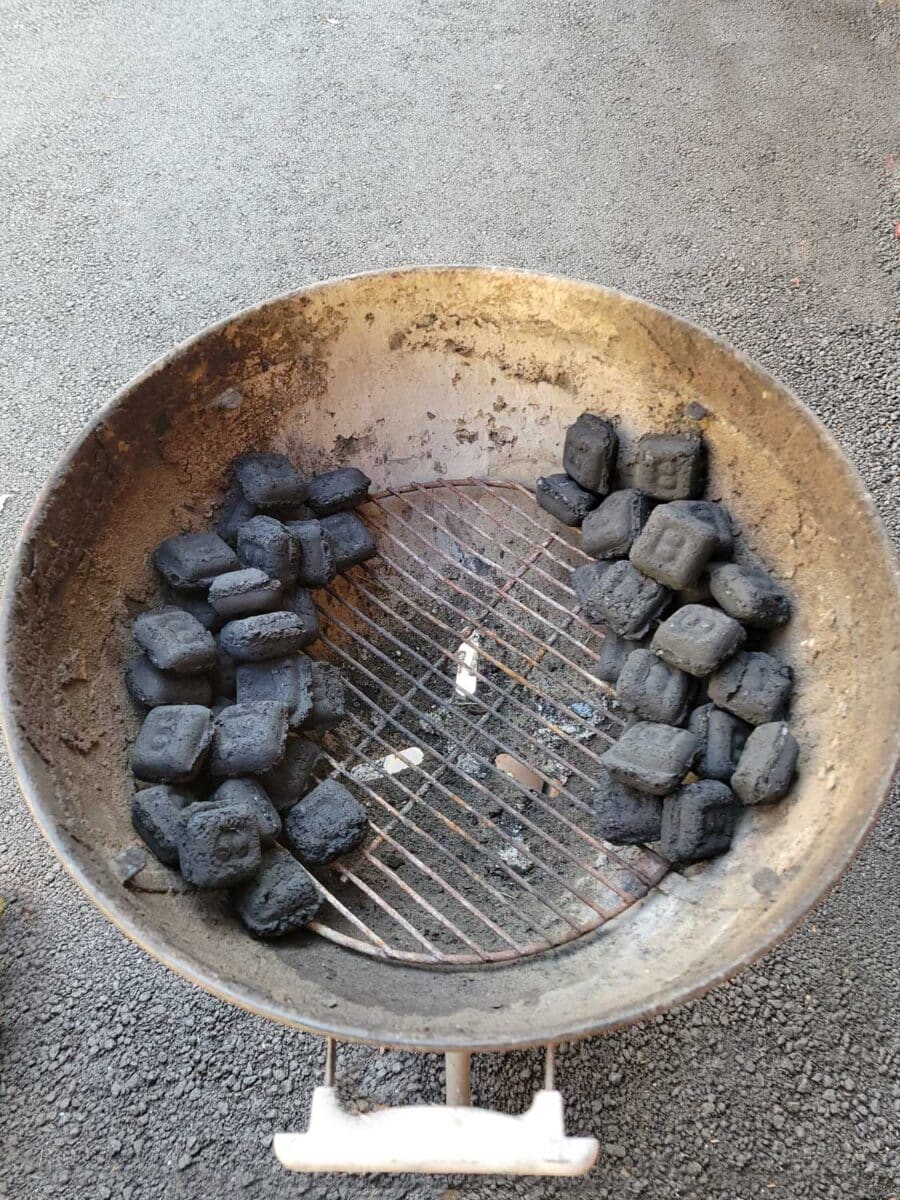
Two-Zone Method (Indirect Heat)
With this setup, you can handle anything: fast, fiery heat for a quick sear and low, steady warmth for tender, even cooking. Think of your grill as having two personalities:
- The Hot Zone (Direct Heat): This is where the magic happens for searing and charring. All your lit coals hang out here, ready to give steaks, burgers, and chops that perfect crust.
- The Cool Zone (Indirect Heat): This side stays mellow—no coals, just gentle, steady heat. It’s perfect for slow-cooking ribs, chicken, or even a pork butt.
Why This Setup Works
Here’s why I swear by this method for almost every time I fire up the grill:
- Versatility: This setup does everything from quick-grilled shrimp to slow-smoked ribs.
- Control: If your meat is cooking too fast, slide it over to the cool side and let it finish cooking slowly.
- Flavor: Infuses every bite with that unbeatable smoky charcoal goodness.
- No Burnt Meat: Keep flare-ups at bay, and your food is perfectly cooked with the indirect zone.
How to Set It Up
Getting the Two-Zone Method going is one of the easiest charcoal setups:
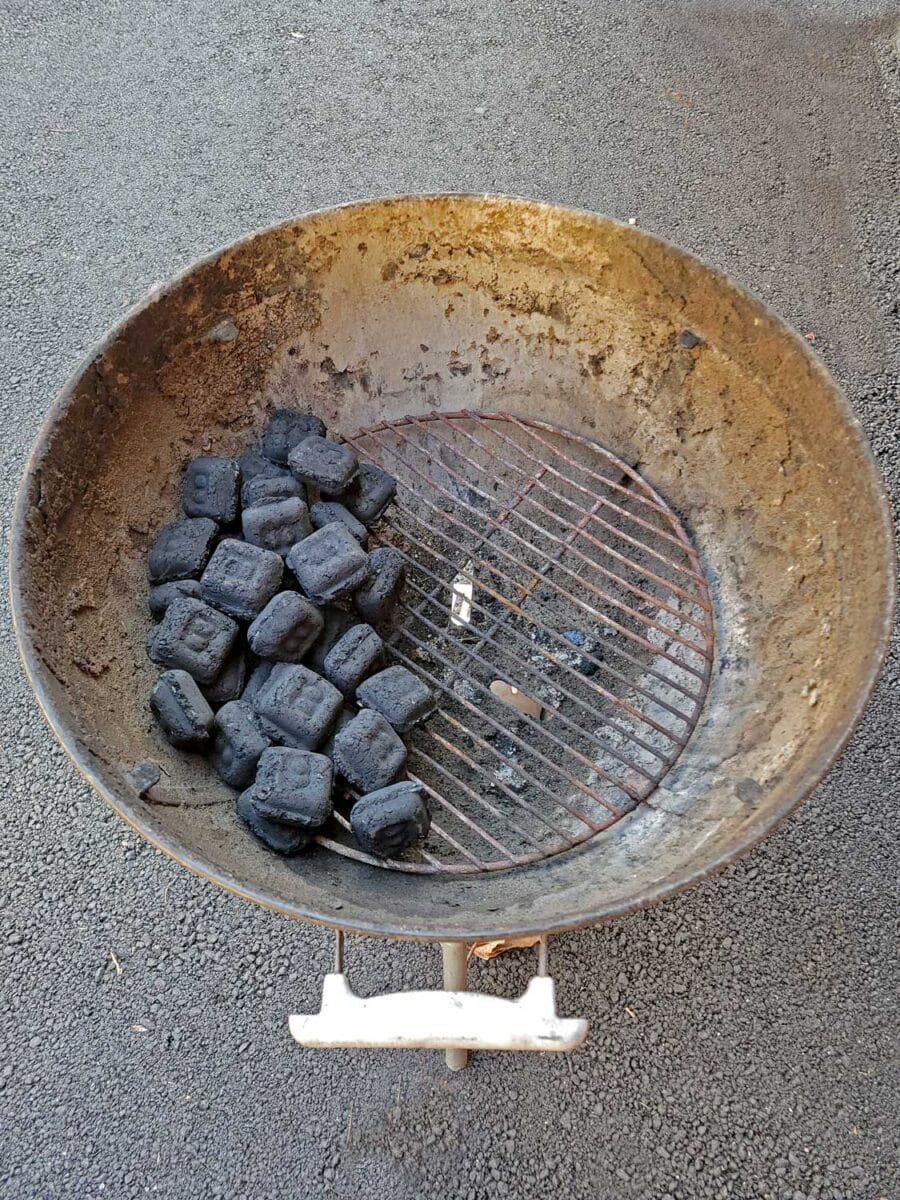
- Pile the Coals: Push all your lit coals to one side of the grill. That’s your direct heat zone.
- Leave the Opposite Side Empty: This is your indirect zone, where things stay cooler.
- Preheat the Grill: Put the lid on and preheat for about 5-10 minutes to get the temp steady.
When to Use It
This method works for just about anything, but here are a few meats I use it for:
- Steaks and Pork Chops: I do what’s called a “Reverse Sear” on tomahawks and thick ribeyes. I cook them low and slow to an internal temp of about 120 degrees F, then move the meat to the hot side and sear to 130 135. Some people prefer to sear on the hot side for a nice crust, then move to the cooler zone to finish. Use whichever method you like.
- Chicken: Cook bone-in pieces like thighs on the indirect side first, then crisp the skin over direct heat.
- Seafood: Quick sear for shrimp, scallops, or fish fillets.
- Ribs and Spatch-Cock Chicken: Low and slow on the cool side, with some wood chunks thrown in for that smoky flavor.
- Saucing Meats: It’s especially good for when you’re saucing chicken.
Pro Tips
- I like to use lump charcoal to do reverse sears over high heat. Lump charcoal burns hotter than the briquettes.
- High Heat (450–550°F): Perfect for searing steaks and quick-cooking.
- Medium Heat (350–450°F): Great for slow-cooking thicker cuts.
- Use your grill vents to tweak airflow and lock in the right temperature.
Advantages and Disadvantages
What’s Great:
- Even cooking for thick cuts of meat.
- More control—no more guesswork or overcooking.
- Sear and slow-cook all at once.
- Perfect for beginners.
What’s Tricky:
- It takes longer than grilling everything directly over the flames.
- Indirect cooking won’t give you the same crispy texture as full-on direct heat.
The Snake Method
The Snake Method is a smart way to set up charcoal for those long, slow cooks. You arrange unlit coals in a snake-like pattern along the edge of your grill, which lets the fire burn slowly and evenly over several hours. This setup keeps the heat low and steady, perfect for smoking meats without babysitting the fire. It’s convenient when the weather’s not cooperating, so you don’t have to worry about constantly tending to the coals.
It’s an easy way to get that smoky flavor while keeping the temperature consistent, making it ideal for bigger cooks or smoking a good piece of meat. If you’re looking to slow-cook something low and slow, the Snake Method is definitely worth a shot.
This is a variation of another type of charcoal used on offset smokers, a Big Green Egg smoker, and other vertical smokers like Smokey Mountain Cooker smokers. Instead of making a circle or unlit charcoal around the perimeter uniformly, you’d add unlit charcoals to the chamber with a few lit coals on top of the unlit coals. This creates a slow, steady burn of coals that can fuel a smoker for hours.
Why It Works
The Snake Method works because it provides an even, low-temperature burn over a long period. By placing the coals in a snake shape, you control the flow of heat and smoke, which means you can maintain a steady cooking temperature for hours. It’s perfect for smoking large cuts of meat like pork shoulders, brisket, or ribs, all while minimizing flare-ups. In my experience, it will normally run 2 to 2 ½ hours without any need for attention. That means I can go sit on my butt and drink a beer of watch TV.
How to Set It Up
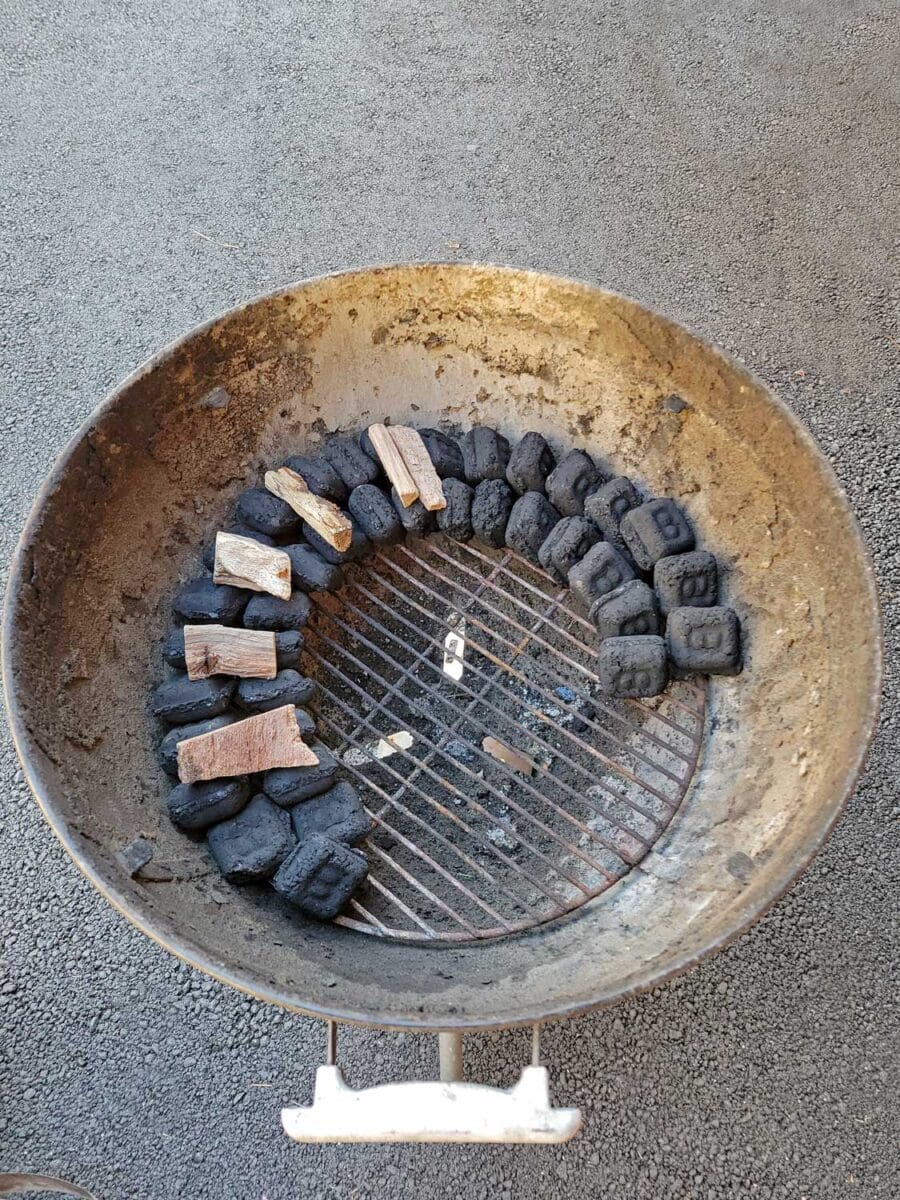
- Arrange the Coals: Start by lining up your coals along the edge of your grill in a snake or crescent shape. The coals should be touching, creating a continuous line of fuel. With small briquettes, I use a double stack of two briquettes. With larger briquettes, you may need to do only a single layer of two briquettes.
- Add Wood Chunks: Place a few chunks of wood between the coals for that smoky flavor.
- Light the End: Light one end of the snake using a small chimney or a few charcoal starters. The fire will slowly work its way down the line, keeping the temperature steady.
- Put on the Grate: Align the grate opening flap near the end of where the wood is in case you need to take away the smoke or add more.
- Close the Lid: Adjust the vents to maintain a temperature between 225 degrees F and 250 degrees F, depending on what you’re cooking.
When to Use It
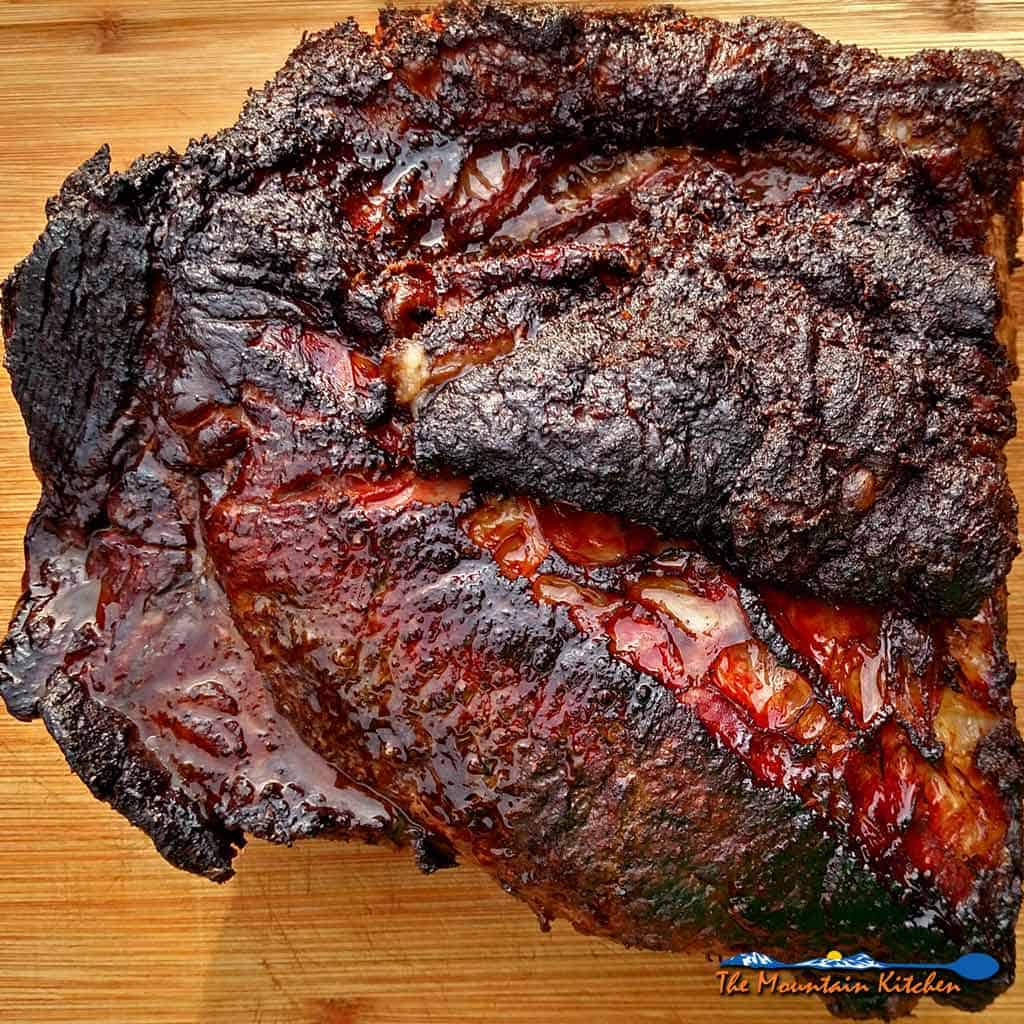
Got a big cook and need steady heat for hours? The Snake Method is your best bet. It’s made for low-and-slow smoking, perfect for big cuts of meat when you’re workin’ on breakin’ down the fat and tissues that make the meat tough. Use this method for:
- Brisket
- Pork Shoulder
- Ribs
- Whole Chickens
It is also great for smoking fish, sausages, or even vegetables over a long period.
Pro Tips
- Low Heat: 225 degrees F to 250 degrees F for long, slow smokes.
- Temperature Control: Adjust your grill’s vents to control airflow and temperature. If the heat is too high, close the vents a bit; if it’s too low, open them to increase airflow.
- Keep the Lid Closed: Opening the lid too often will cause heat fluctuations and extend the cooking time. Keep it closed to maintain a steady temperature.
- Use a Water Pan: Place a pan of water in the grill to help regulate temperature and keep the meat moist while cooking.
Advantages and Disadvantages
What Great:
- Steady, Low Heat: Ideal for slow-cooking and smoking over hours without needing constant attention.
- Great for Long Cooks: Perfect for large cuts of meat that need low and slow heat to get tender.
- Minimal Flare-Ups: The snake design reduces the chance of sudden flare-ups, keeping your food from getting burnt.
What’s Tricky:
- Takes Time to Set Up: Unlike a quick, direct heat setup, the Snake Method requires a little extra time to arrange the coals and get the fire going.
- Not Ideal for Quick Grilling: Since it’s a low-and-slow method, it’s not suited for fast cooks like burgers or steaks.
- Limited Flexibility: Once set up, adjusting the fire or moving food around can be hard, so make sure you’re ready for a long cook.
Three-Zone Slit Method
I use this method a lot for big cooks. It’s ideal for larger cuts like roasts, whole chickens, and turkeys, especially when using the rotisserie attachment. Basically, you separate your coals into two equal piles on opposite sides of the grill, leaving an empty space in the middle for indirect heat. This setup gives you two direct heat zones and an indirect zone in the middle.
Why It Works
The Three-Zone Split-Fire setup gives you two zones for direct heat—high, medium, or low—and one zone in the middle for indirect heat. This makes it easy to maintain even, steady temperatures on both sides of your meat, while the indirect zone lets you slow-cook things to perfection. Adding a water pan is a game-changer, too. It helps keep the heat steady, adds moisture to the air, and catches all those tasty drippings. This makes the whole setup work much smoother and more efficient.
How to Set It Up
- Arrange the Coals: Pile your coals into two equal piles on opposite sides of the grill. This creates two zones for direct heat (one for high, one for low or medium heat).
- Create the Indirect Zone: Leave the space between the two piles of coals empty. This will be your indirect heat zone, perfect for slow cooking.
- Add a Water Pan: Place a foil pan filled halfway with water in the empty space between the coals. This helps regulate the temperature and adds moisture to the grill to keep your meat juicy.
- Preheat: Close the lid and let the grill heat up to around 250 degrees F to 350 degrees F. Adjust the vents to fine-tune the temperature.
- Place Your Food: Once the grill is up to temp, place your food in the indirect heat zone and cook away.
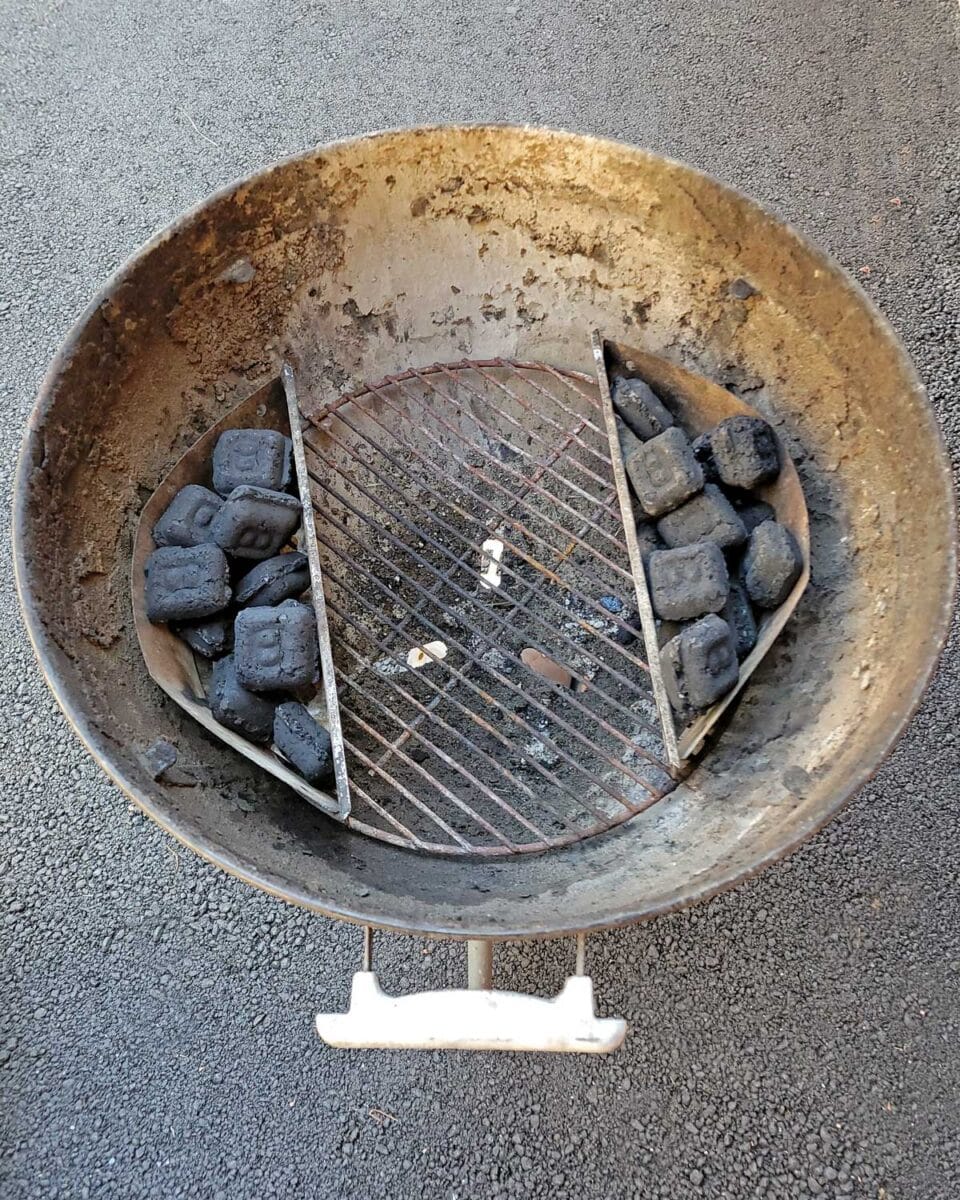
Using Charcoal Baskets
I have noticed that when using charcoal baskets, I tend to get better heat control than when just laying them on the side of the grill.

Rotisserie
The three-zone split fire is also the method I use when using my Weber Rotisserie.
When to Use It
The Three-Zone Split Fire is perfect when you’re smoking or slow-cooking large cuts where you want that even heat on both sides without the direct flames touching your meat. It gives you that low-and-slow cooking capability but with the flexibility to sear and cook at the same time. Use this method on cuts of meat like:
- Roasts (pork loin, beef tenderloin)
- Whole chickens or turkeys
- Large briskets or pork shoulders
- Smoked Cheesecake or Smoked Pecan Pie
Pro Tips
- Low heat: 250 degrees F – 350 degrees F.
- Control Heat: Use your grill vents to adjust the temperature and keep things steady.
- Add a Water Pan: Place it between the coals to regulate heat, add moisture, and catch drippings.
- Be Patient: Low-and-slow takes time, but it’ll reward you with tender, flavorful results.
Advantages and Disadvantages
What’s Great:
- Consistent Heat: you have the same level of heat on either side of the roast.
- Better Control: Gives you more precise temperature control.
- Water Pan Option: Gives you a space to place a water pan to help stabilize heat.
What’s Tricky:
- Slower Cooking: Foods may take longer due to the indirect cooking method.
- Consumes Charcoal Faster: Burns through more charcoal as you use multiple zones.
Heat Control Tips for All Charcoal Setups
- Charcoal: Experiment with lump charcoal for hotter burns and briquettes for consistent temperatures for long smokes like ribs or brisket. I can’t stress enough how different types of charcoal make a huge difference in the amount of heat inside your grill.
- Airflow: Adjust the vents on your grill to increase and decrease the heat. The more oxygen you allow inside the grill (fully open vents), the hotter your grill will get. You can adjust the top and bottom vents to regulate the temperature. Opening the vents increases airflow, raising the heat, while closing them reduces oxygen and lowers the temperature. If you’re a beginner, you may want to leave both vents open until you get the hang of things. I can’t think of many times when I haven’t had to add charcoal.
- Use a Thermometer: A grill thermometer is a handy gadget for keeping an eye on the temp inside your grill. It’s a game changer when you’re trying to hold steady heat for a long period of time. I also like using my infrared thermometer from Thermoworks.
- Add Charcoal as Needed: You may need to add more charcoal for low and slow cooks. Using the snake or two-zone method, you may need to add more coals to the hot zone to maintain your temperature. In fact, you will, 95% of the time.
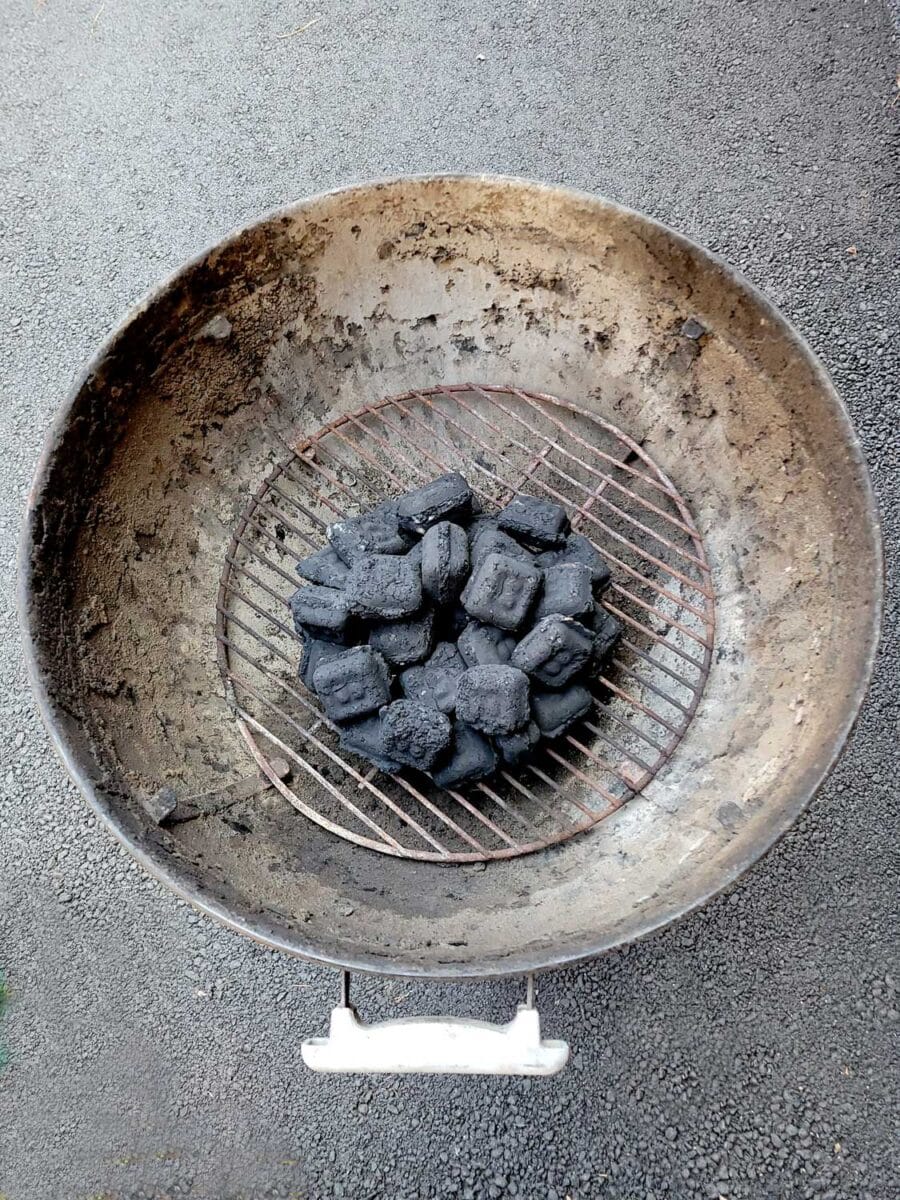
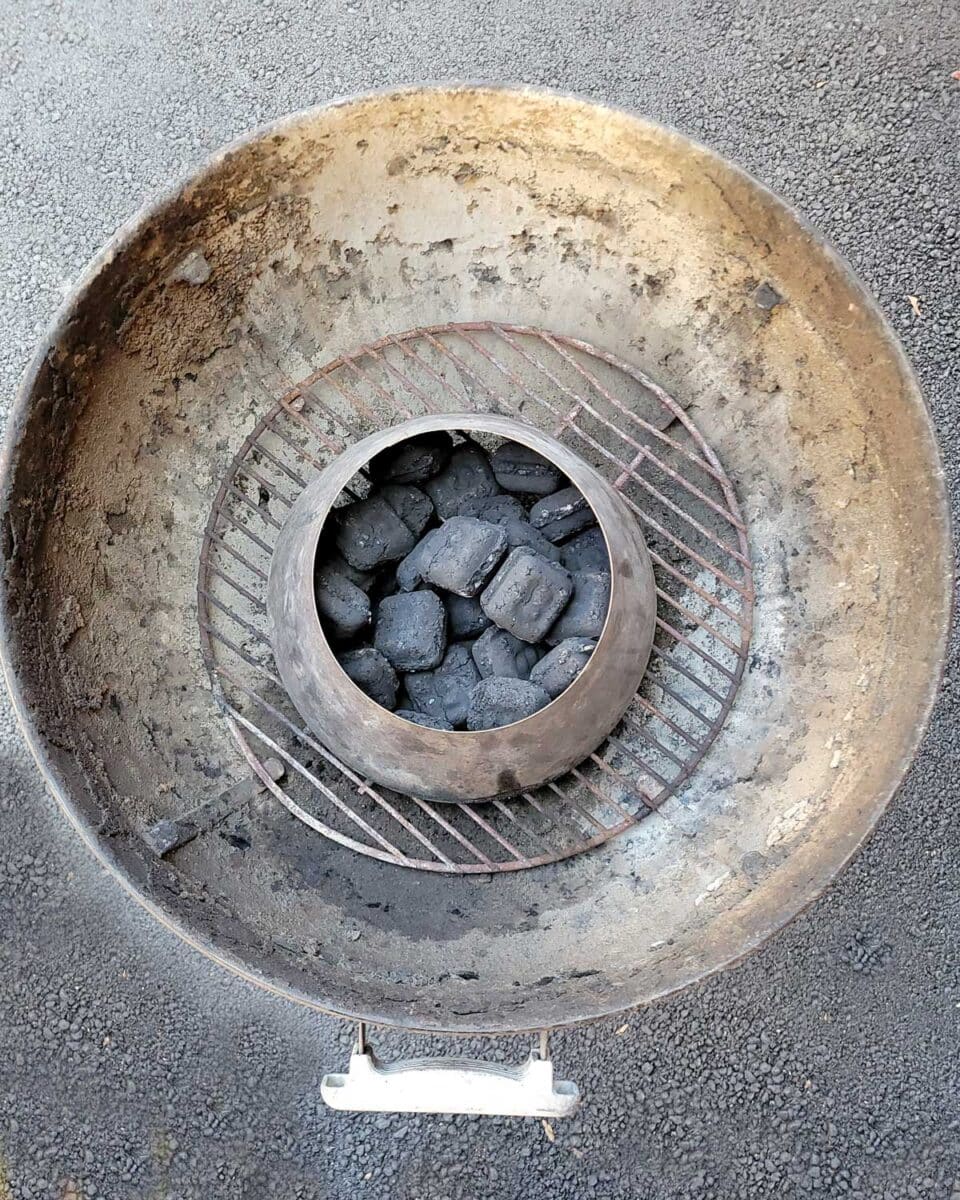
Bulls-Eye (Vortex)
Another less common setup is to pile the charcoal up in the center of the grate. This gives you a small area of direct heat, but not around the perimeter, which gives you a circle of indirect heat on the outer edge of the grill. This charcoal setup is for slow cooking or foods like bone-in chicken.
I normally use this method with my Vortex, which creates a really high-heat zone directly above the small opening of the vortex. This creates high-heat convection and makes some pretty tasty and crispy chicken wings. I don’t use this thing nearly enough!
The secret to mastering your grill is getting the hang of different charcoal setups. Once you start experimenting with the methods I showed you, it will be a lot easier to regulate the temperature of your grill, whether you’re after a quick sear or a slow smoke. It’s all about finding the right balance for what you’re cooking.
So, next time you fire up that grill, remember that control over your heat makes all the difference in getting that perfect bite. With a little practice, you’ll get the hang of grilling on a charcoal grill in no time.
Share your favorite charcoal setups in the comments below, then fire up the grill and make some memories!


Paul J Eaton says
Howdo Folks,
Now that the weather is getting warmer here in Calgary, my old bones are telling me to get cookin’ outdoors. I have collected many of your recipes and tips and this year I am going to buy a a Webber. Just me and the Anchor so don’t need a fancy one.
Best Wishes,
Paul Eaton