Smoking ribs is a true labor of love. Try these easy-to-follow steps to create mouthwatering, smoked baby back ribs using a charcoal grill!
Smoking ribs is a true labor of love, but you don’t need some fancy smoker to get the job done. All you need is a basic charcoal grill, common knowledge, and some easy-to-follow steps to create mouthwatering, succulent, and flavorful smoked baby back ribs in your backyard.
I know this because the grilling enthusiast I live with is pretty passionate about smoking ribs. According to David, it is hard to beat a rack of perfectly smoked baby back ribs slathered in sauce.

What Are Perfectly Smoked Baby Back Ribs?
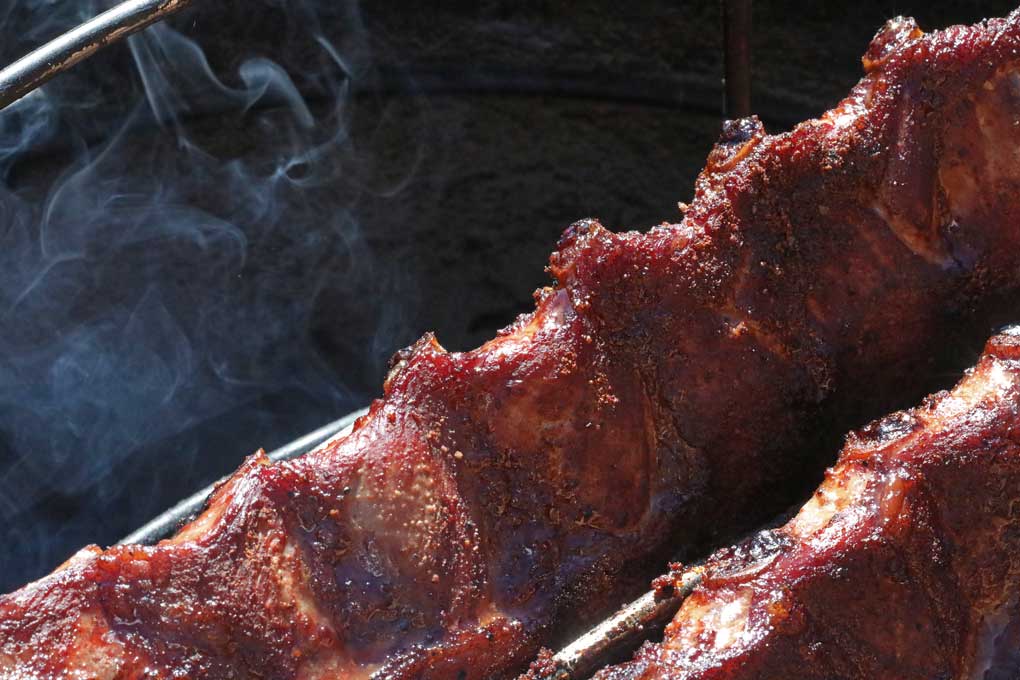
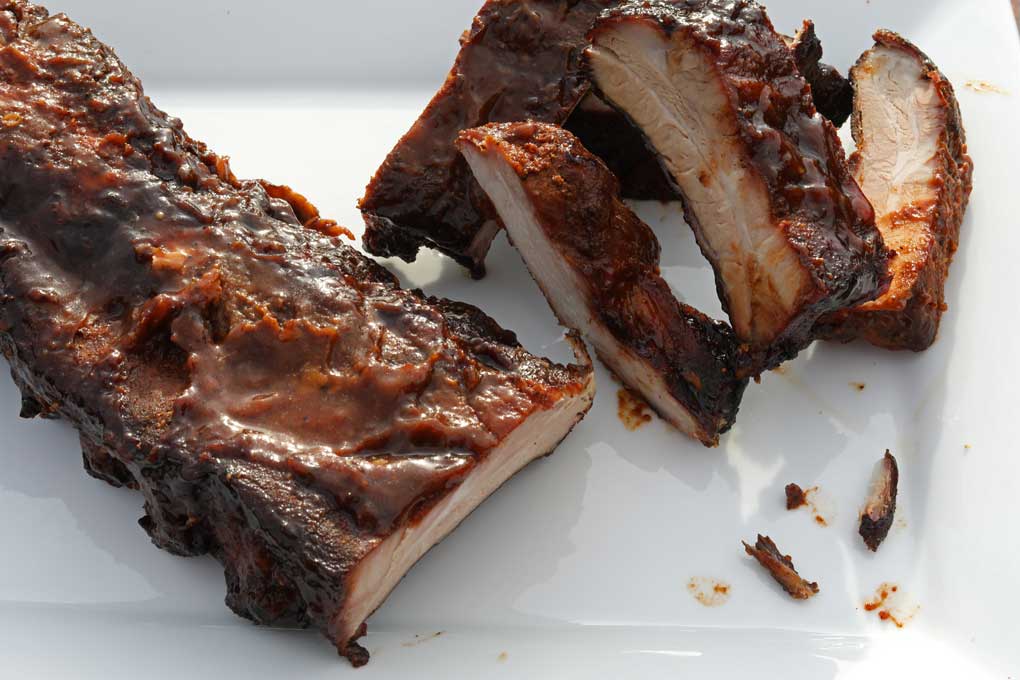
Ribs should have bark on the outside with a pink smoke ring underneath it and a strip of gray juicy cooked meat in the center. This is before applying any sauce to ribs.
According to my pitmaster husband, David:
“Perfectly smoked baby back ribs are achieved when the ribs are cooked to the precise consistency; where you render the fat. The ribs should stay firm and in one piece, until you break them, leaving just a little meat for gnawing off the bone. It’s really all about time and temperature.
They’ll make you have sauce on your face, slam up to your eyebrows!”
Should I Boil My Ribs First?
David implores you, NEVER EVER BOIL YOUR RIBS!
Surprisingly, many folks think they must boil their ribs before smoking them. The concept of boiling ribs comes from Eastern Europe. Their ribs simmer in water with cabbage, potatoes, carrots, and caraway seed to make a pork stew.
Consequently, the problem with boiled ribs is that water is a solvent. The water pulls the flavor out, and all flavors are left inside the pot. Believe it or not, boiling the ribs can dry the meat because its proteins contract and squeeze all the moisture out of the muscle fibers.

The rib meat should not fall off the bone, as some people believe. If the rib meat falls off the bone, the ribs were likely overcooked or boiled with no flavor at all.
As a result, ribs like that usually swim in barbecue sauce to mask the fact that the meat by itself has no flavor. YUCK!
Baby Back Ribs Vs. Spare Ribs
Despite the name, baby back ribs do not come from baby pigs. Baby back ribs come from a part of the rib connected to the backbone. This is part of the loin muscle that runs along the back on both sides of the pig’s spine. Whereas the spare ribs come from the belly.
Spare ribs, also known as St. Louis style ribs, tend to be rectangular flat slabs at about 6 inches long vs. the curved rack known as baby back ribs which are about 3 inches on the shorter end.
Baby back ribs tend to be more expensive than spare ribs but make no mistake; they are more tender and leaner. One rack of baby back ribs feeds about three people and the average hungry adult, including David Spivey, who loves ribs with his whole heart.
How To Cook Smoked Baby Back Ribs On A Charcoal Grill
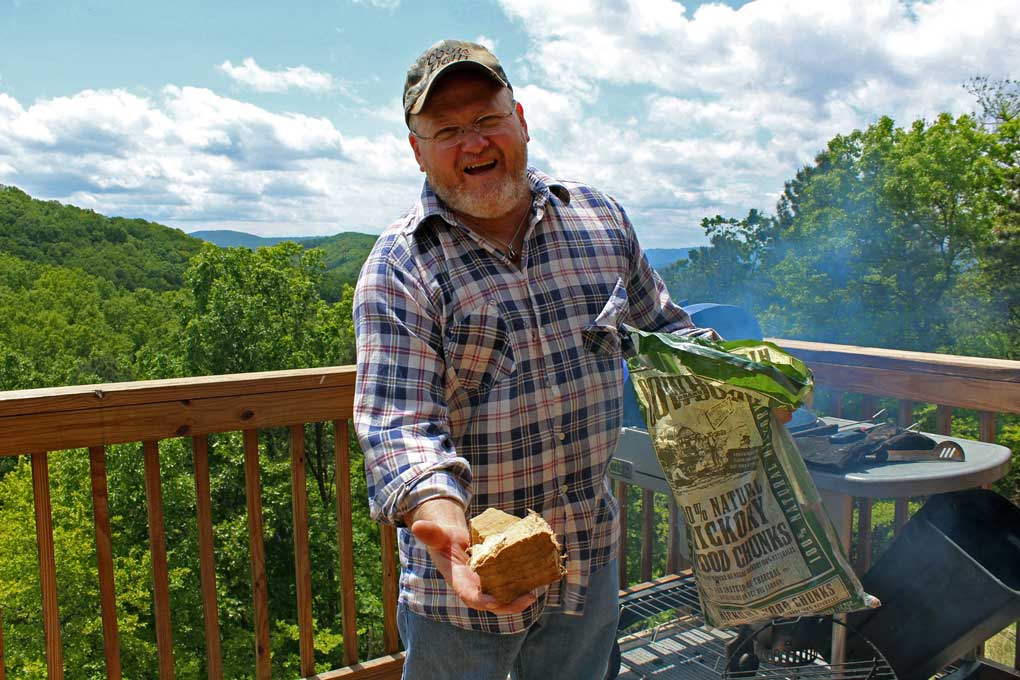
You can smoke baby back ribs on whatever grill or smoker you have. For this rib recipe, David uses his Weber Performer kettle-style grill. It’s ideal for grilling and smoking anything you want. It’s easy and simple to use and doesn’t cost a fortune for someone who’s just starting with smoking meat. You’ll be surprised how good ribs on the grill are using charcoal.
What Is Needed:
- One slab of baby back ribs per adult
- pork dry rub (recipe to follow)
- charcoal grill, such as a Weber Kettle
- hickory wood chunks
- 18-pound bag charcoal
- rib grilling rack
- Cooking/Grilling Tongs
- Meat Thermometer
- 2 ½ quart saucepan
- grill brush
Pork Dry Rub For Baby Back Ribs:
- Two tablespoons brown sugar
- One teaspoon each of paprika, black pepper, Kosher salt, garlic powder, and onion powder
- ½ teaspoon of cayenne pepper
Like this rub? Make a larger batch to keep on hand here!
Barbecue Sauce:
BBQ Sauce of your choice – ours is a secret… but the sauce contains butter, ketchup, vinegar, Worcestershire sauce, mustard, sugar or brown sugar, salt, and pepper. Sometimes it will have chipotle peppers, but that depends on who David cooks for. It’s a matter of personal preference.
Get our Classic Barbecue Sauce Recipe [HERE].
#1 Prep the Ribs
Rinse the racks of ribs under cold running water and blot them dry with paper towels.
Remove the membrane from the back of the ribs. The membrane is a thin, white-looking skin on the back of each rack of ribs. This membrane can block out the flavor by creating a barrier against the seasoning.
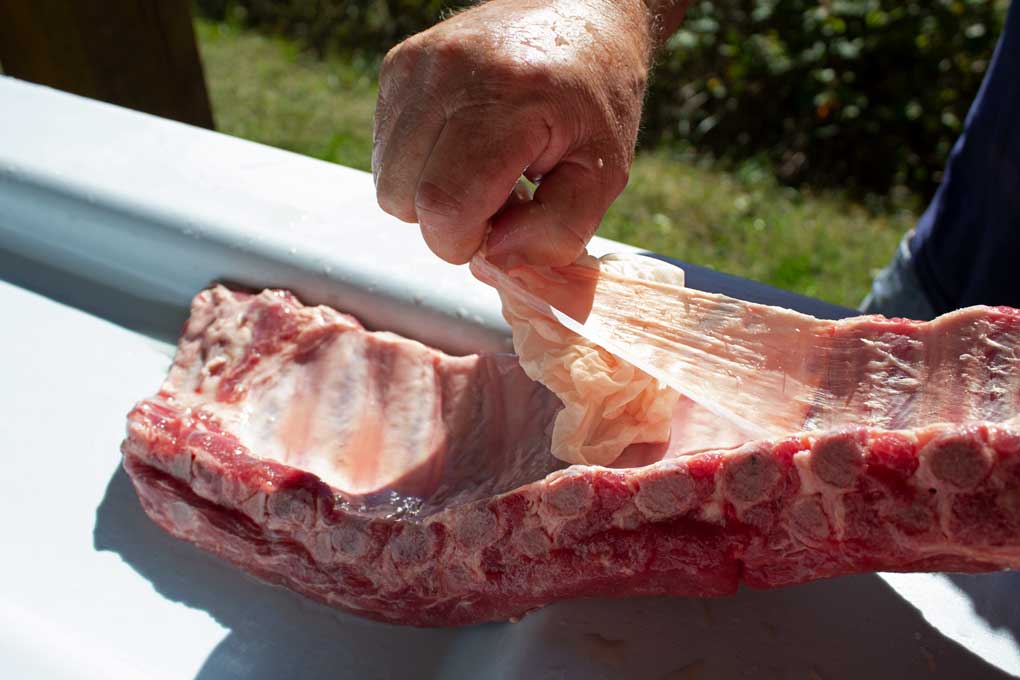
To remove the membrane, lay the ribs on a flat surface and curve side up so that the curve of the ribs points up at you. Using a sharp knife, peel the membrane from one corner near the bone. Pull across the rack with firm, steady pressure. If it tears, pull it up and continue where it tore off. Rinse and pat the ribs dry again.
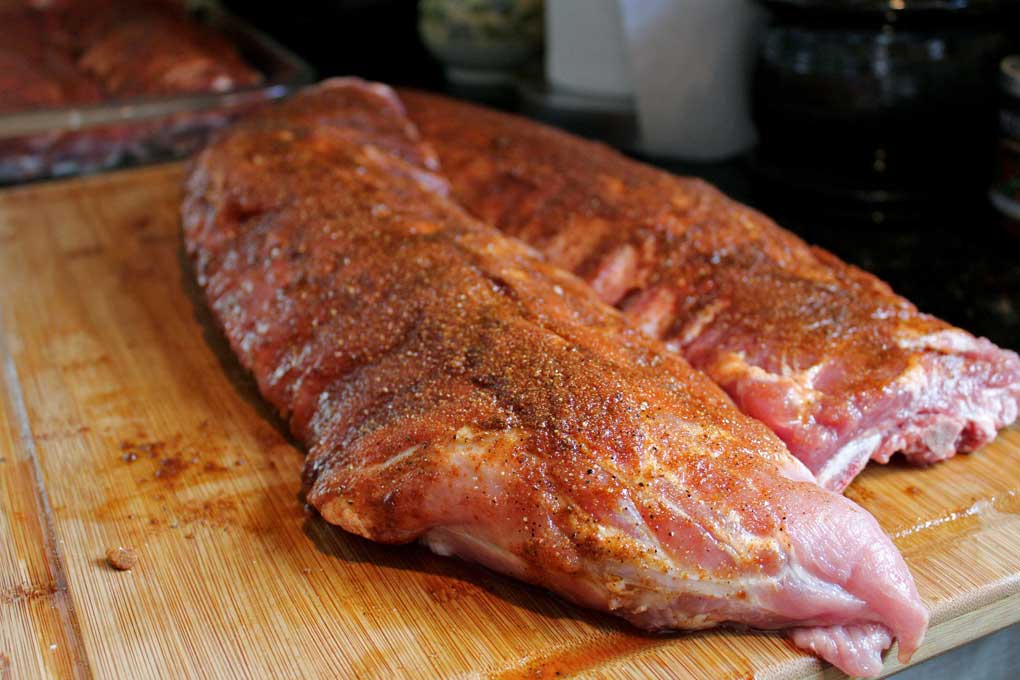
Combine all the ingredients for the rub in a small bowl (make sure to work out any clumps from the brown sugar for even distribution); stir to mix. Rub the seasonings onto both sides of the racks.
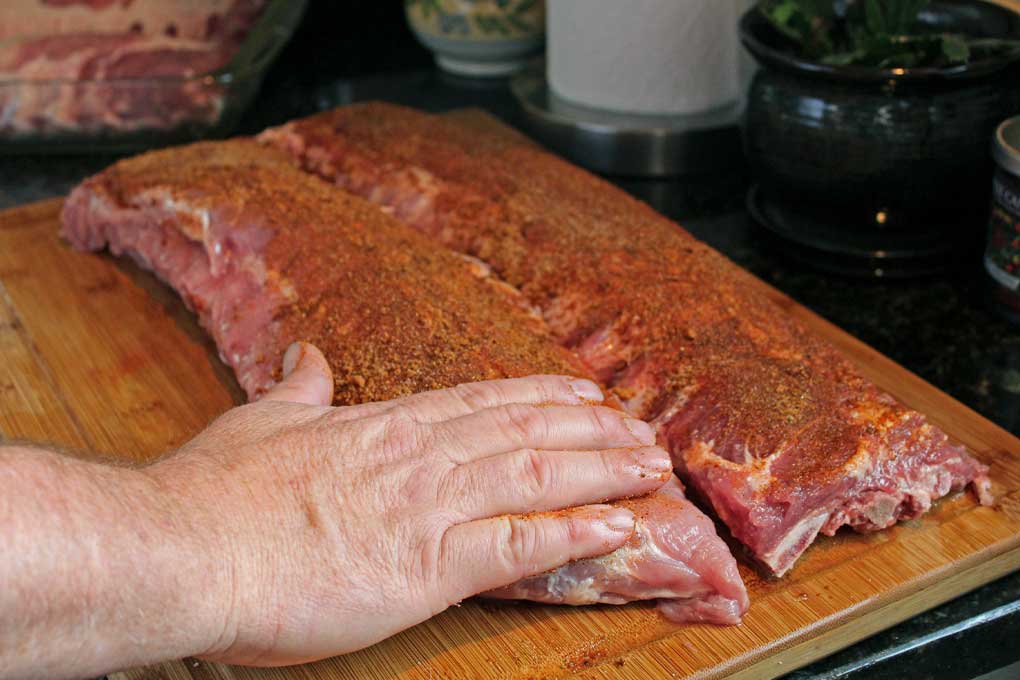
David usually rubs his just before setting up the grill. However, If you have time, wrap the racks in plastic wrap and let them cure in the refrigerator for at least 4 hours or as long as overnight. Smoking the ribs right away is perfectly fine, but sitting in the fridge for several hours allows the dry rub to penetrate the meat a little more.
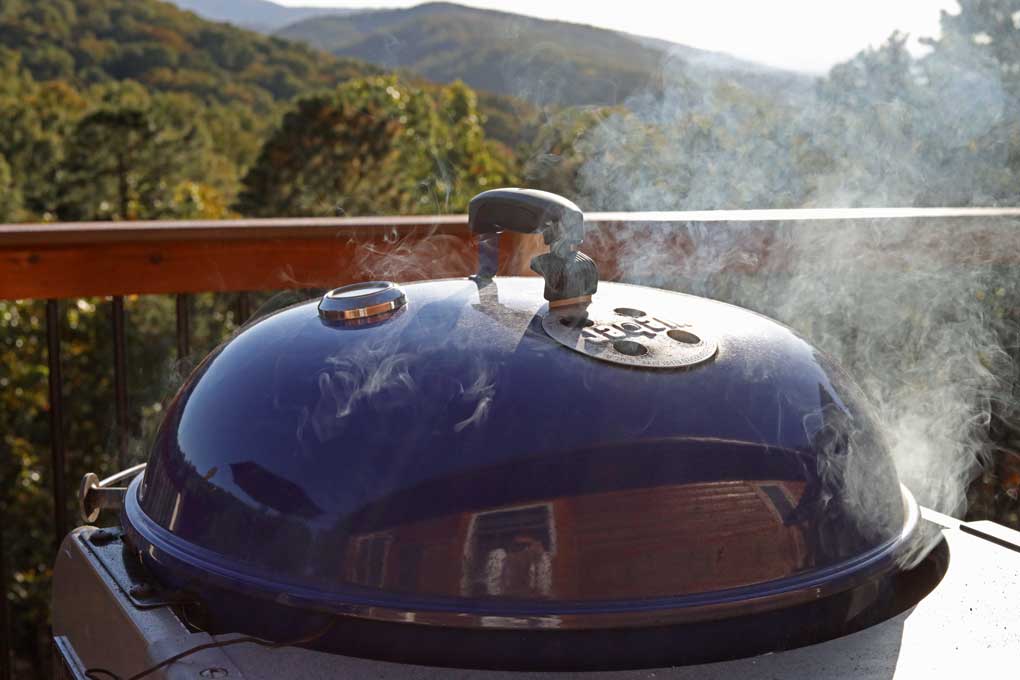
#2 Prepare the Charcoal Grill For Smoking Ribs
Smoking is a form of indirect cooking and usually takes place over a period of hours over low temperatures.
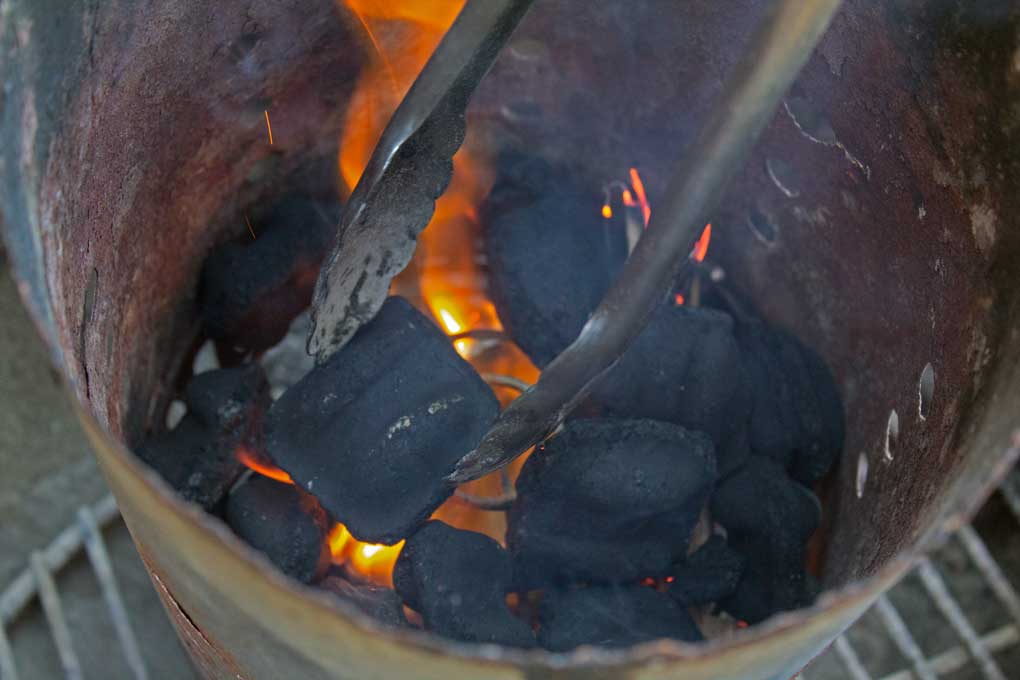
Preheat the grill to about 200 to 250 degrees F max. Light only about 10 to 16 pieces of charcoal to maintain this low temperature and set it up for an indirect Three-Zone Split-Fire. To do this, separate the coals into two equal piles on opposite sides of the grill grate.
Charcoal baskets are great for holding clusters of charcoal together. The baskets also help them burn longer.
Note: If you use wood chips instead of chunks, consider soaking a few handfuls in water for about 30 minutes before placing them atop the coals. This will keep them from burning up too fast and provides more smoke.

#3 Smoking The Ribs
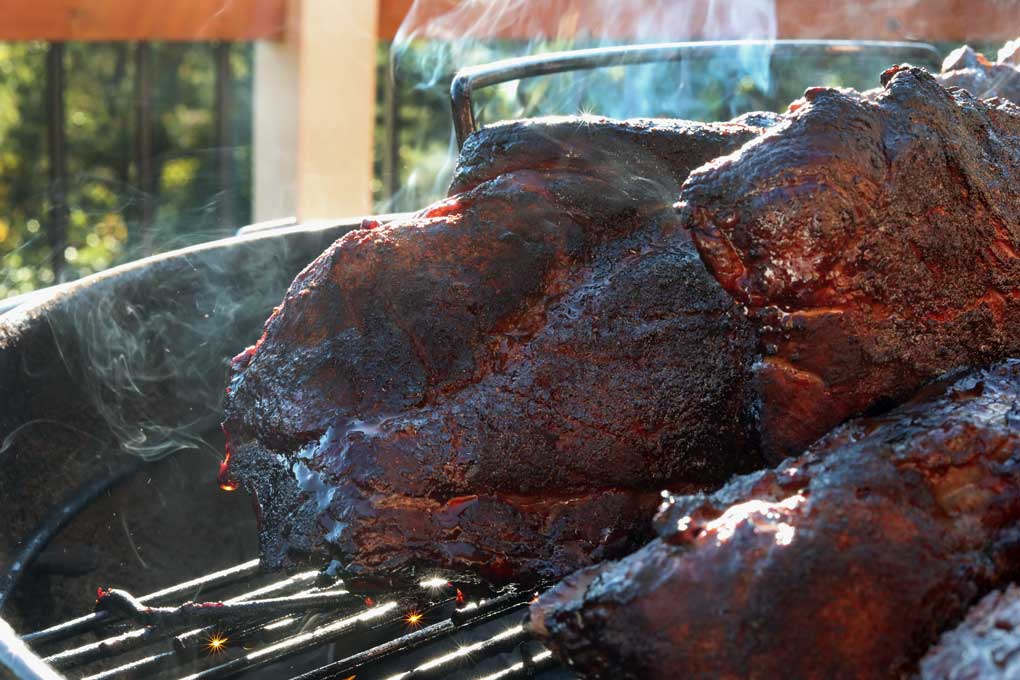
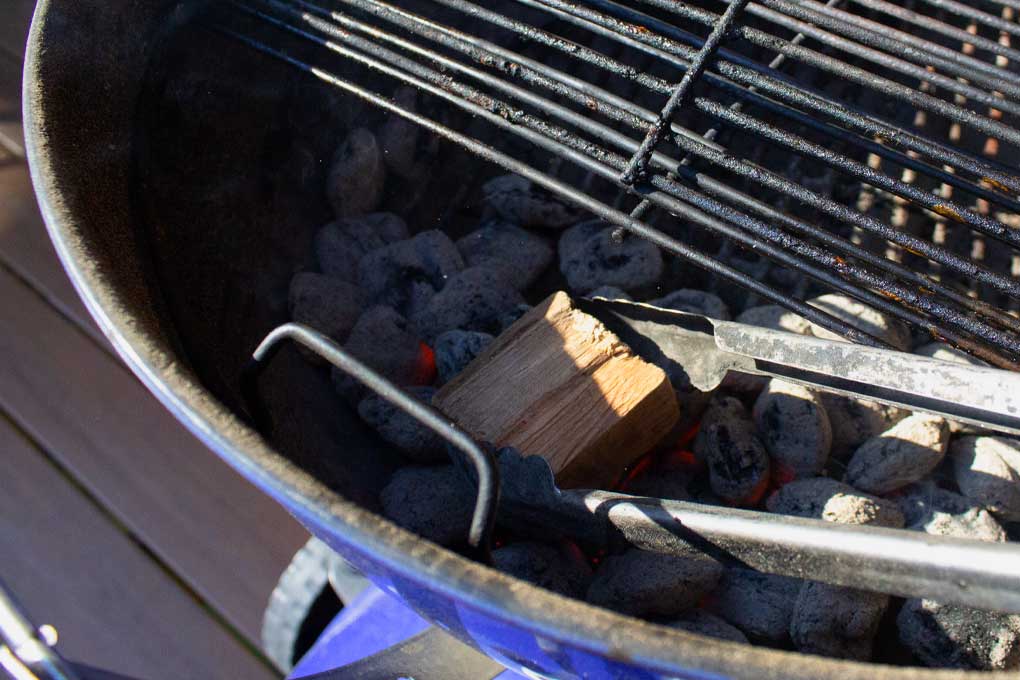
When the smoker or grill is in the ideal temperature range, you are ready to smoke; place the ribs into the grilling rack over indirect heat; toss a chunk of hickory wood on top of each basket of hot charcoal, and place the lid on.
Bring the temperature up to 225 degrees F, using the vents on the grill to regulate the temperature. The vents control the amount of oxygen getting to the fire. So less air means less fire.
You will need to add fresh coals and possibly more wood chunks to each side of the grill every hour for at least the first 3 hours.
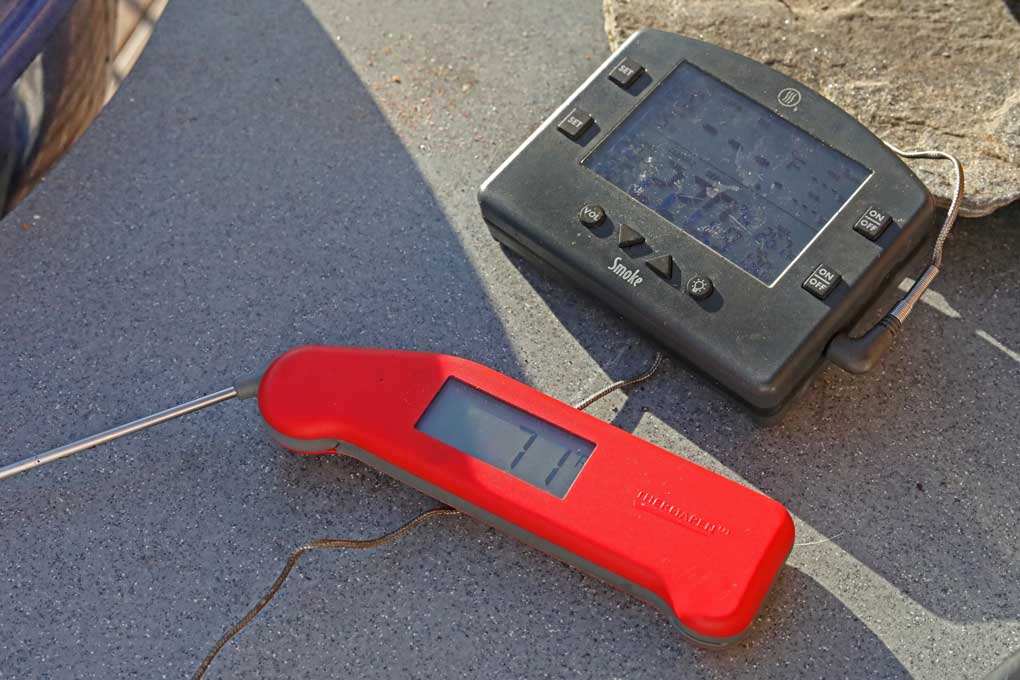
Knowing the temperature inside your smoker or grill is crucial. Even if your smoker or grill has a temperature gauge, we still highly recommend purchasing a digital BBQ thermometer such as Smoke™ from Thermoworks. Thermoworks thermometers are some of the most accurate thermometers money can buy. This particular model was designed for competition BBQ teams and professional chefs. It has a two-channel alarm that uses probes to accurately read the meat’s and pit’s temperatures.
#4 Low and slow
Check the grill’s temperature every hour, staying as close to 225 degrees F as possible. It’s important to resist the temptation to open the lid. Only open the grill lid if you need to add more charcoal and wood to maintain temperature and smoke.
After 3 hours, check the temperature of the meat to see where it is and get an idea of how much more time it will need to smoke.
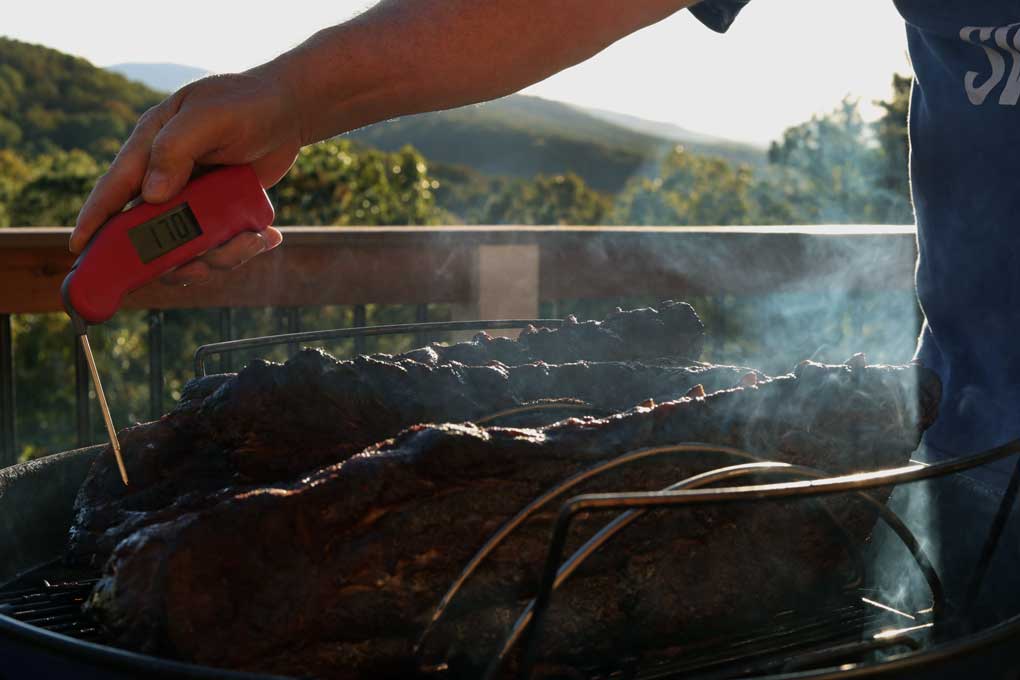
#5 Test For Doneness
The goal temperature of smoked baby back ribs is an internal temperature of 190 degrees F. Use an instant-read thermometer, such as the Thermapen® ONE by Thermoworks, to take the temperature of the ribs. Be careful not to take the reading from the bone.
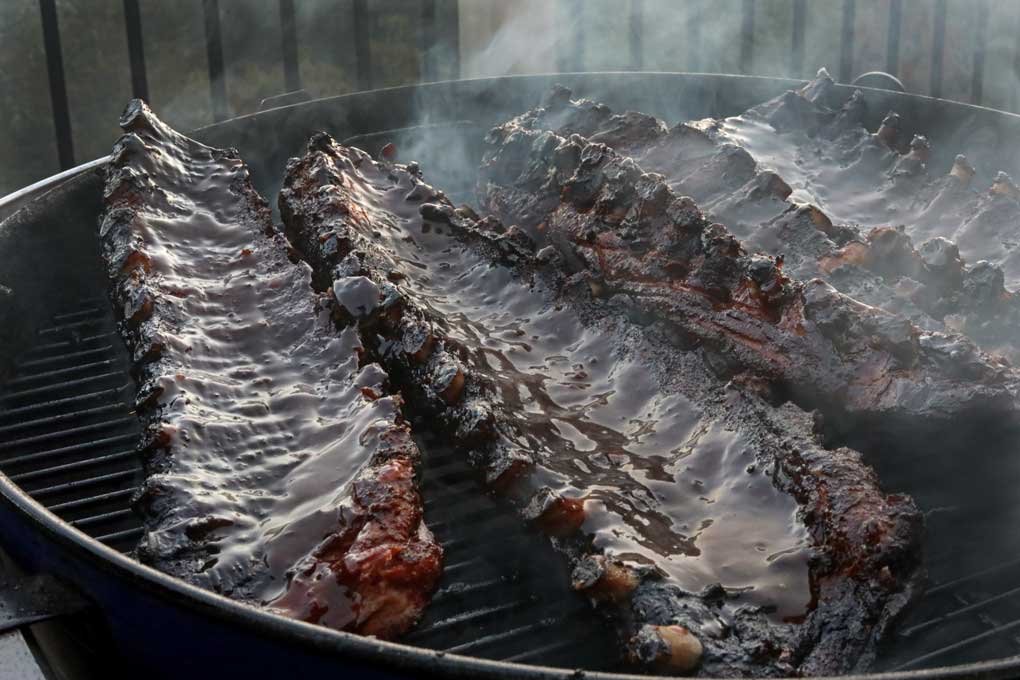
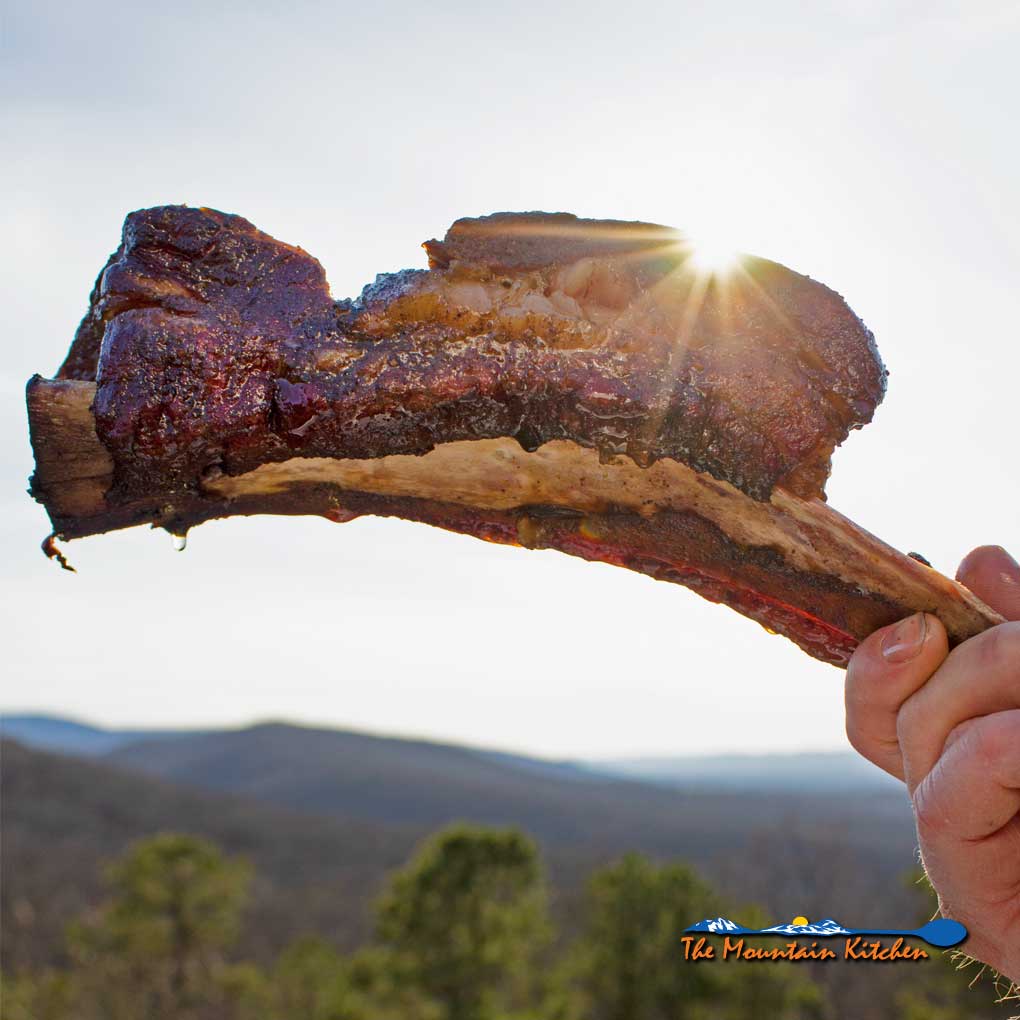
David says if you smoke ribs enough, you just kind of know, but it takes some practice. “Smoke the ribs until a dark ‘bark’ (outside crust) forms, the meat starts to draw away from the bone, and the smoker’s temperature has remained constant for about 5, sometimes 6 hours.”
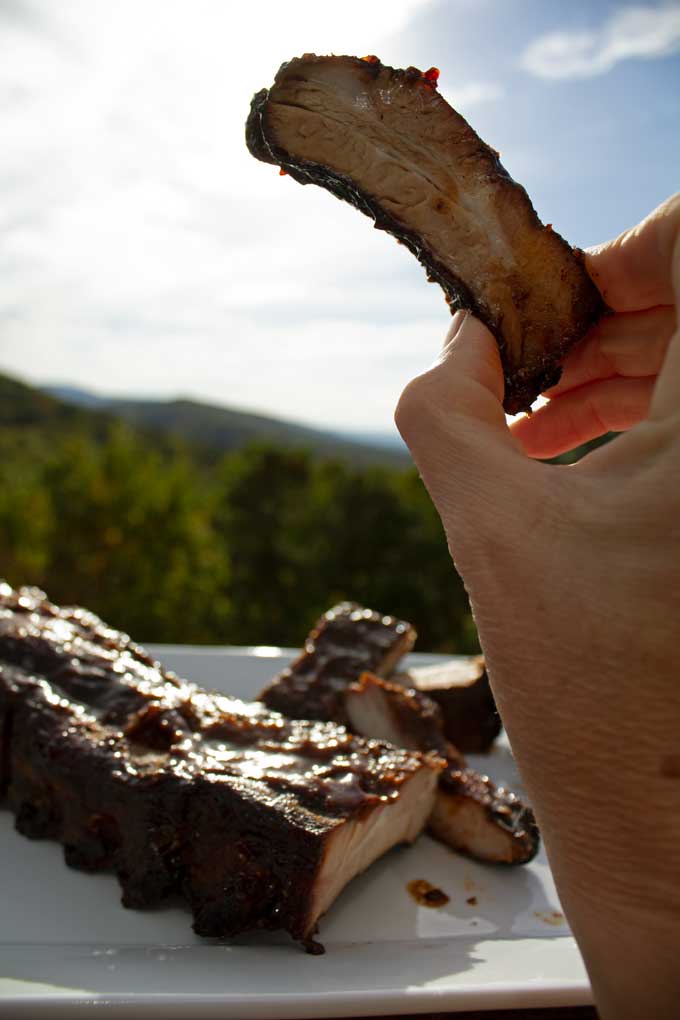
You can also crack them to test for doneness. To do this: use a pair of tongs, pick up a slab of ribs, and bounce the ribs slightly. They are ready when the slab bows over until the meat cracks on the surface. A small crack typically means you need just a little more time. The ribs should almost break when you lift the slab.
#6 Sauce The Baby Back Ribs
Sauce the ribs before when the meat is done. David says if you do a 5-hour smoke, the 6th hour is for saucing over a low temperature.
David makes his own sauce over a gas burner on the stove. It is warm and ready to apply to the ribs. If you use a bottled sauce, you want to warm it up and cook it without burning it. Many sauces, including David’s, benefit from baking onto the meat; they may even add extra depth by caramelizing.
It is best to take the racks of ribs out of the rack, spread out the coals, and lay the ribs flat on the grill grate. If you leave the ribs in the rack, the sauce tends to roll off without a chance to adhere to the racks and tack up.
Use a grilling brush or mop to slather the meat side of the ribs with sauce. Close the lid and let the sauce cook on the meat for about 15 minutes. Then flip the racks over and brush the sauce onto the back of the ribs.
Close the lid and continue to cook. Repeat this process as often as you want, according to how saucy you want the ribs. Don’t go overboard. Remember, most of the flavor is in the meat. You don’t want to over sauce to mask the taste of good smoked baby back ribs. 2 to 3 times in an hour is a gracious plenty.
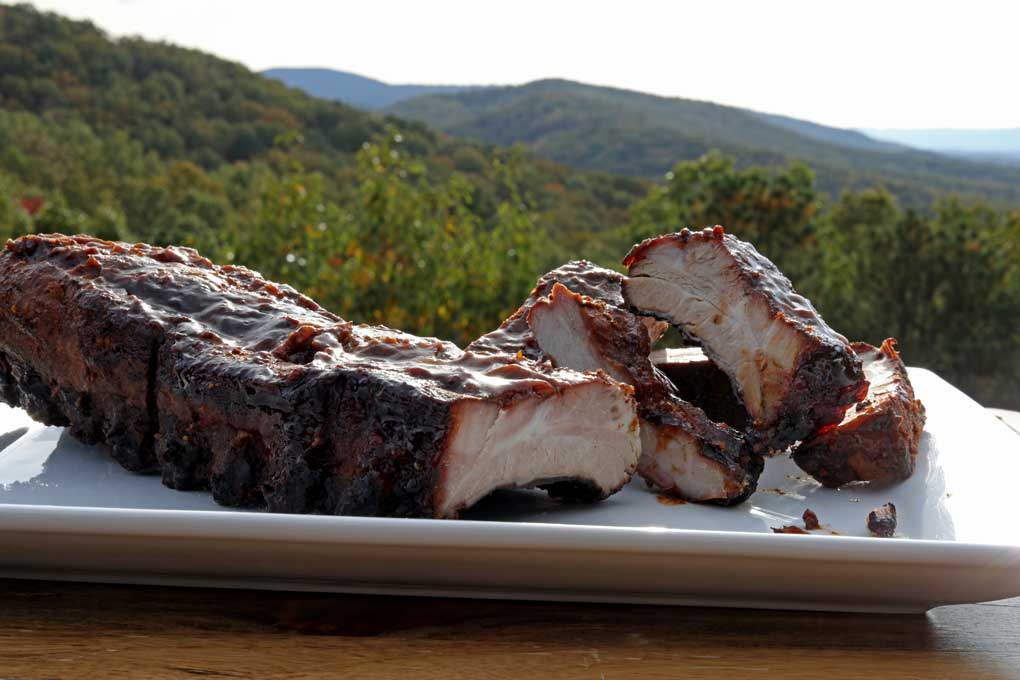
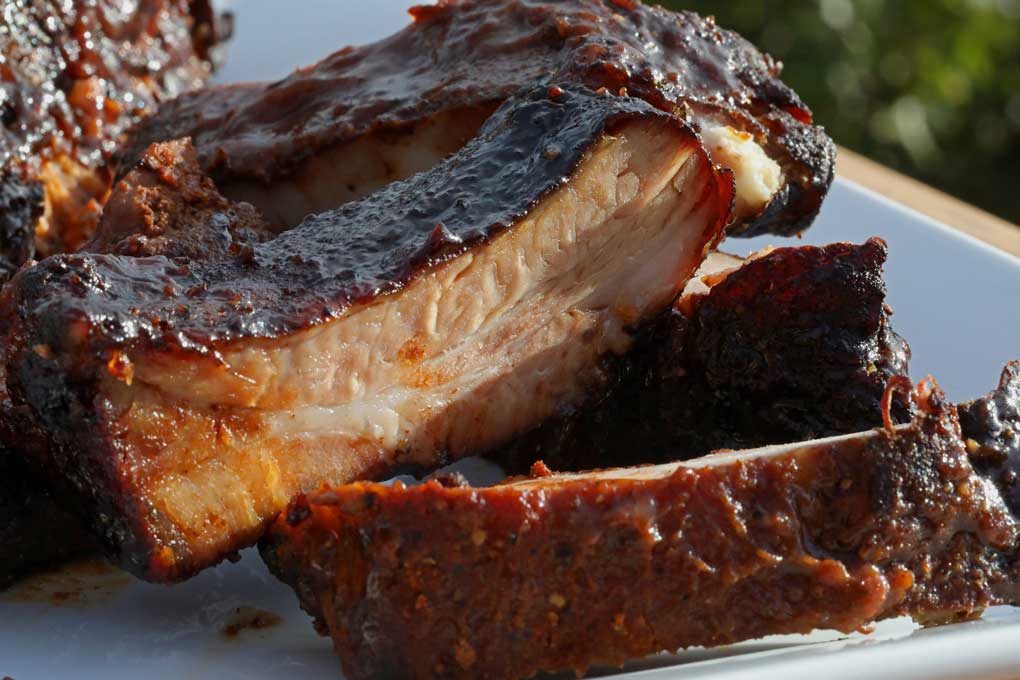
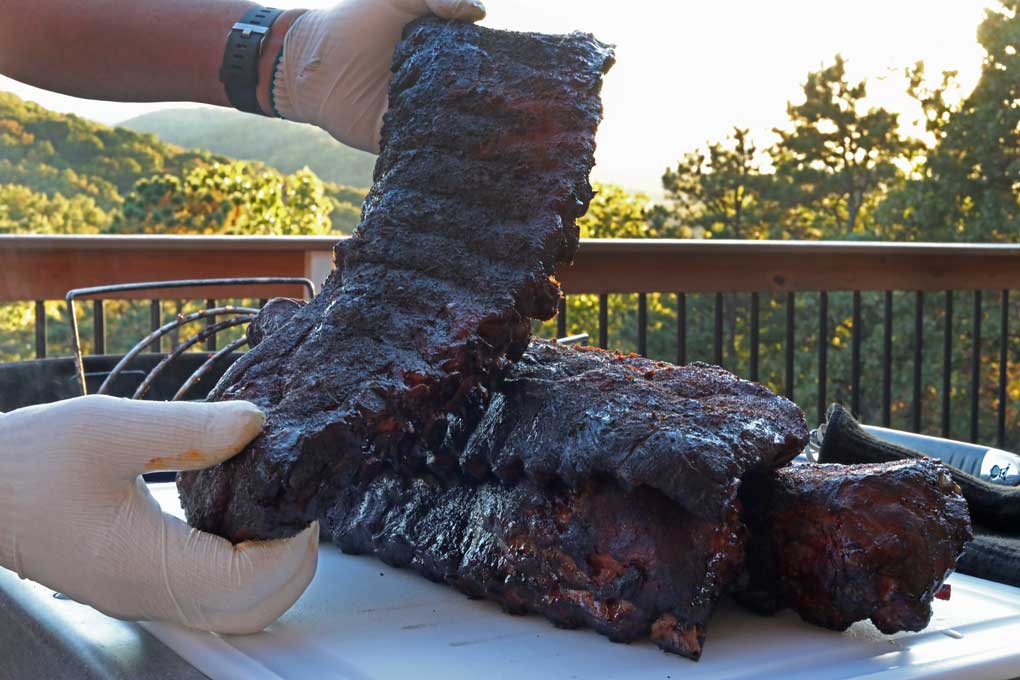
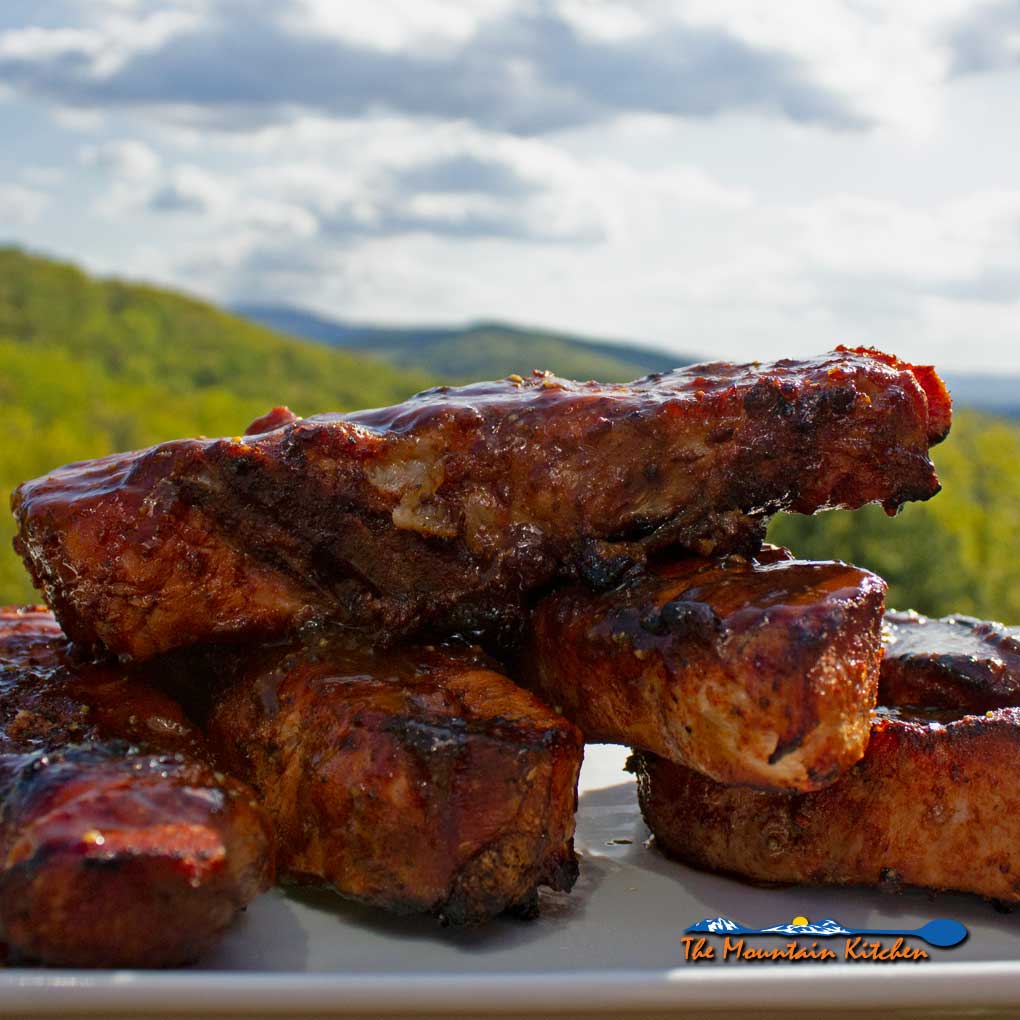
At the end of these six steps, if you break into a rack of ribs and notice a thin pink layer just beneath the surface of the meat. Congratulations! That is the highly prized smoke ring. It’s kind of like a pink halo around the meat, a sign of mouthwatering, succulent, and flavorful smoked baby back ribs!
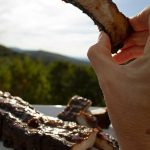
Break out a roll of paper towels; it’s time to chow down!
Debbie, reporting for David Spivey.


Smoked Baby Back Ribs On A Charcoal Grill
Useful Equipment:
- Hickory Wood Chunks
- 18-pound bag charcoal
Ingredients
- 1 rack Baby Back Ribs (1) slab per adult
Pork Dry Rub For Baby Back Ribs:
- 2 tablespoons brown sugar
- 1 teaspoon paprika
- 1 teaspoon black pepper
- 1 teaspoon garlic powder
- 1 teaspoon onion powder
- ½ teaspoon cayenne pepper
- ½ cup BBQ Sauce about ½ per rack, Use your favorite or get a recipe HERE.
Instructions
#1 Prep the Ribs
- Rinse the racks of ribs under cold running water and blot dry with paper towels.
- Remove the membrane from the back of the ribs. The membrane is a thin, white looking skin on the back of each rack of ribs. This membrane can block out the flavor, because it creates a barrier against the seasoning.
- To remove the membrane, lay the ribs onto a flat surface so that the curve of the ribs point up at you. Using a sharp knife, peel the membrane from one corner near the bone. Pull across the rack with firm steady pressure. If it tears, just pull up and continue where it tore off. Rinse and pat the ribs dry again.
- Combine all the ingredients for the rub in a small bowl (make sure to work out any clumps from the brown sugar for even distribution); stir to mix. Rub the seasonings onto both sides of the racks. (see notes)
#2 Prepare the Charcoal Grill For Smoking
- Smoking is a form of indirect cooking and usually takes place over a period of hours over low temperatures.
- Preheat the grill to about 200 to 250 degrees F max. To maintain this low temperature, begin by lighting only about 10 to 16 pieces of charcoal and set up the grill for an indirect Three-Zone Split-Fire. To do this separate the coals into two equal piles on opposite sides of the grill grate. (see notes)
#3 Smoking the ribs
- When the smoker or grill is the ideal temperature range, you are ready to smoke, place the ribs into the grilling rack over indirect heat; toss a chunk of hickory wood on top of each basket of hot charcoal, and cover the grill.
- The temperature of the kettle needs to be around 250 degrees F. This is done by controlling the top and bottom vents of the grill to restrict the flow of oxygen. To start out, move the bottom vent, so it is half closed and close the top vent almost all of the way.
- Bring the temperature up to 250 degrees F, using the vents on the grill to regulate the temperature. The vents control the amount of oxygen getting to the fire. So less air means less fire.
- You will need to add fresh coals and possibly more wood chunks to each side of the grill every hour for at least the first 3 hours.
#4 Low and slow
- Check the temperature of the grill every hour, staying as close to 250 degrees F as possible. It’s important to resist the temptation to open the lid. Only open the lid of the grill if you need to add more charcoal and wood to maintain temperature and smoke.
- After 3 hours, check the temperature of the meat to see where it is and get an idea of how much more time it will need to smoke.
#5 Test For Doneness
- The goal temperature of smoked baby back ribs is an internal temperature of 190 degrees F. Use an instant-read thermometer, such as the Thermapen by Thermoworks to take the temperature of the ribs. Be careful not to take the reading from the bone.
#6 Saucing the Baby Back Ribs
- Saucing should be done prior to removing the ribs after the meat is done. David says if you do a 5-hour smoke the 6th hour is for saucing over a low temperature.
- Warm the barbecue sauce up before applying to the ribs.
- Meanwhile, take the racks of ribs out of the rack, spread out the coals. Lay the ribs flat on the grill grate.
- Use a grilling brush or mop to slather the meat side of the ribs with sauce. Close the lid and let the sauce cook onto the meat for about 15 minutes. Then flip the racks over and brush sauce onto the back of the ribs. Close the lid and continue to cook. Repeat this process as many times as you want according to how saucy you want the ribs to be. (see notes)
- At the end of these six steps if you break into a rack of ribs and notice a thin pink layer just beneath the surface of the meat. Congratulations! That is the highly prized smoke ring. It’s kind of like a pink halo around the meat; a sign of mouthwatering, succulent and flavorful smoked baby back ribs!
- Break out a roll of paper towels; it’s time to chow down!


Colin says
Don’t have a rib rack (but will now look into getting one for next time). If I’m just putting them on the grill, any recommendations to change the charcoal pattern? Planning on doing two racks
The Mountain Kitchen says
Hi Colin, Sorry for the delayed response. How did those ribs turn out? You could do a two-zone fire also. Thanks for commenting!
Pat says
Just joined your group and look forward to everything you send us. I have a Smokin – it #1 electric smoker and love the thing along with my kettle Weber grill. I’m starting out with a question. I read a study from an Ivy League school, Cornel. I believe, that claims that soaking wood ahead of time only adds about 90 seconds to the life of the wood. Almost every grilling/BBQ expert says soaking helps prolong the woods life, as you also mentioned. Do you think the Cornel study holds any water? haha
The Mountain Kitchen says
Hi Pat! David hardly soaks wood anymore. He only soaks chips because they are so small they would burn up in just a few minutes. We really don’t see a difference when smoking larger chunks or logs. Thanks for joining us!