I will never buy peanut butter from the store again!
Homemade peanut butter made with farm-fresh oven-roasted peanuts is an all-natural healthy alternative to store-bought peanut butter. It is so easy to make! All it takes is a few minutes, some peanuts and a food processor. Peanut butter never tasted so good!
Hello, my name is Debbie Spivey. I grew up playing in the peanut dirt of Southampton County, Virginia. But do you know it took me over 40 years to make homemade peanut butter! What the heck?!?!
This realization baffles me to no end because I practically grew up in the back of a peanut truck on the farm. It never dawned on me to make peanut butter. Come to think of it, I don’t think anyone from around where I grew up did either. We were perfectly content eating raw peanuts out of the dirt or roasted over the barrel wood stove at daddy’s shop. Of course, my daddy ate boiled peanuts but that’s an acquired taste or rather a texture preference…. Bleh!
Most of my favorite childhood memories are from the fall harvest. Each fall, I sat in the back of the dump trucks filled with peanuts and ate to my heart’s content. This was one of my favorite things to do!
Farming operations have changed quite a bit over the years, so if you are curious as to what this means, I can explain. Back then, the peanuts were dumped out of the truck onto a long conveyor belt. The belt carried the peanuts up to the top of the large drying bin. The drying bin had a large propane dryer (like a huge hairdryer) that was used to dry the peanuts before taking them to market. Dried peanuts would not mold, which means they could be stored for a longer period of time.
In the back of the dump bed of the truck, there were two support chains holding the wooden sides together to take the pressure off a load of peanuts inside that pushed against the walls.
The dump bed was raised up a little bit at a time to allow for a steady flow of peanuts emptying out of the truck. When the chains in the back started to show, I’d sit up on the end of the dump bed closest to the cab of the truck. Each time the dump bed raised, the peanuts emptied out away from the chain, until it became exposed. I’d end up holding on to that chain eventually having to wedge myself to the top. The dump bed raised up in the air like that made a giant slide.
Just before all the peanuts had run out of the bottom of the truck, I’d sit on my ass and I slide all the way down the dusty metal dump bed. The peanuts at the bottom were my cushion from the long slide down. As a small child, it was so much fun.
I was so nasty when I got back into the house! I had to go directly to the bathtub to clean up for supper. Looking back, I can’t thank my mama enough for letting me be a kid.

Sometimes mama and I would take my daddy lunch to the field. And sometimes I’d get lucky and he took me for a ride on his tractor. To a five-year-old little girl, that tractor might as well have been his white horse and my daddy was like a knight in shining armor. He’d give me a ride even if it was just for a row or two. That was better than sliding down the dump truck any day of the week.
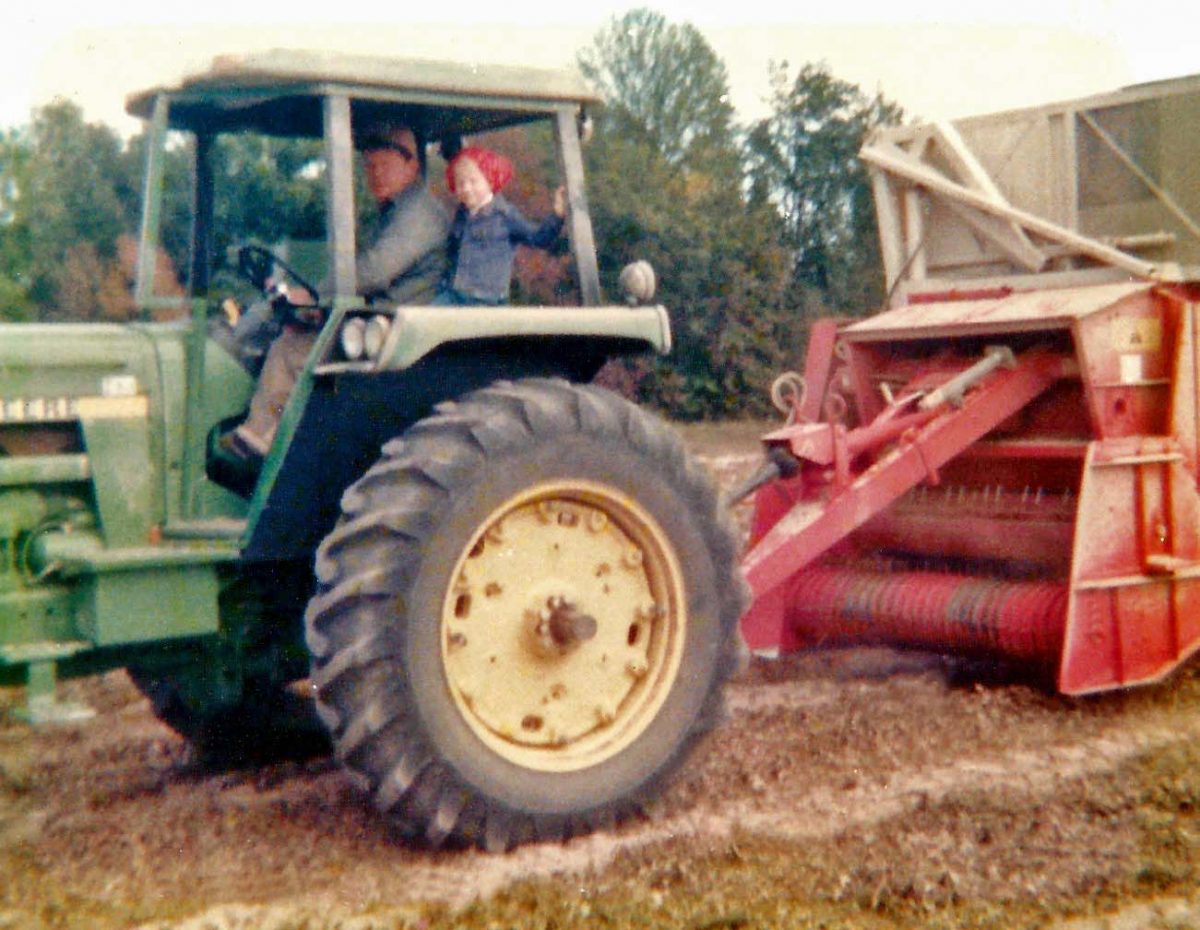
Just look at this picture of me! This is long before he had a closed cab tractor. Mama had just washed my hair so she wrapped my head up in a doo-rag so I wouldn’t get peanut dust in it. Y’all, I was bandana jean jacket cool and didn’t even know it! I was such a Tomboy…lol!
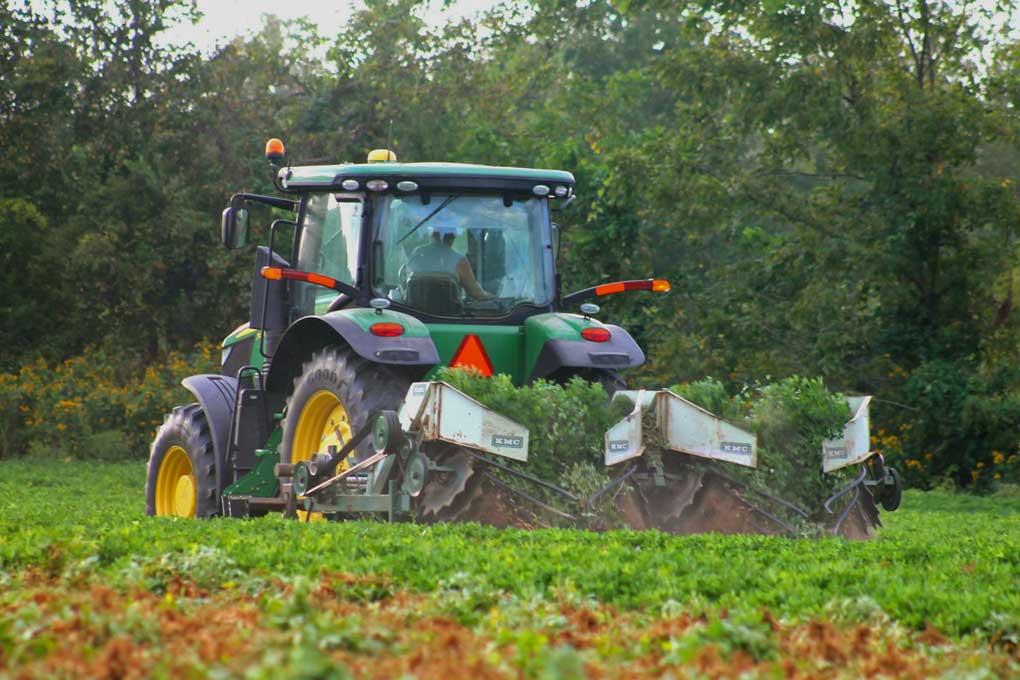
My daddy and brother sold their farming operation many years ago. I’m grateful to my brother-in-law who continues the farming tradition. He now tends our family land and is able to share the experience with his grandchildren.
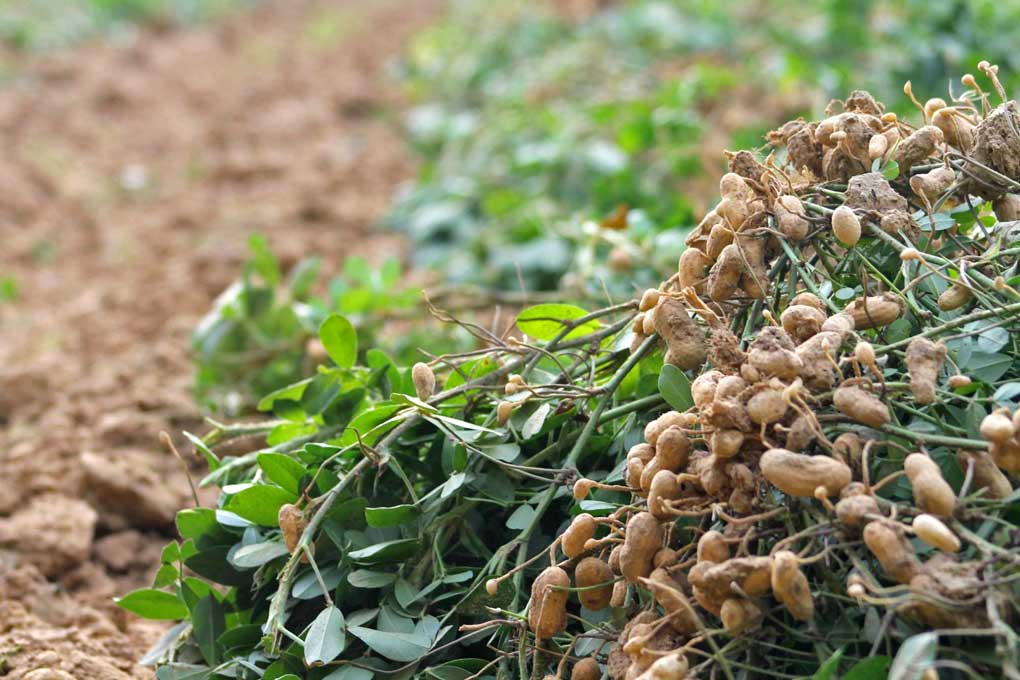
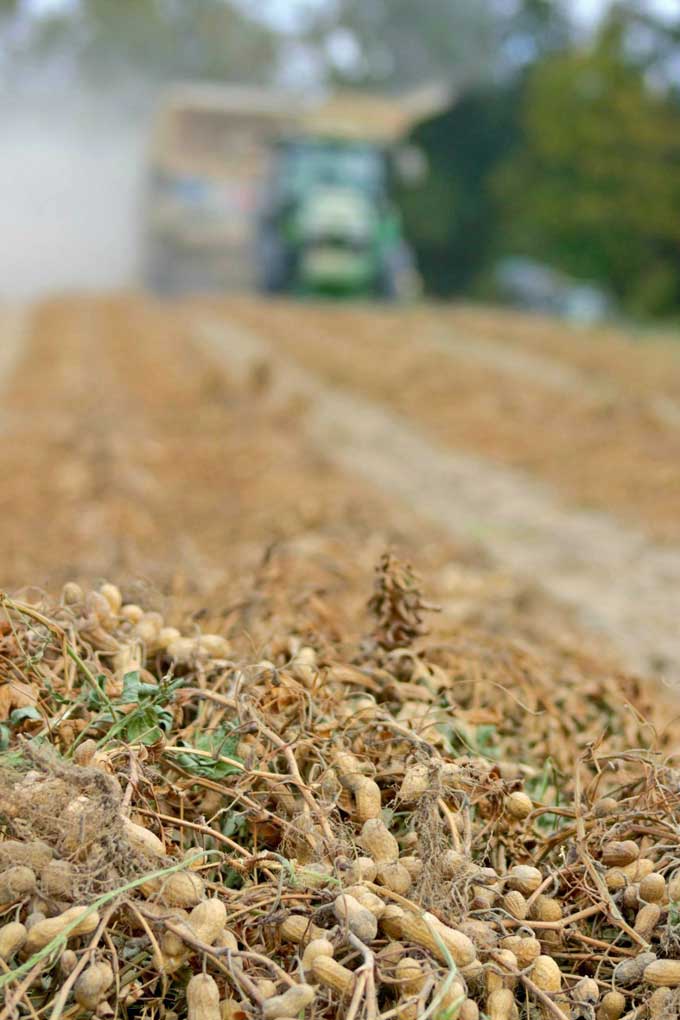
I mentioned in the September Mountain Moments post that we made a short visit home last month on our way to David’s family reunion in Hertford, NC. My brother-in-law had just started digging his peanuts. My sister knew I was coming and told me to make sure to get some peanuts. There was a fresh dug field beside our mama’s house.
Peanut harvest doesn’t last long, especially when the weather is good. I think this year my brother-in-law may have finished in record time. My timing was perfect this year. I got lucky this time and I managed to get some peanuts before the end of the harvest.

The smell of peanuts almost knocked me off my feet when I opened the truck door. Peanut dust is intoxicating to a country girl’s heart and you miss it when you aren’t there to smell it. I was digging up sweet memories of fall and missing my daddy something awful.
This recipe post is about three years in the making or perhaps it was a lifetime in the making? Regardless, I wanted to ensure that my recipe was tested before sharing it with you. More importantly, I wanted to try the recipe using the freshest peanuts possible, so that I could share the experience with you.
Although fresh oven-roasted peanuts make the best peanuts, you can purchase roasted peanuts at the store and try some making peanut butter for yourself!

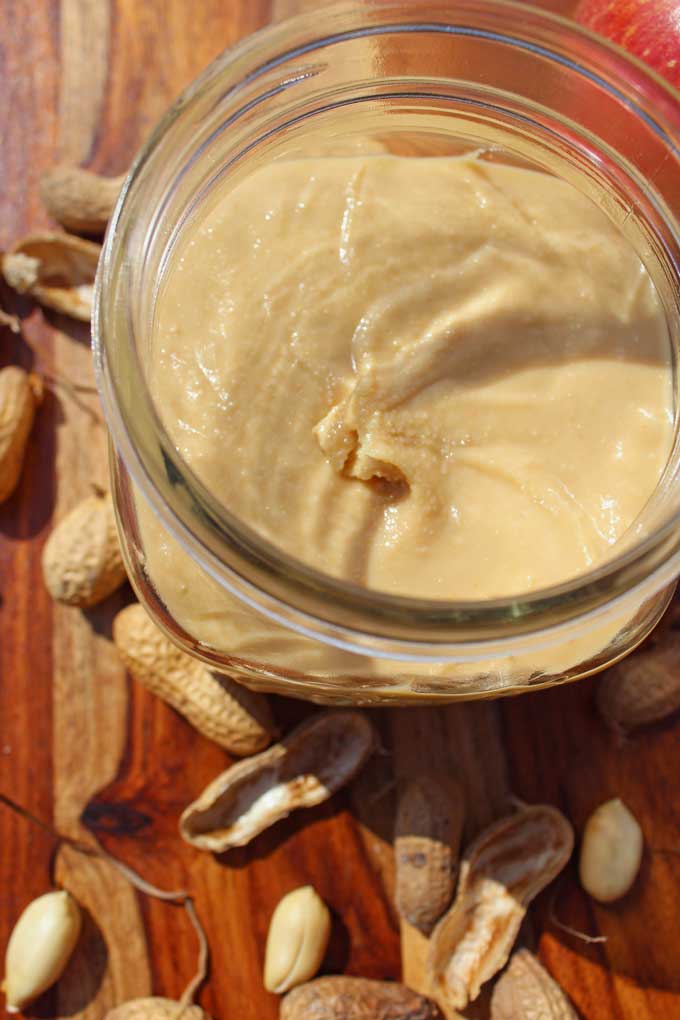
The peanut butter turned out better than I imagined it would. I sure wish I had gotten more peanuts. However, peanut dirt runs through my veins. There is no way I’d get enough to satisfy my peanut loving sole.

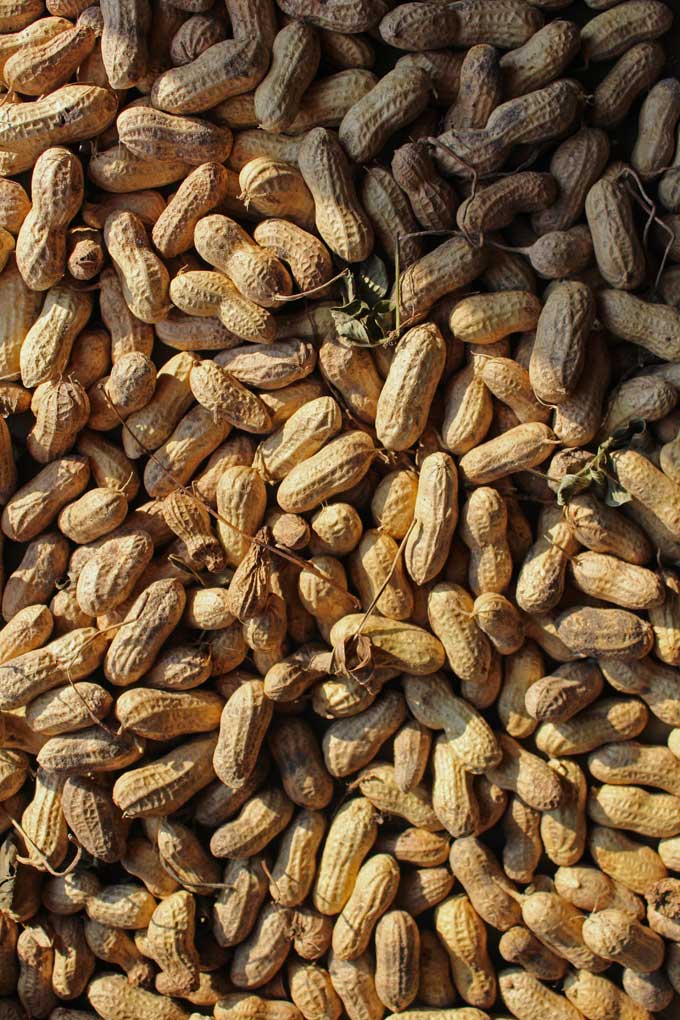
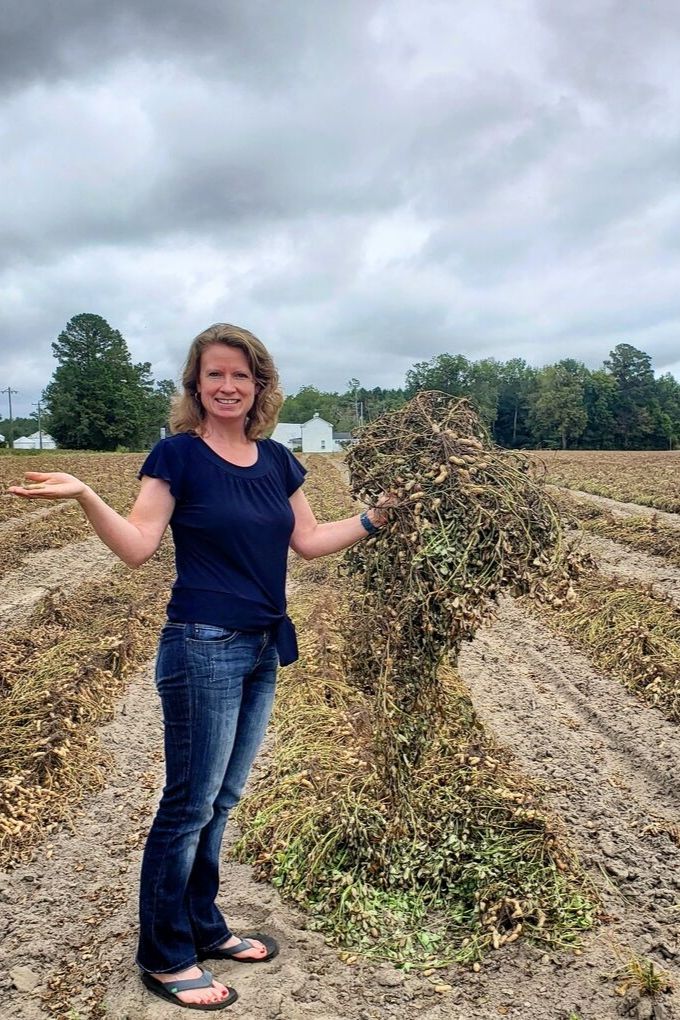
The peanuts used for this recipe are courtesy of my brother-in-law Joey Johnson. The farming photos are provided by my niece (his daughter) Ashley, from Southampton County, Virginia.

How To Make Farm To Table Peanut Butter
How To Oven-Roast The Peanuts:
Preheat the oven to 350 degrees F.
Place the peanuts onto a shallow baking pan in a single layer.
Place the pan inside the preheated oven and roast the peanuts. Stir the peanuts once or twice during the roasting time.
Roast the peanuts until slightly underdone.
Take into consideration that the peanuts will continue to cook from the carryover heat when removed from the oven.
For unshelled peanuts, bake for 20 to 25 minutes.
For shelled peanuts, bake for 15 to 20 minutes.
Cool the peanuts completely. Peanuts can hold in heat for a while, so be careful when trying to shell them!
When the peanuts have cooled, remove the peanuts from the shell, and remove the skins. Shell and skin the peanuts until you have two cups of roasted peanuts.
Now you are ready to make peanut butter!
Make extra for snacking! Keep in mind oven-roasted peanuts are a healthy, convenient snack that provides a great source of protein.
How To Make Peanut Butter:
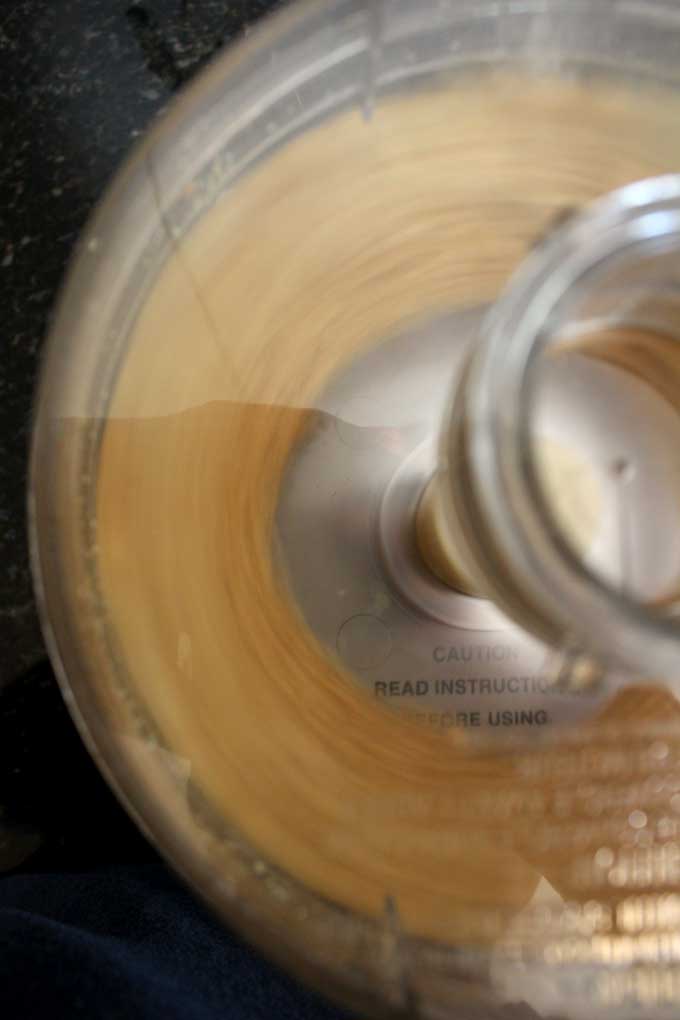
Dump the peanuts into the bowl of a food processor fitted with a blade attachment.
Turn on the food processor and let it run for about 4 to 5 minutes.
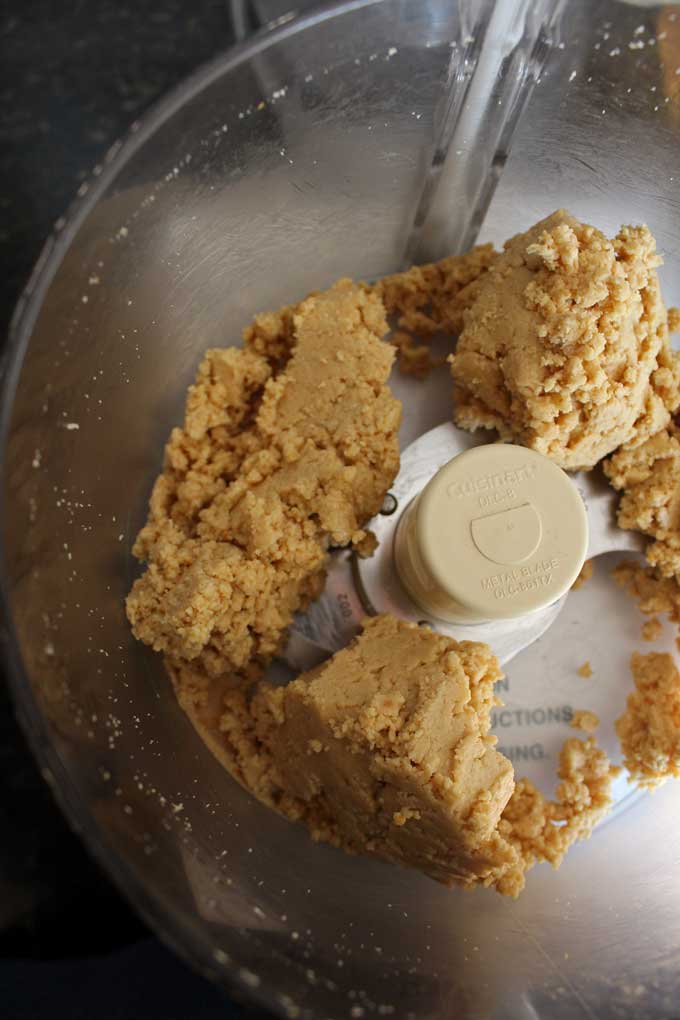
While the peanuts are processing, they go through different stages.
At first, there will be dense crumbs.

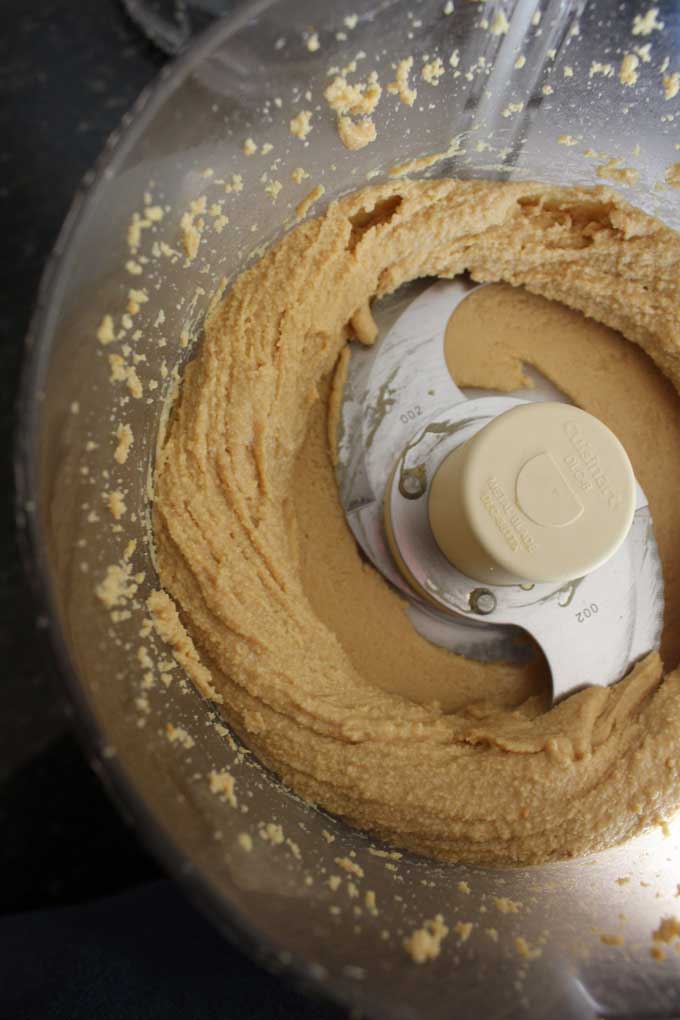
Then at about one minute of processing time, the peanuts clump into a ball. It may seem like it’s not going to turn into peanut butter, but it will! Just keep the food processor on.
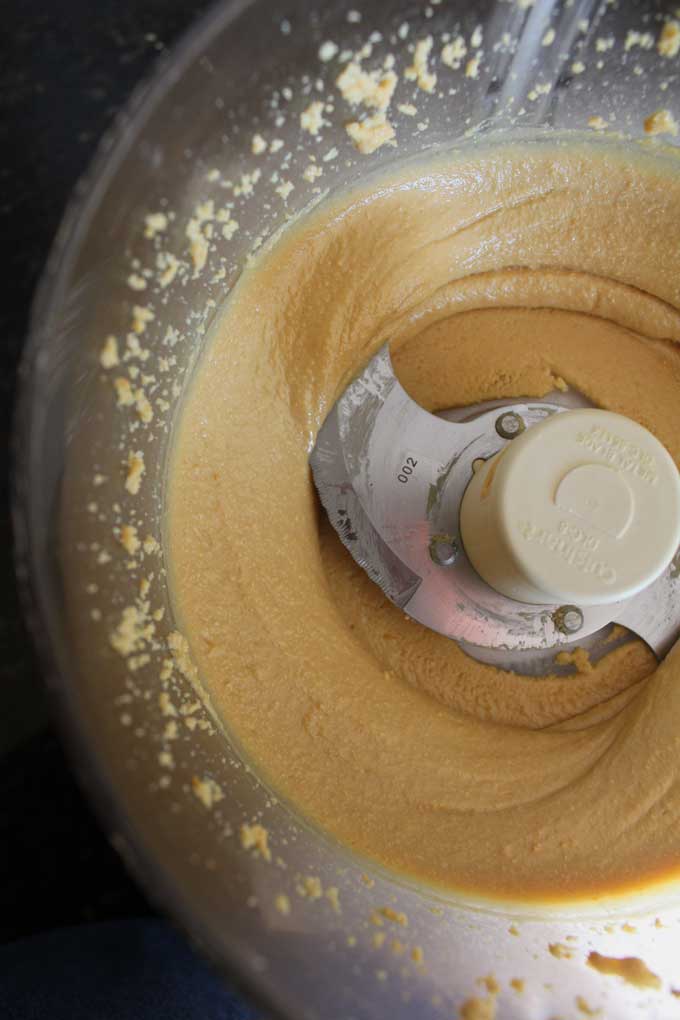
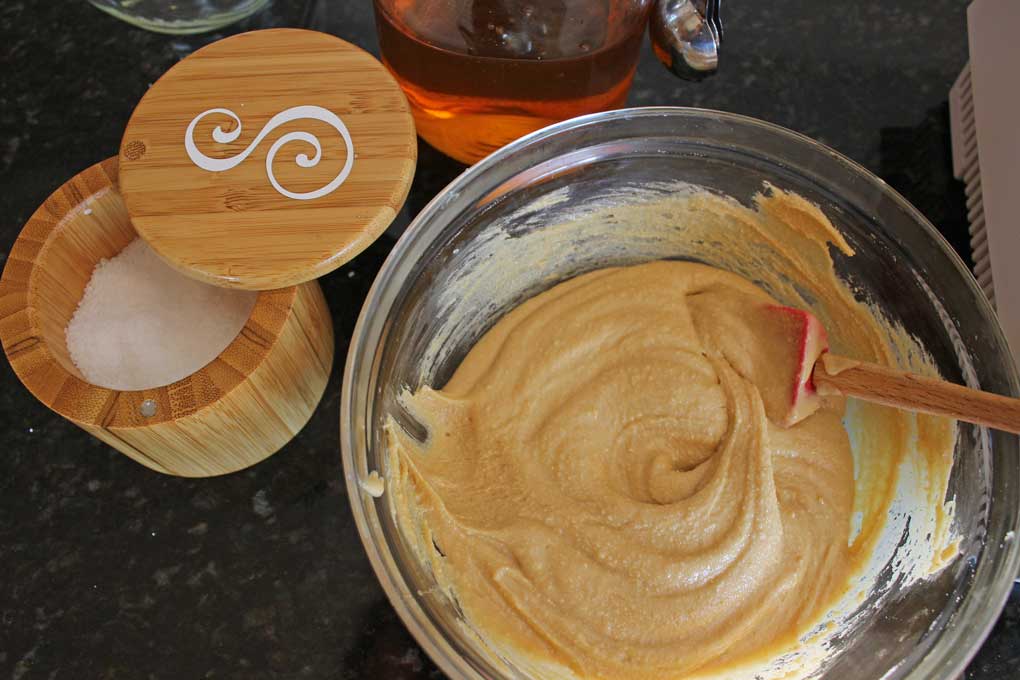
At about 3 minutes in, the ball splatters against the sides of the food processor bowl and begins to smooth out. At this point, you have peanut butter. Stop the food processor, scrape down the sides.
Place the lid back on and process for another minute or so until the peanut butter is smooth and creamy.
Pour the peanut butter out into a medium bowl. Stir in the honey and season with salt, to taste.
Questions that you may have about making peanut butter:
- How do you select peanuts for oven-roasting? When using peanuts in the shell, you want to use clean, unbroken peanuts without discoloration and the peanuts should not rattle inside of the shell when you shake them.
- What kind of peanuts can I use? Raw dried peanuts that you oven-roast yourself make the best peanut butter and I highly recommend using them. However, they may be hard to find. Instead, you can use roasted peanuts that have no salt or that are lightly salted. Using plain unseasoned nuts allows you to season the peanut butter to your taste. This means you are also in control of the amount of sugar and salt in the peanut butter, which is very helpful if you watch your sodium and sugar intake. Feel free to use salted, unsalted, honey roasted or any flavored peanuts. It’s fine. Make it your own!
- Can I use other types of nuts? Yes! This method of making peanut butter is the same as other types of nut butter. You can make almond butter, pistachio butter, cashew butter and or any other kind of nut butter you desire!
- Can I use a blender? I cannot speak from experience, but according to what I have read you can. However, you will need a professional style blender that can handle the job, such as a Blendtec or Vitamix.
- Can I use the food processor to stir in the honey? Stirring the honey in gives the peanut butter a better texture. There are some recipes that say to mix the honey into the peanut butter while in the food processor. In my experience, this made the peanut butter clump up and become too thick.
- What about crunchy peanut butter? If you are a crunchy peanut butter fan, you can add in some chopped peanuts after you process the peanut butter or reserve about ¼ to ½ cup of the 2 cups of peanuts needed to make the batch.
- Can I make larger batches? Yes, but do not add more than 2 cups of peanuts in the food processor at a time. I’m speaking from experience on this. If you add more than two cups of peanuts there is not enough room inside the processor bowl for the peanuts to work their magic. It’s best to process the peanut butter in batches and add together.
- Do I need to add oil? NO! Peanuts have natural oil, so there is really no reason to add oil to the peanut butter. Yes, many recipes call for oil. I have used everything from store-brand peanuts to fresh. I’ve never had a need to add oil.
- Will the peanut butter separate? Yes, it can. Sometimes when you open the container you’ll notice oil laying on top of the peanut butter. This is normal but doesn’t happen all the time. Just stir before using it.
- How can you tell if the peanut butter has gone bad? You’ll smell it. The peanut butter will have a paint-like smell to it. David can tell rancid nuts from far away. He has a keen sense of smell for it.
Storage:
Add the peanut butter to a glass jar with a lid or airtight container. Store in a cool dry place for up to two weeks or store in the fridge for long term storage.
According to internet research, homemade peanut butter can be stored in the refrigerator for up to 6 months. However, I don’t see how it will ever stay in there that long. You’ll eat it up long before then!
When storing in the fridge it is best if you remove the peanut butter at least a half an hour before using it. This will allow it to loosen up.
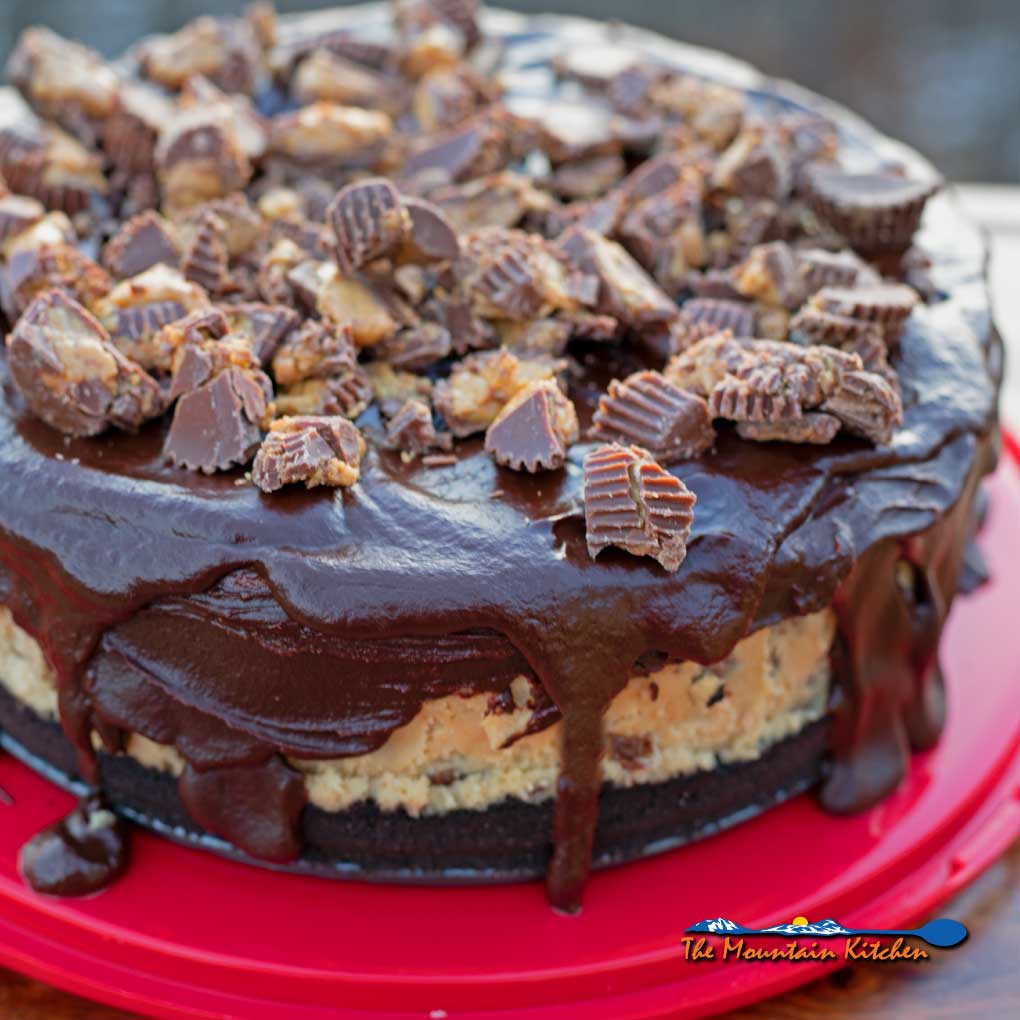
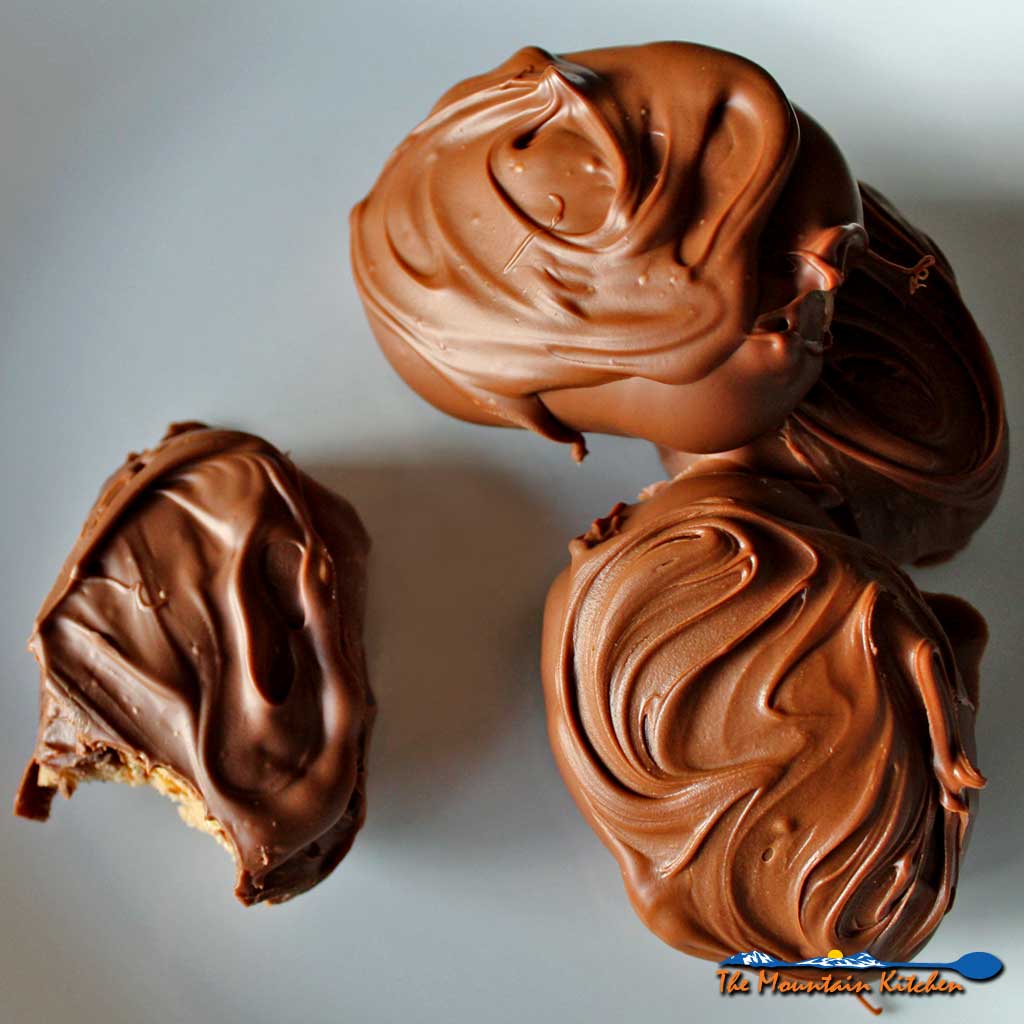
Recipes that use peanut butter:
I encourage you to use fresh peanuts whenever possible. Try adding it to your favorite recipes. Here are some recipes that I’ve shared that use peanut butter. Check them out!
- Peanut Butter Bread
- 5-Ingredient Peanut Butter Eggs
- Mama Rosa’s Christmas Peanut Butter Fudge
- Rainbow Roll-Ups With Peanut Sauce

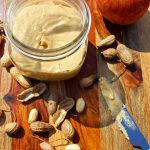
Farm To Table Peanut Butter
Useful Equipment:
Ingredients
- 1 ½ pounds unshelled raw peanuts or 1 pound shelled raw peanuts
- 1 to 2 tablespoons honey
- Kosher salt to taste
Instructions
How To Oven-Roast The Peanuts: If using shelled roasted peanuts skip steps 1-7 and go straight to Making Peanut Butter.
- Preheat the oven to 350 degrees F.
- Pour the peanuts onto a shallow baking pan in a single layer.
- Place the pan inside the preheated oven and roast the peanuts. Stir the peanuts once or twice during the roasting time.
- Roast the peanuts until slightly underdone. Take into consideration that the peanuts will continue to cook from the carryover heat when removed from the oven.
- For unshelled peanuts, bake for 20 to 25 minutes. For shelled peanuts, bake for 15 to 20 minutes.
- Cool the peanuts completely. Peanuts can hold in heat for a while, so be careful when trying to shell them!When the peanuts have cooled, if using unshelled peanuts, remove the peanuts from the shell, and remove the skins. Shell and skin the peanuts until you have two cups of roasted peanuts.
- Now you are ready to make peanut butter! Make extra for snacking! Keep in mind oven-roasted peanuts are a healthy, convenient snack that provides a great source of protein.
How To Make Peanut Butter:
- Dump the peanuts into the bowl of a food processor fitted with a blade attachment.
- Turn on the food processor and let it run for about 4 to 5 minutes.
- While the peanuts are processing, they go through different stages. At first, there will be dense crumbs. Then at about one minute of processing time, the peanuts clump into a ball. It may seem like it’s not going to turn into peanut butter, but it will! Just keep the food processor on. At about 3 minutes in, the ball splatters against the sides of the food processor bowl and begins to smooth out. At this point, you have peanut butter. Stop the food processor, scrape down the sides. Place the lid back on and process for another minute or so until the peanut butter is smooth and creamy.
- Pour the peanut butter out into a medium bowl. Stir in the honey and season with salt, to taste.
- Enjoy your freshly made peanut butter!


Julie Menghini says
What a fun post! We don’t grow peanuts in Nebraska but I sure support the peanut farmers of America with my consumption of them! Your recipe looks amazing. I grew up getting my hands dirty too but it was corn and not edible unless you’re a sow LOL. Sure did eat my share of dirt and even had a few date nights harvesting with a beau in a combine.
The Mountain Kitchen says
Thanks, Julie! My father raised corn also. I was dirty from that too…lol! Another great harvest smell with lots of memories. 🙂
Daniel Mitchell says
Debbie, you make me homesick! I use to live in Houston County Alabama in a small town outside of Dothan named Ashford Alabama. My house was next to a peanut farmer. He would disk a section at the corner of our house so we could grow tomatoes. I remember seeing and smelling the peanuts. After the harvest in November we would have the National Peanut Festival. It was so much fun. I remember we would have a debate who the number one peanut producers were, from Alabama and Virginia. Thanks Debbie.
The Mountain Kitchen says
Peanut dirt gets in your blood, doesn’t it? Just nothing like peanut farming!
erica anderson says
I live in Midland City literally I live on the border of Dothan and Midland City and of course I went to the peanut festival and have green peanuts in my fridge right now. I love fresh raw peanuts and will definitely be making everything related to peanuts. My family is from Ghana and it is customary to also use peanuts. I recommend everyone try peanut butter soup with fufu. I will be using this recipe to make the peanut butter needed for the soup. ♥️🥜
Jay Howell says
I used green peanuts that had not been dried yet. I cooked them exactly like the recipe called for the full 25 minutes. My peanuts were very tan and did not have a cooked taste. The recipe said they should be a little undercooked so I took the skins off and kept going with the recipe. My peanut butter is the color of tahini. It’s not Brown at all. Should I have cooked the peanuts longer in the shell? Or should I have shelled them and cook them outside the shell? What are your thoughts?
The Mountain Kitchen says
Hi Jay, the peanuts should have been shelled. Sorry, the recipe was not clear on that. You will notice that in my pictures the peanut butter is also the color of tahini. If the peanuts are too brown the peanut butter will have slight burnt taste so you have to be careful and check them often. How did yours taste? Next time, shell the peanuts first. I’ll update the recipe. Thanks!