Supermarket rotisserie roast chicken is good, but it ain’t got nothing on a smoked whole chicken. This brined chicken has an amazing mesquite smoke flavor on the rotisserie.
This smoked whole chicken is not only smoky but also tender and incredibly juicy; it tastes like heaven! Let us guide you through cooking one of the best chickens you will ever pull from your grill, pellet grill, or smoker.
We recently purchased a 22-inch Weber Rotisserie attachment for the Weber Performer. We’ve only begun to spin meat on this thing, but this smoked whole chicken is worth documenting to share with you.
While this recipe is specific for a Weber charcoal grill with rotisserie only, you could probably use the same method with a whole chicken on a rack using whatever type of smoker you have. The only thing is the bird won’t baste itself in its own juices as it does on a rotisserie.
This whole chicken recipe is perfect for a lazy Sunday hanging out in the backyard or a well-planned holiday gathering.
Let’s smoke a chicken!
What You’ll Love About This Recipe:
- Affordable: Whole chicken is one of the cheapest ways to purchase chicken. Take advantage of store sales; you can easily feed 4 to 6 people for very few of your hard-earned dollars.
- Minimal Ingredients: Cooked low and slow, we were amazed by how tender and juicy this bird was. Not only that, but the flavor was out of this world without using a dry rub. Only brine and mesquite wood for flavor. No rub is necessary!
- Easy to Cook: With the grill set up using the “snake” or “fuse” charcoal and wood configuration, the chicken cooks itself.
How To Make Smoked Whole Chicken
This recipe has very minimal ingredients. The following equipment list may seem lengthy, but we recommend all of the products we use to give you a better cook.
Equipment and Supplies:
- Briner Bucket
- 22-inch Weber Grill
- 22-inch Weber Rotisserie
- Charcoal
- Charcoal Chimney
- Mesquite wood chunks
- Butcher’s Twine
- Instant-read thermometer
- Grilling Gloves
- Disposable Gloves
- Utility Tongs
- Mini Saucepan
- Grilling Brush
- Poultry Shears
Wood for Smoking Chicken
We use mesquite wood for this recipe. Many say mesquite has a strong flavor, but it’s really good with chicken. If you want a milder wood flavor, try fruit wood such as apple, hickory, cherry, or maple. Use your favorite, but we highly recommend mesquite.
What’s Needed to Make This Recipe
The recipe card at the end of this post lists the full ingredient list with measurements.
- This recipe is based on a 5-6 pound chicken (whole roasting)
- Brine Solution recipe to follow
- A stick of unsalted melted butter
Prepare the Chicken for Brine
Remove the chicken from the package, remove the giblets from the inner cavity, and rinse with cold water.
The Chicken Brine Solution
Brining is a sure shot easy way to infuse some major flavor and moisture into your bird all the way down to the bone. This chicken brine is a savory yet flavorful brine that will make the juiciest, most delicious smoked chicken you’ve ever tasted.
The Brine Ingredients:
Herbs and Spices: Black peppercorns, a bay leaf, fresh thyme, and rosemary make up the aromatics of this brine and give this chicken an amazing flavor without competing with the mesquite smoke.
Brine Solution: It is not a brine mixture without two main ingredients: salt and water. All other items are negotiable, but you must have these two elements to make a brine.
Prepare the Brine Solution:
- Mix the brine ingredients all together. Stir well to dissolve all of the salt. This will take a minute or two of stirring.
- Place the whole chicken inside a plastic Briner Bucket, zip-top bag, or plastic container.
- Pour the brine solution over the chicken, ensuring enough solution to cover the entire bird. Next, lock the lid of the briner bucket into place and place the lid on. Alternatively, seal the bag allowing as much air to escape as possible.
- Brine for 12 hours or overnight.
Tips for Brining:
- Mix the brine ingredients in a clear bowl to ensure all of the salt dissolves before adding the chicken.
- If you do a lot of brining, we highly recommend investing in a Briner Bucket. You can learn more about them HERE.
Fire Up the Grill and Prepare for Rotisserie
Prepare the grill for indirect heat. For long cooks, David loves using the snake method (also known as the fuse method) when using the Weber kettle. It’s easy to control and practically maintains a consistent heat without having to tend the grill.
To cook using the snake method, lay a chain of charcoal in a half-circle along the outer edge of the grill. There should be 3 layers with 2 charcoals on the bottom with one charcoal on top. Place a chunk of mesquite wood every few inches along the top of the “snake.”
Turn the charcoal chimney upside down and light only a small handful of charcoal. Then, when the charcoals are hot, you just drop the lit coals onto one end of the “snake” to start the cook.
(Watch our video for a brief demonstration of how to set up the grill using the snake method).
Drain the Chicken
While the grill is heating up, prepare the chicken for smoking. Remove the chicken from the brine and pat the chicken dry with paper towels. Drain the brine into the sink, collect the garlic and herbs, and place them back inside the chicken cavity.
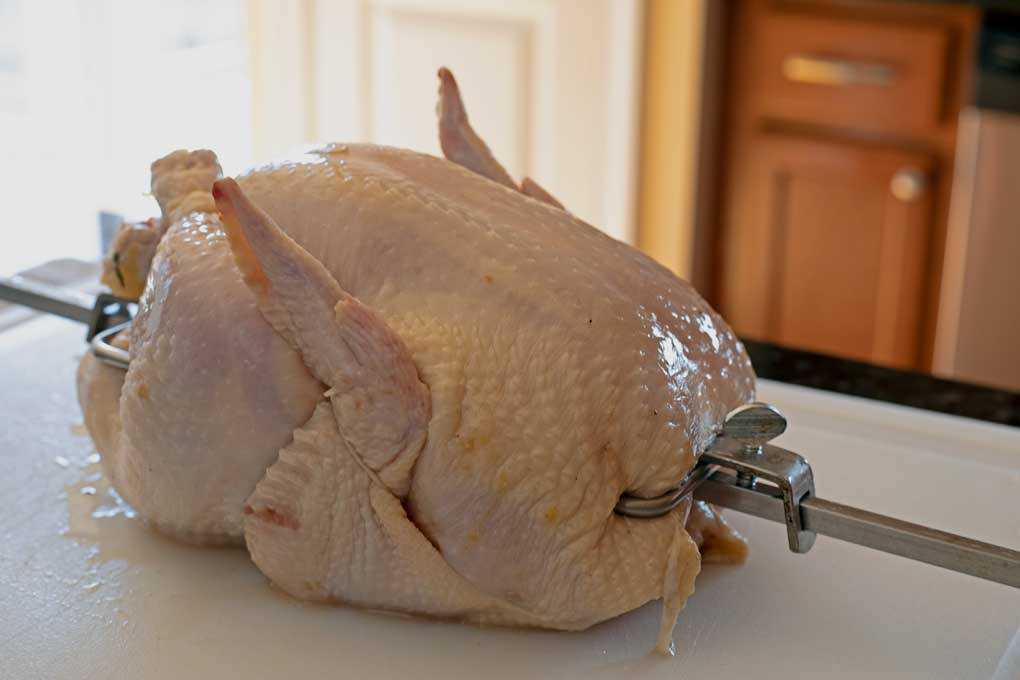
How To Truss A Chicken
Trussing the chicken will help retain its shape and keep it from flopping all over the place while turning the rotisserie. It also keeps the wings and legs from cooking too fast.
Truss the chicken with butcher’s twine. The following video will show you the method David used to truss the chicken:

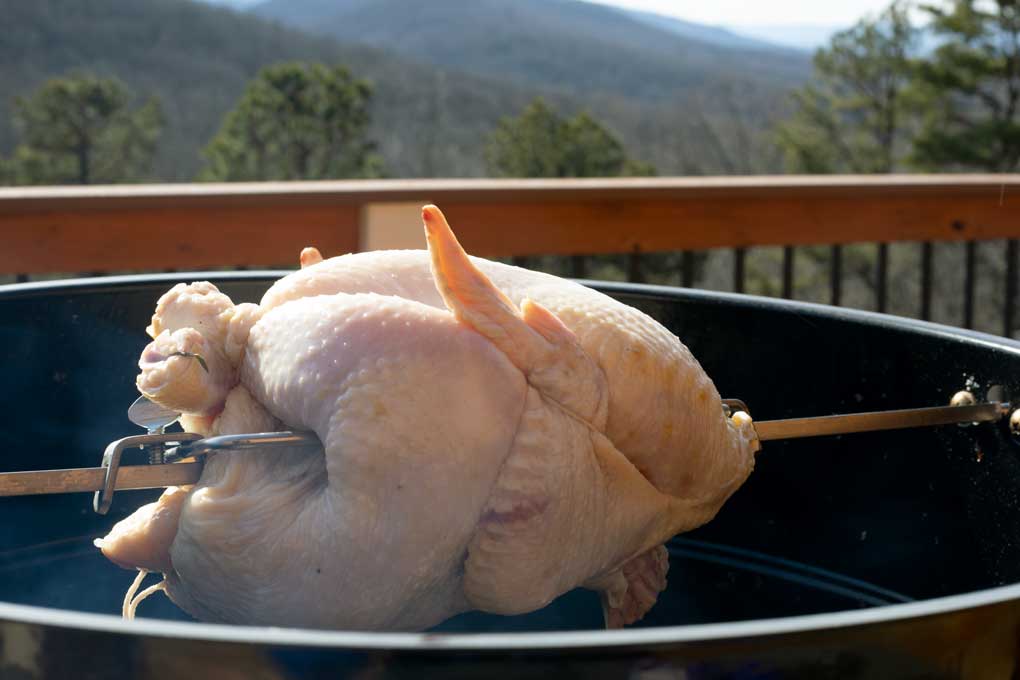
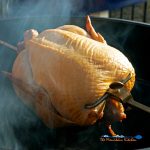
Place the Chicken on the Rotisserie Spit
Place the spit rod through the chicken. Ensure the chicken is secured as close to the center as possible. This will allow the spit to turn smoothly and not tax the rotisserie motor.
Once you have it centered, clamp the chicken down and try to turn it by hand to get a feel for how it will spin on the rotisserie.

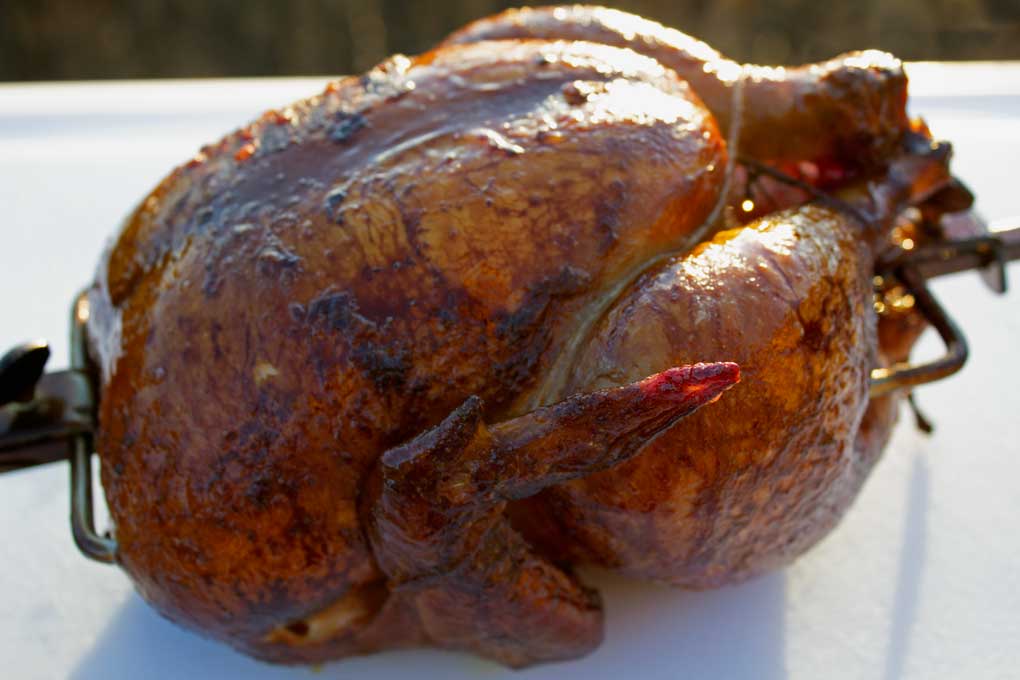
Smoke the Chicken
Place the hot coals at the beginning of the “snake.” Then secure the spit on the rotisserie, and flip the switch! Watch the chicken twirl a few times to ensure it’s secure and rotates smoothly. Finally, put the lid on and start smoking!
Low and Slow…
About 1 ½ hours into the smoke, remove the lid and check on the chicken. Take a look at the color and make any adjustments needed to the coals and wood at this time. Then, place the lid back on and keep on cooking.
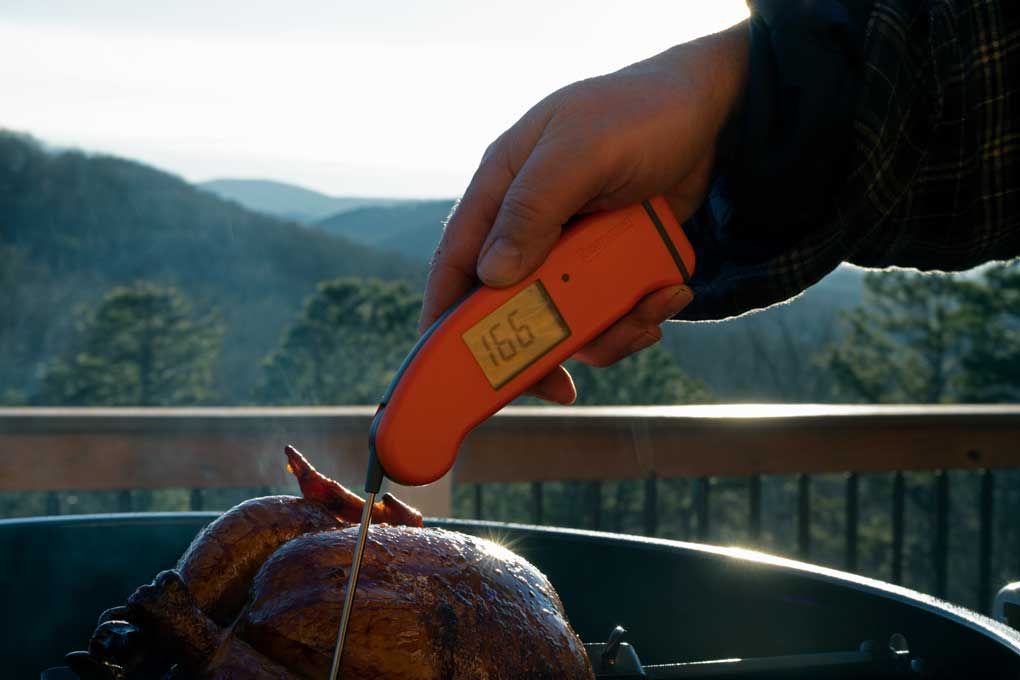
Rotisserie Chicken Temperature Vs. Time
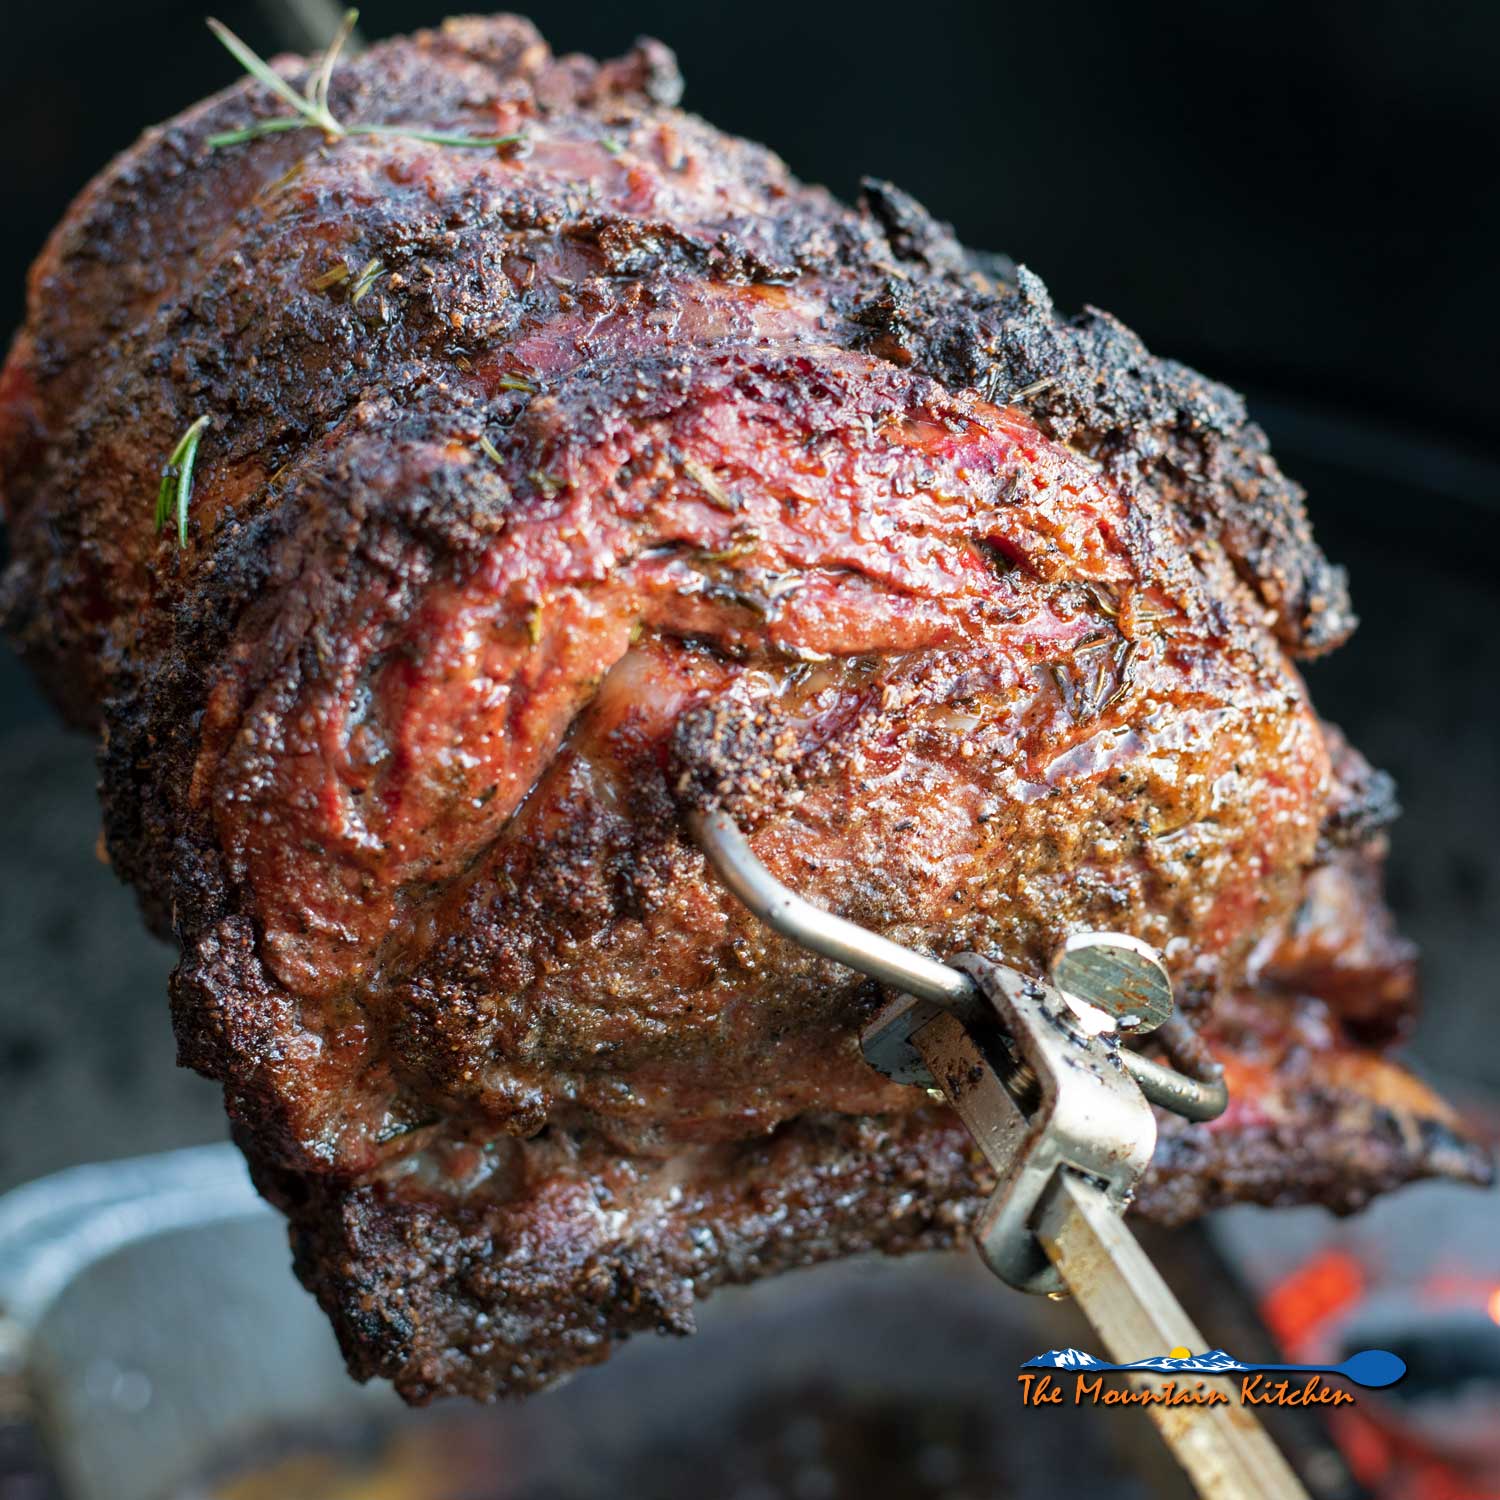
The chicken is done when the internal temperature reaches 165 degrees F within the breast area and about 170 degrees within the thighs (thickest parts). Most pitmasters will pull the chicken off about 160 and expect carry-over heat to finish taking it up to the ideal done temperature. We tend to pull ours off at 170 degrees F to ensure it’s done all the way through and so tender that it nearly falls apart.
As always, it is more important to cook by temperature than by time. We found that smoking a chicken cooking temperature between 225 and 250 degrees F will take about 1 hour per pound. Then you can crank the heat up a bit, and the chicken will cook faster, but it probably won’t be as tender and juicy.
At about 2 ½ hours in, remove the lid and stop the rotisserie. Use an instant-read meat thermometer to take the temperature reading from the breast and the thigh area. This will show you how much more time is needed to cook the chicken.

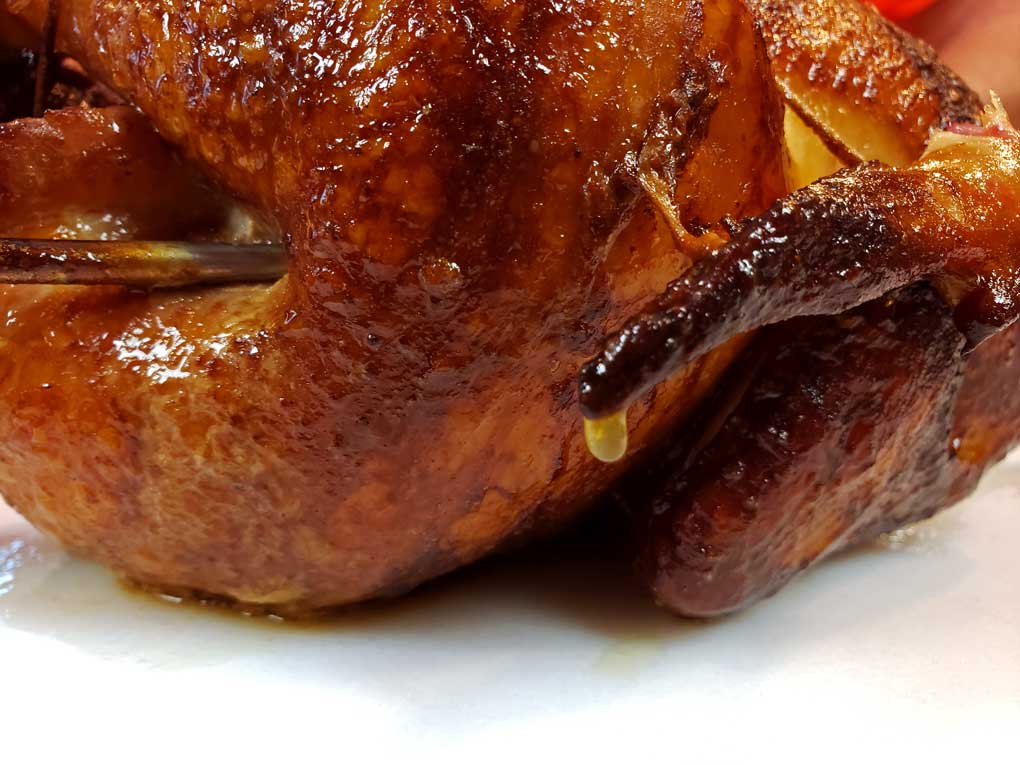
Basting the Smoked Whole Chicken
Basting with a butter mixture will help crisp up the skin a little but doesn’t crisp it up a lot. If you really want crispy skin, increase the heat at the end and monitor the chicken closely!
During the last 30 to 45 minutes of cooking, melt about ½ stick of butter in a small saucepan.
Pour the melted butter into a small bowl and baste the chicken with butter every 10 minutes or so.
Tips for Smoking a Whole Chicken
- Use a drip pan to catch the chicken drippings, keeping the grill’s bottom clean!
- Caution: Be careful not to spatter too much butter onto the coals, as the butter will cause them to flame up.
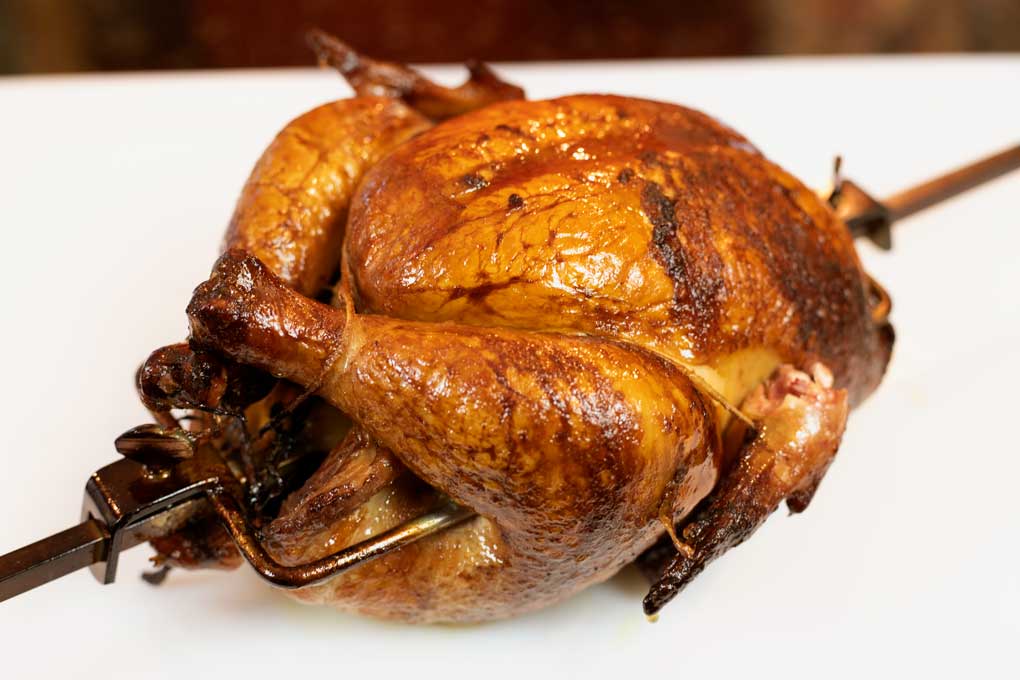
Remove the Smoked Chicken and Allow It To Rest
All the spinning and cooking have made this chicken tired. Turn off the rotisserie and carefully remove the chicken from the grill. Remember that spit is hot, so wear grilling gloves to protect your hands.
Place the chicken onto a cutting board. Remove the spit and rotisserie forks from the chicken. Tent loosely with aluminum foil and allow the chicken to rest for at least 20 minutes before carving.
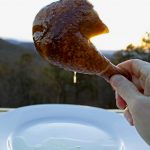
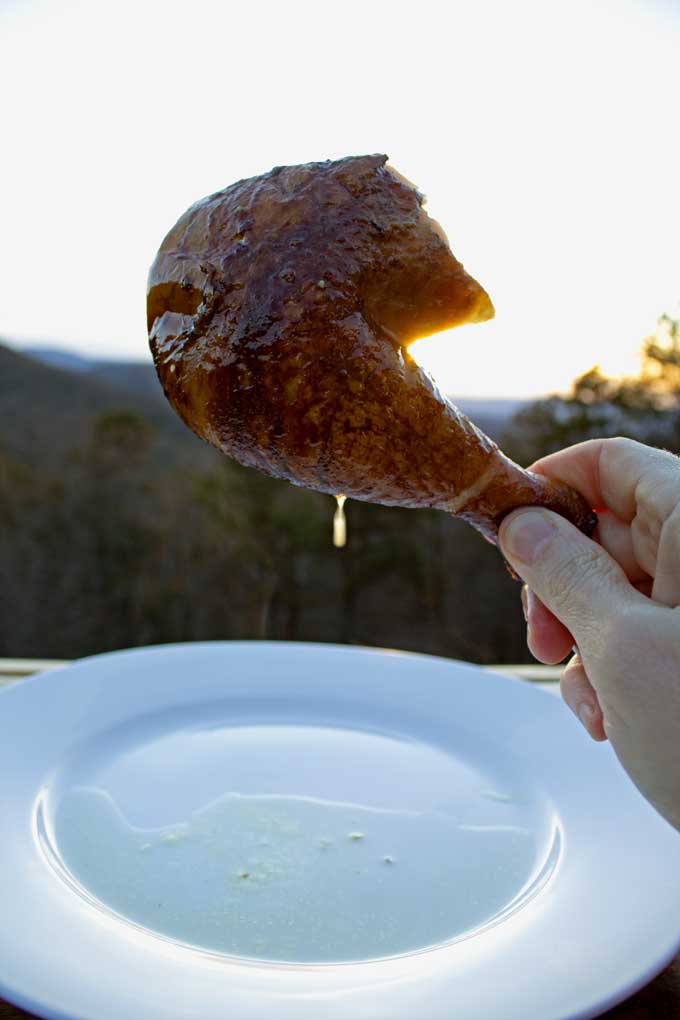
Carve and Serve the Rotisserie-Smoked Chicken!
Use poultry shears to cut up the smoked chicken for serving.
Recipe FAQs
Yes, use your favorite bbq sauce. However, this chicken is so juicy you won’t even need it.
The skin was too wet or not enough heat. Make sure the skin is dry before you put the chicken on the grill. If you have time after brining the chicken, put the whole chicken in the refrigerator for a few hours to dry out the skin. This will help keep the chicken skin from becoming rubbery. Also, ensure the grill is hot toward the end of the cook so that the butter helps crisp up the skin.
Yes! Remember to soak the wood chips for about 30 minutes before grilling
What To Serve With Rotisserie-Smoked Chicken
Serve with a nice glass of rosé, chardonnay, or a tall glass of ice-cold beer along with one of the following side dishes:
What To Do With Whole-Smoked Chicken
Smoky chicken is great for salads, sandwiches, and wraps but makes the best chicken salad you have ever dreamed about.
If you invest in a Weber rotisserie, stay tuned! We will do our best to bring you more rotisserie grilling recipes like this one.
As always, rate this recipe and make comments below. We’d love to hear from you!

Smoked Whole Chicken Using a Rotisserie
Useful Equipment:
- Charcoal
- Mesquite Wood Chunks
Ingredients
- 5-6 pound whole roasting chicken
- Brine Solution recipe to follow
- ½ to 1 stick unsalted butter melted
The Brine Solution:
- 2 ½ tablespoons whole black peppercorns
- 6 sprigs fresh thyme
- 3 sprigs fresh rosemary
- 3 bay leaves
- 1 head of garlic broken down into individual cloves, peeled and smashed
- 1 ½ cups Kosher salt
- 1 ½ quarts water (12 cups)
Instructions
Brine the Chicken:
- Mix all of the ingredients of the brine solution together. Stir well, until all of the salt has dissolved. This will take a minute or two of stirring.
- Place the whole chicken inside a plastic Briner Bucket, zip-top bag, or plastic container.
- Pour the brine solution over the chicken, making sure there is enough solution to cover the entire bird. Lock the lid of the briner bucket into place and place the lid on. Alternatively, seal the bag allowing as much air to escape as possible.
- Brine for 12 hours or overnight.
Fire Up the Grill and Prepare for Rotisserie:
- Prepare the grill for indirect heat. For long cooks, David loves using the snake method (also known as the fuse method) for longer cooks on the Weber kettle. It’s easy to control and practically maintains itself with consistent heat without having to tend the grill.
- To cook using the snake method lay a chain of charcoal in a half-circle along the outer edge of the grill. There should be 3 layers with 2 charcoals on the bottom with one charcoal on top. Place a chunk of mesquite wood every few inches along the top of the “snake”.
- Turn the charcoal chimney upside down and light only a small handful of charcoal. When the charcoals are hot, drop them onto one end of the “snake” to start the cook.
Drain the Chicken:
- While the grill is heating up, prepare the chicken for smoking. Remove the chicken from the brine and pat dry with paper towels. Turn the brine out into the sink and collect the garlic and herbs, placing them back inside the chicken cavity.
Truss the Chicken:
- Trussing the chicken will help retain its shape and keep it from flopping all over the place while turning the rotisserie.
- Truss the chicken with butcher’s twine. (see video for demonstration)
Place the Chicken on the Spit:
- Place the spit through the chicken. Ensure that the chicken is secured as close to the center as possible. This will allow the spit to turn smoothly and will not tax the motor on the rotisserie.
- Once you have it centered clamp the chicken down and try to turn it by hand to get a feel for how it will spin on the rotisserie.
Smoke the Chicken:
- Place the hot coals at the beginning of the “snake”. Then secure the spit on the rotisserie, flip the switch! Watch the chicken twirl a few times to ensure it’s secure and rotates smoothly. Put the lid on and start smoking!
Low and Slow…
- About 1 ½ hours into the smoke, remove the lid and check on the chicken. Take a look at the color and make any adjustments needed to the coals and wood at this time. Place the lid back on and keep on cooking.
- The chicken is done when the internal temperature has reached 165 degrees within the breast area and about 170 degrees within the thighs (thickest parts). Most pitmasters will pull the chicken off about 160 and expect carry-over heat to finish taking it up to the ideal done temperature. We tend to pull ours off at 170 to ensure it's done all the way through and so tender it nearly falls apart.At about 2 ½ hours in, remove the lid and stop the rotisserie. Use an instant-read thermometer to take the temperature reading from the breast and the thigh area. This will give you an idea of how much more time is needed to cook the chicken.
Baste the Chicken:
- During the last 30 to 45 minutes of cooking, melt about ½ stick of butter in a small saucepan.
- Baste the chicken with butter every 10 minutes or so. This will help crisp up the skin a little. Caution: Be careful not to spatter too much butter onto the coals as the butter will cause them to flame up.
Remove the Chicken and Allow It To Rest:
- All the spinning and cooking has made this chicken tired. Turn off the rotisserie and carefully remove the chicken from the grill. Remember that spit is hot so wear some gloves to protect your hands.
- Place the chicken onto a cutting board. Remove the spit and forks from the chicken. Tent loosely with foil and allow the chicken to rest for at least 20 minutes before carving.
Carve and Serve:
- Use poultry shears to cut up the smoked chicken for serving.


Karen (Back Road Journal) says
While I don’t have the necessary equipment to smoke a chicken, I enjoyed watching the trussing technique. Nice video.
The Mountain Kitchen says
Hi Karen! So good to hear from you. I hope this video will help you truss your next chicken. We still have to reference it ourselves! 🙂
BILL says
David,
On your Rotisserie Smoked Chicken recipe, I see that you wet brine the bird. Do you think a dry brine would work as well? Actually, just how much extra flavor do those spices add to the cooked bird during a wet brine.