Following David’s 10 steps to smoking a pork butt will result in perfectly cooked meat that’s tender, moist, and juicy.
Follow David’s smoked pork butt recipe, and you will have perfectly cooked meat that’s tender, moist, and juicy. Yes, a slow-smoking a pork butt is a hell of a time investment, but well worth the wait once you wrap your lips around some of that pork.
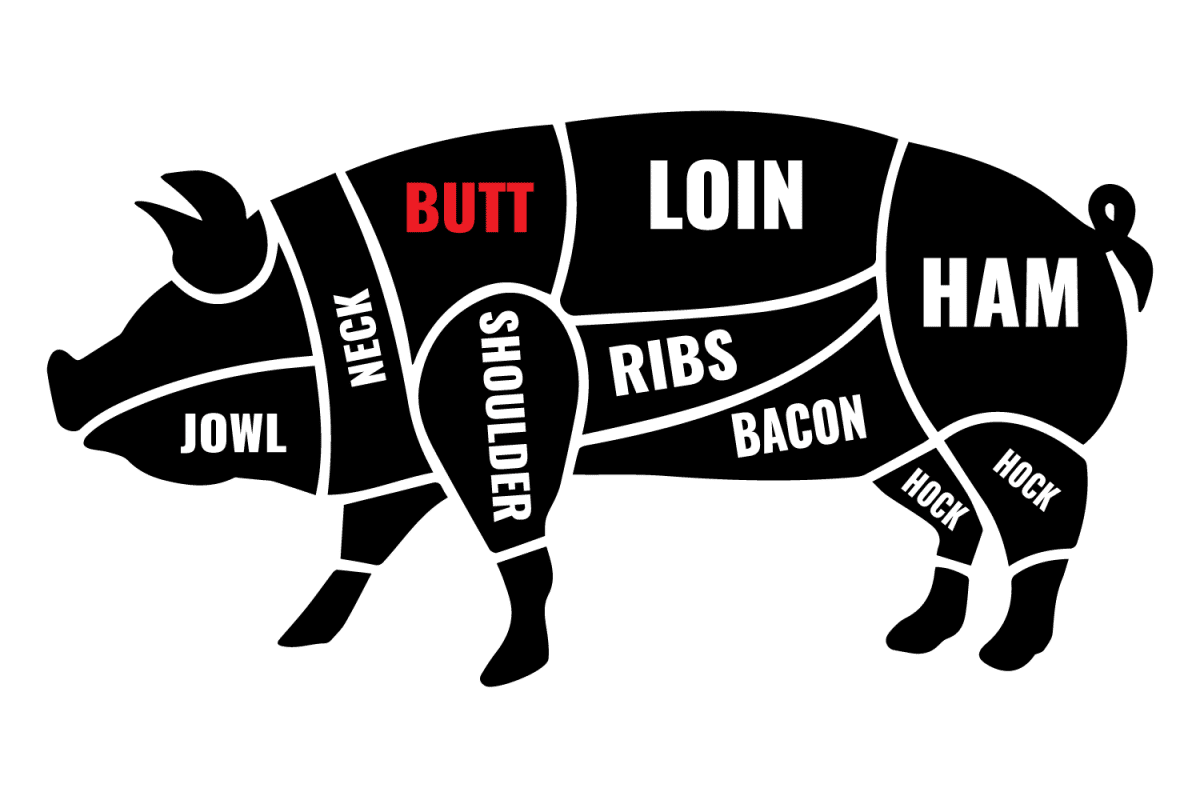
What is Pork A Pork Butt?
There are two large pork roasts within the shoulder of a pig.
- Boston Butt (Pork butt): The shoulder’s upper part is meatier with less bone.
- Picnic Shoulder: The lower part of the shoulder, which is the pig’s foreleg. Just above the hock. This portion has a large bone in the center with less meat.
Despite the name “butt,” a pork butt comes from the upper portion of a pig’s shoulder. This sub-primal cut is the thicker section of the shoulder that includes part of the neck, shoulder blade, and the upper portion of the front leg.
Because this portion of the leg does not get as much use as the lower part of the leg, it has more marbling and lots of connective tissue, making it relatively tough. This shoulder roast is well suited for long slow-cooks such as smoking or braising.
David’s 10 Steps To Smoking A Pork Butt
What’s Needed:
The three main components or this pork recipe are the meat, the rub, and the sauce.
- Pork: 1 pork butt preferably with the bone-in (about 5-9 a pound roast)
- Pork Rub: we use our All-Purpose Pork Rub, but use whatever spice rub you like.
- BBQ Sauce: Use your favorite barbecue sauce – ours is a secret… made of butter, ketchup, vinegar, Worcestershire sauce, mustard, sugar, salt pepper, and chipotle peppers. We also have another recipe if you are interested. You can find it HERE.
Equipment David Uses
- Water Smoker or Charcoal Grill
- A bag of Hickory Wood Chunks
- Grilling gloves
- Charcoal
- Charcoal chimney
- Water
- Tongs
- Meat Thermometer
- Injector
- Heavy-Duty Aluminum Foil
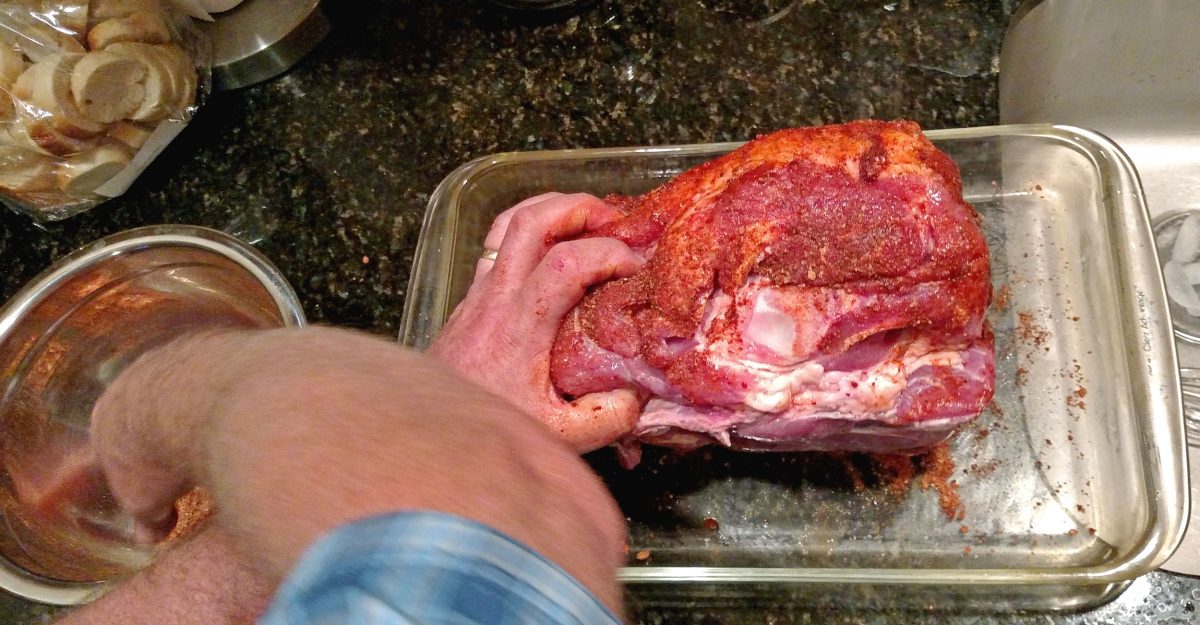
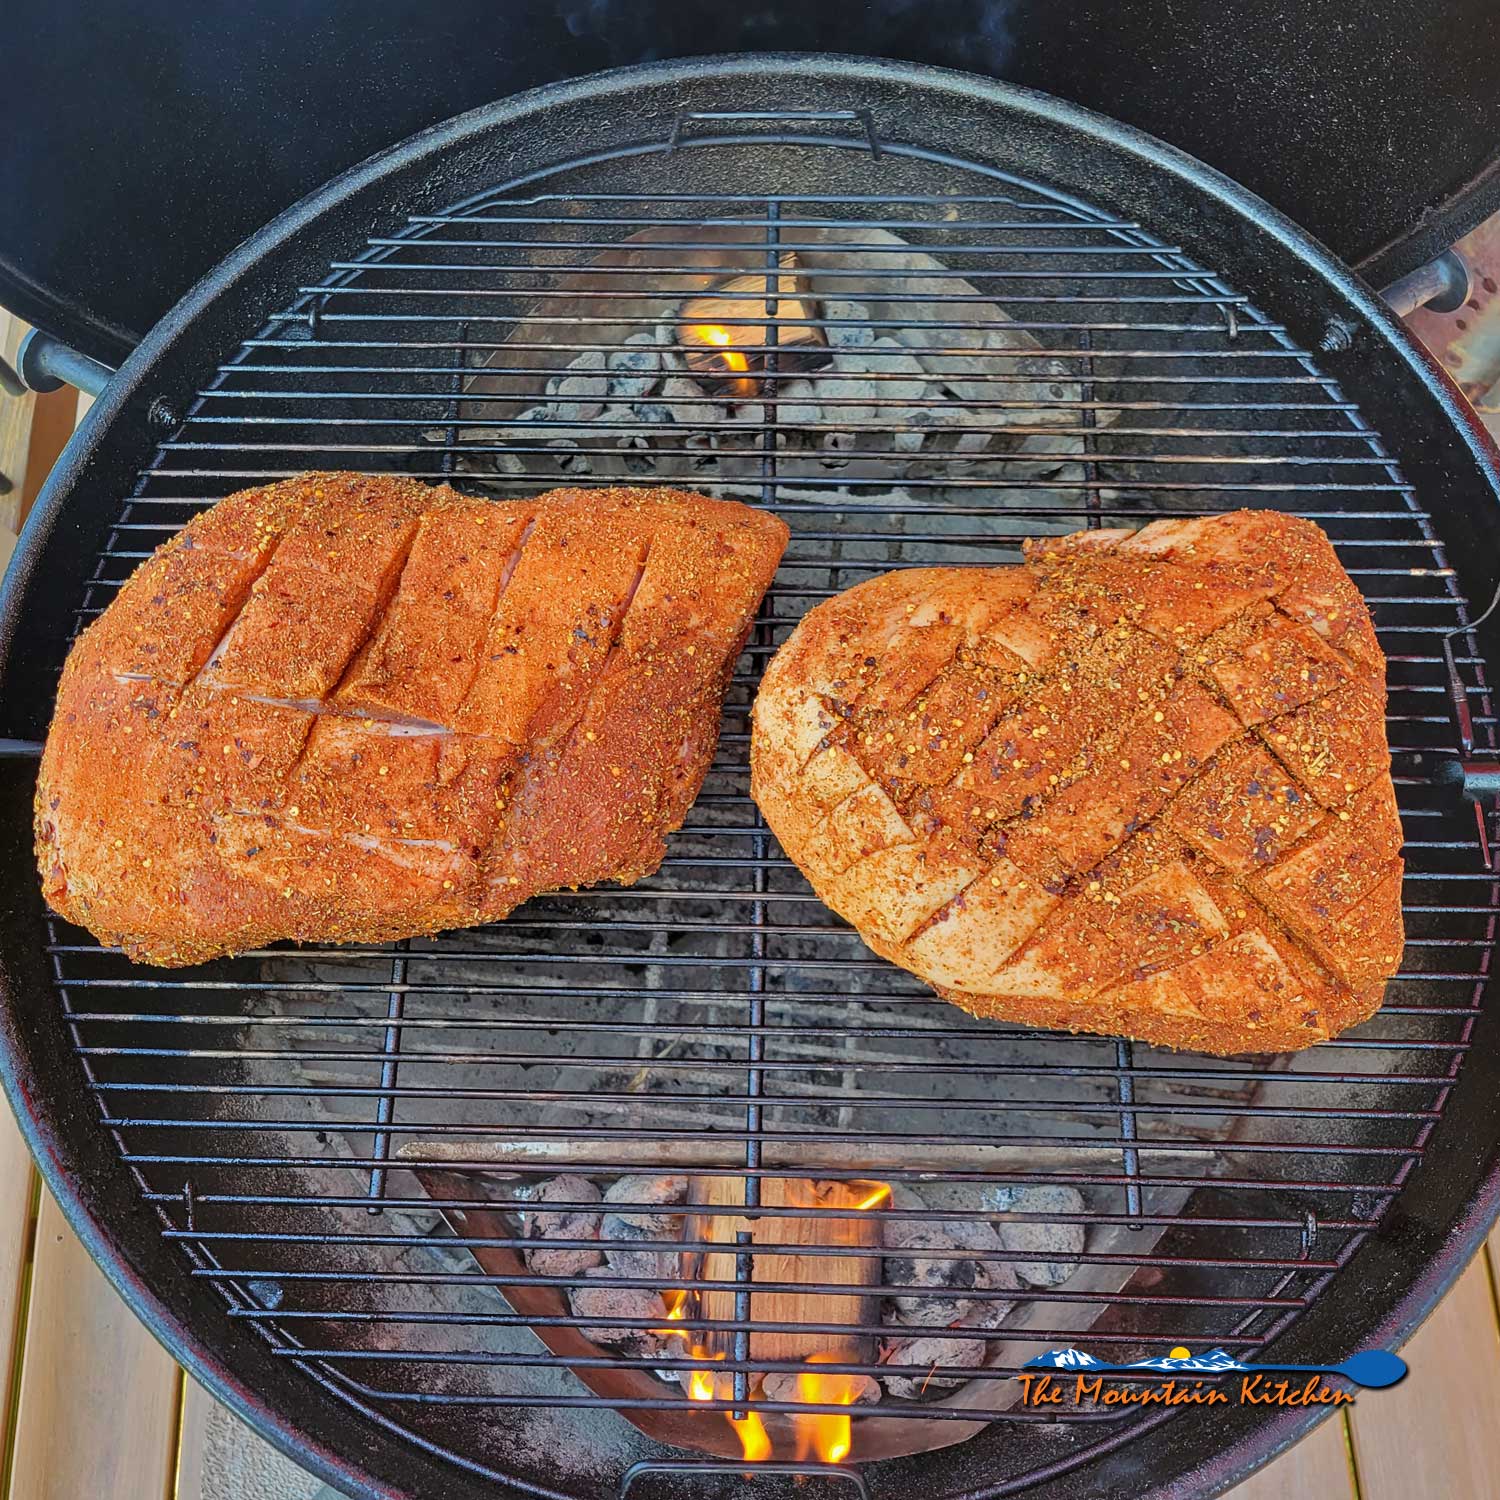
#1 Prep The Pork For The Smoker
A pork butt is a hunk of meat laced with flavorful fat and connective tissue. Start with a butt in the 5-pound range, which is just the right size to fit any smoker or grill.
- Trim the pork to leave at least a ¼-inch cap of fat. (Any less, and the pork will dry out; any more, and the fat will prevent the rub from seasoning the meat.)
- Rinse the meat under cold running water and blot dry with paper towels.
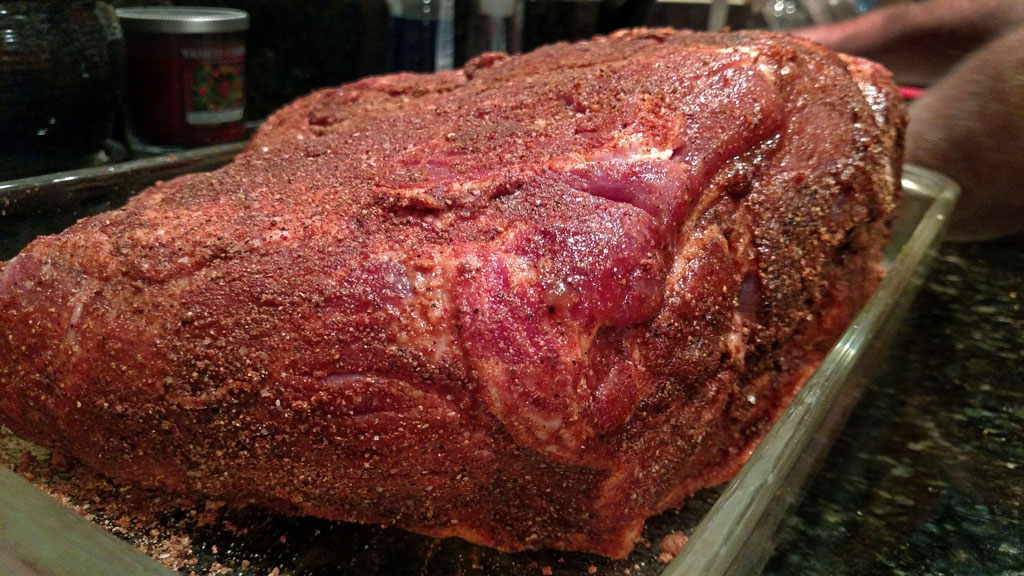
- Combine all the ingredients for the rub in a small bowl (make sure to work out any clumps from the brown sugar for even distribution) and stir to mix.
- Rub onto the meat on all sides.
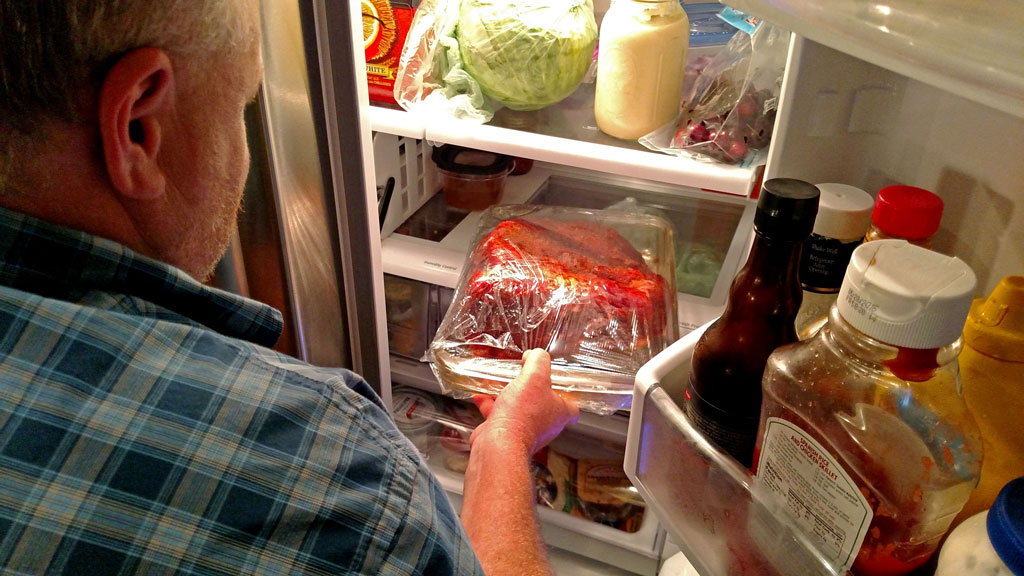
If you have time, wrap the pork in plastic wrap and let it cure in the refrigerator for at least 4 hours or as long as overnight. Smoking a pork butt right away is okay, but sitting in the fridge for several hours allows the rub to penetrate the meat.
#2 Prep The Smoker Or Grill
Smoking is a form of indirect cooking and usually takes place over a period of hours over low temperatures.
Preheat the grill or smoker to 225-250 degrees F. To maintain this low temperature, use only half as much charcoal as usual. (A half chimney-full.) When the coals are ashed over and white, toss 2-3 wood chunks onto the coals and close the lid.
Using a charcoal grill, set it up for indirect heat with a drip pan with water directly underneath the meat to stabilize the temperature.
#3 Smoking the Pork Butt
- Place the pork butt onto the hot grate over the drip pan, fat side up, and cover the grill.
- Bring the temperature up to 225 degrees F, using the vents to regulate the temperature. Knowing the temperature in your grill is crucial, so purchase a digital BBQ thermometer if your grill doesn’t have a temperature gauge. We use and recommend Thermoworks’s Smoke™.
- You will need to add fresh coals and more wood chunks to each side of the grill every hour for at least the first 4 hours.
#4 Low And Slow
- Check the grill’s temperature every hour, staying as close to 225 degrees F as possible. Resist the temptation to open the lid.
- Only open the charcoal door or the lid if you need to add more charcoal or soaked wood chips to maintain temperature and smoke.
- After 4 hours, check the temperature of the meat to see where it is and get an idea of how much more time it will need to smoke.
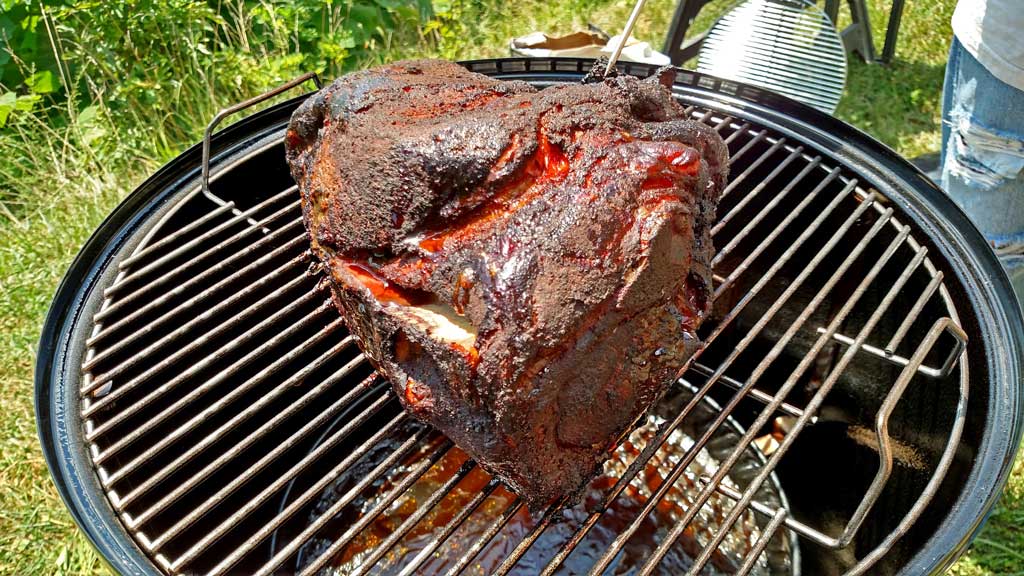
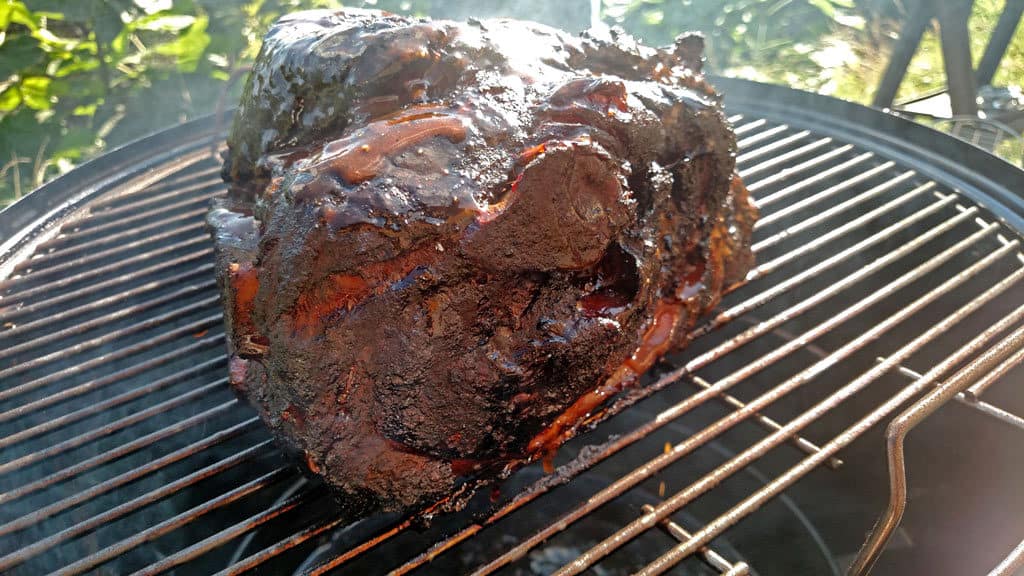
#5 Test For Doneness
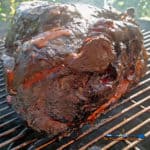
Smoke the pork butt until a dark “bark” (outside crust) forms and the internal temp is about 190 degrees F, about 5 hours; use a meat instant-read meat thermometer to test for doneness. Take readings in at least three of the thickest areas.
#6 Never Mind The Stall
When the pork’s internal temperature reaches about 165 degrees F, the surface evaporation causes the meat’s internal temperature to plateau. Pitmasters call this “the stall.” Don’t panic. It will pass. Just wait out the stall. The ideal temperature of a properly smoked pork butt is 190 to 195 degrees F.
The internal temperature of the pork can increase by 10 degrees even after it’s been removed from the grill, so keep that in mind. For example, if the internal temperature is 190 degrees F when you take it off the grill, it may rise to an optimal 200 degrees F, perfect!

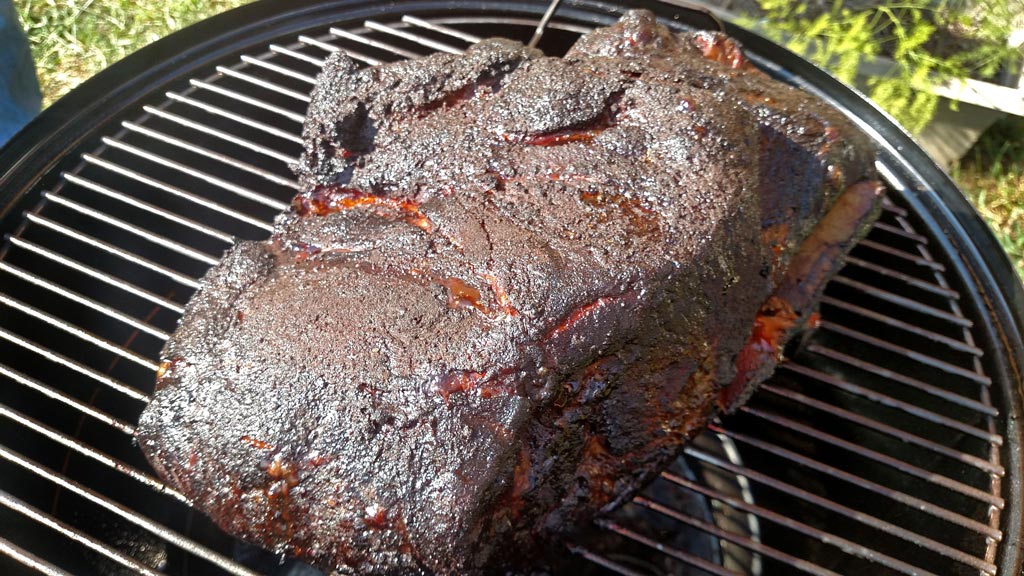
#7 Saucing the Meat (optional)
Start basting the meat with a warm barbecue sauce using a brush or mop for the last 1 ½ hours at about 180 degrees F. Then mop it every 30 minutes after that.
It’s okay to be messy with it. Just slather it down and cover it back up.
If you opt out of barbecue sauce, you may want to consider wrapping the pork in butcher paper or aluminum foil after you get the color bark you want. Wrapping the meat will keep it from darkening and becoming black from the smoke.
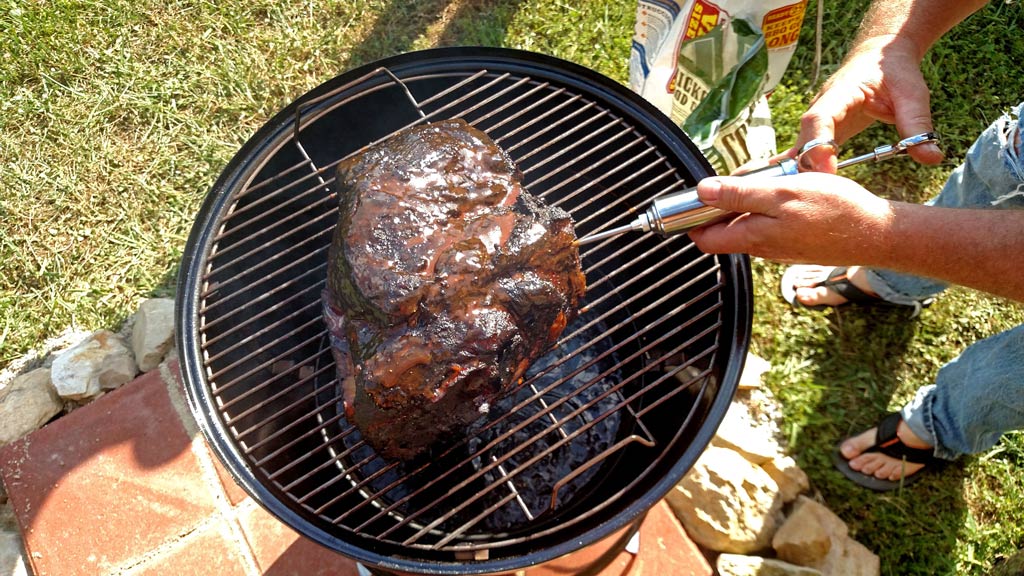
#8 Injecting The Pork With Sauce (optional)
David prefers injecting his meat with barbecue sauce during the last hour of smoking. Rubs and sauce sit on the meat’s surface and penetrate only a few millimeters into the meat. Injecting gets the flavor to the center of the food in seconds with the push of a plunger.
Injectors look like oversize hypodermic needles. Don’t waste your time with plastic injectors. They don’t last. Instead, find a stainless steel injector. They typically come with a 2 to 4-ounce capacity—enough for almost anything you slap on your smoker or grill.
To inject the meat, you may need to pour your barbecue sauce into a narrow container so you can suck the sauce up inside the needle. Once the injector is full of sauce, that is where all the fun begins!
How To Inject the Sauce Into the Pork:
- Insert the needle and go all the way to the center. Press the plunger slowly and ease the needle out.
- Insert the needle again about every 1 ½-inches apart and leave behind about 1 ounce of sauce per pound.
- Some sauce will almost always follow the needle out of the hole, but if it comes spurting out like it hit an artery, use less pressure.
- You want to avoid pockets of liquid and have the sauce evenly distributed inside the meat. He usually injects it when he brushes sauce on the outside, but only once or twice.
#9 Resting The Pork (not optional)
When the pork is about to fall apart and dripping with BBQ sauce, remove the meat from the smoker or grill and rest as you would with grilled or roasted meats.
Allowing the pork to rest before chopping or serving it relaxes the meat fibers; moisture driven out of the meat is redistributed and reabsorbed by some dissolved proteins.
Rested meat holds on to more of its natural juices. This also keeps your cutting board from flooding with meat juices when you slice it into the pork. A good 15 to 20-minute rest should do under loosely tented foil.

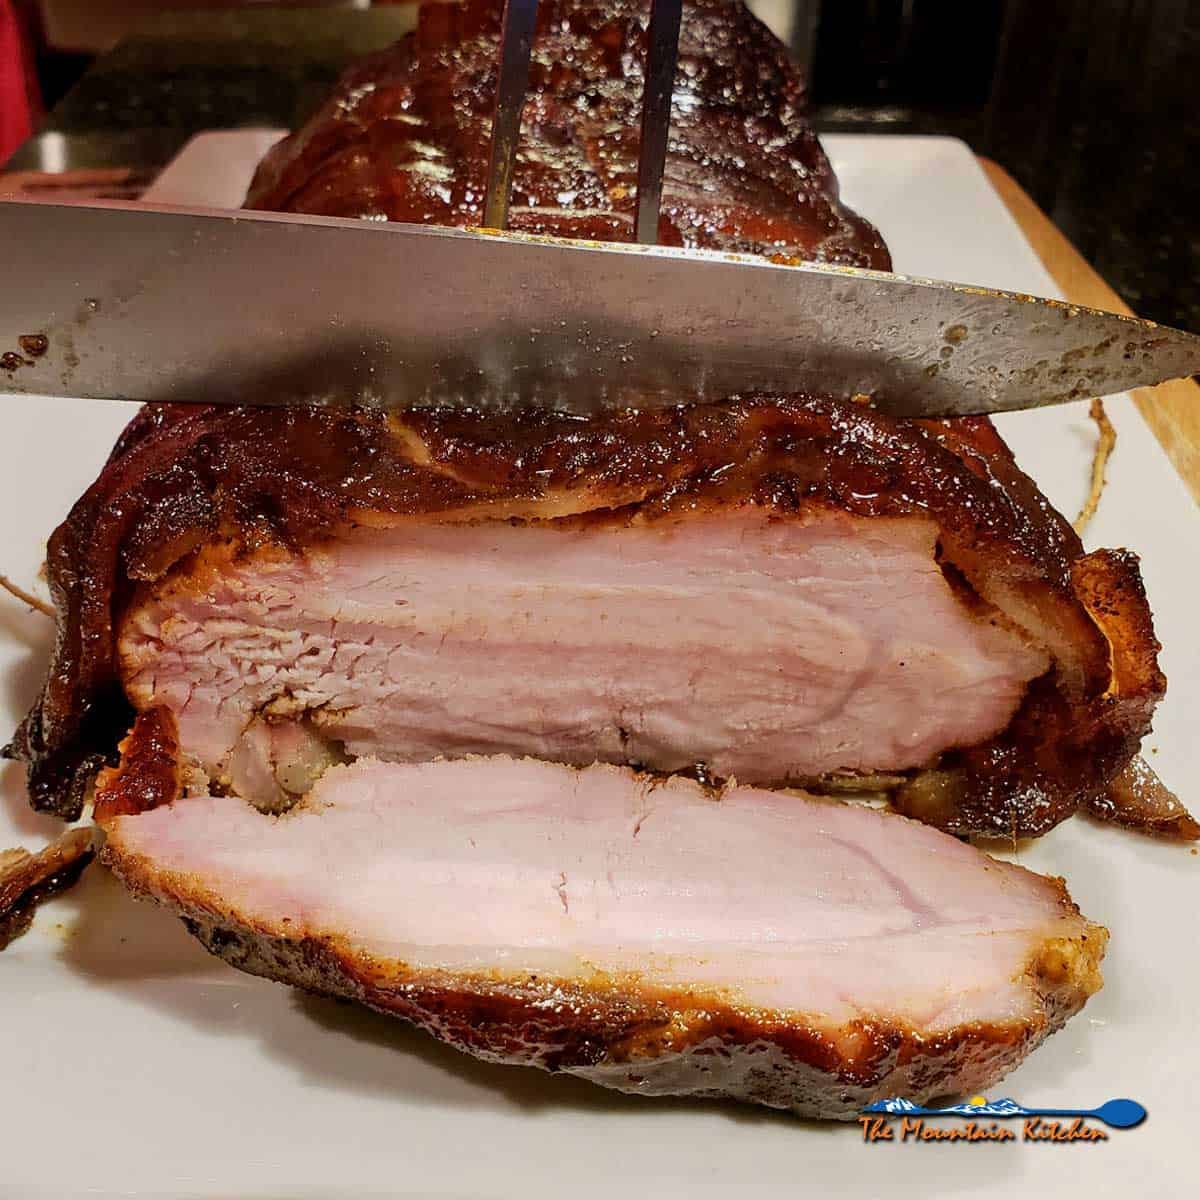
#10 Slice Or Shred And Serve
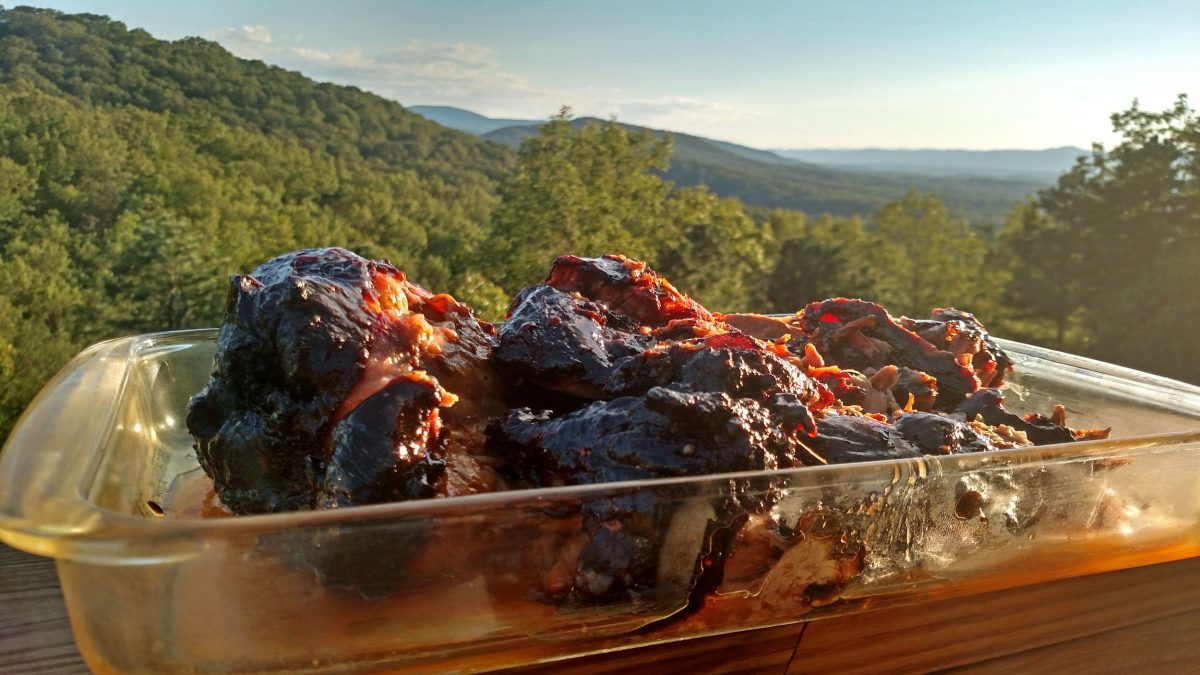
Perfectly cooked meat should be moist and juicy. If you wish, drizzle some BBQ sauce and serve slices of flat fanned out like a deck of cards or shred it to make pulled pork.
What to Do With Pork Butt
You can serve it sliced on a plate with barbecue sauce or shred it with a fork to serve on pulled pork sandwiches with coleslaw. You can also serve it in tacos or burritos.
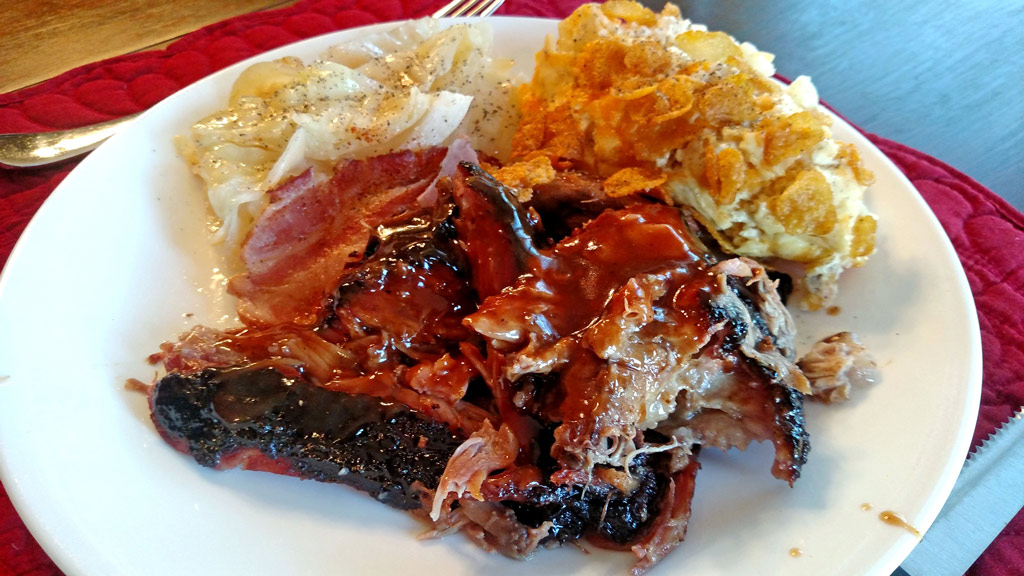
What to Serve With Smoked Pork
We served the pork with some Hash Brown Potato Casserole and grilled cabbage, but your favorite side dish will go along perfectly.
Unless David throws on a burger or something, I’m vegetarian for the night. I’m not too fond of smoked pork, and I am okay with that. As long as David’s happy, I’m happy. And that man is happy when he is grilling or smoking meat!

This blog post has been updated on December 7, 2022.
Smoking A Pork Butt With BBQ Sauce
Useful Equipment:
- Charcoal
- Hickory Wood Chunks
- Heavy-Duty Aluminum Foil
Ingredients
What’s Needed:
- 7 pork butt preferably bone-in (Boston Butt) between 5-9 pounds
All-Purpose Pork Dry Rub
- 2 tablespoons brown sugar
- 1 teaspoon paprika
- 1 teaspoon black pepper
- 1 teaspoon Kosher salt
- 1 teaspoon garlic powder
- 1 teaspoon onion powder
- ½ teaspoon cayenne pepper
- BBQ Sauce of your choice
Instructions
Prep the Pork
- Start with a pork butt in the 5-pound range, which is just the right size to fit on any smoker or grill. Trim the pork to leave at least a ¼-inch cap of fat.
- Rinse the meat under cold running water and blot dry with paper towels. Combine all the ingredients for the rub in a small bowl (make sure to work out any clumps from the brown sugar for even distribution) and stir to mix. Rub onto the all sides of the pork butt.If you have time, wrap the butt in plastic wrap and let it cure in the refrigerator for at least 4 hours or as long as overnight. Smoking the pork right away is ok, but sitting in the fridge for several hours allows the rub to penetrate the meat.
Prep the Smoker or Grill
- Smoking is a form of indirect cooking and usually takes place over a period of hours over low temperatures. Preheat the grill or smoker to 225-250 degrees F. To maintain this low temperature, use only half as much charcoal as usual. (A half chimney-full.) When the coals are ashed over and white, toss 2-3 wood chunks onto the coals and close the lid.Using a charcoal grill, set it up for indirect heat with a drip pan with hot water directly underneath the meat to stabilize the temperature.
Smoke the pork
- When the smoker or grill is the ideal temperature range, you are ready to smoke, place the pork on the hot grate over the drip pan, fat side up, toss a hand full of the soaked wood chunks and some dry wood chunks onto the coals and cover the grill.
- Bring the temperature up to 225 degrees F, using the vents to regulate the temperature. Use a probe thermometer to help monitor the temperature.
- You will need to add fresh coals and more wood chunks to each side of the grill every hour for at least the first 4 hours.
Low and Slow
- Check the temperature of the grill every hour, staying as close to 225 degrees F as possible. Resist the temptation to open the lid. Only open the charcoal door or the lid if you need to add more charcoal or wood to maintain temperature and smoke. After at least 4 hours, check the temperature of the meat to see where it is and get an idea of how much more time it will need to smoke.
Test for Doneness
- Smoke the pork until a dark “bark” (outside crust) forms and the internal temperature of the meat is about 190 degrees F, about 6 to 10 hours, depending on weight; use a meat thermometer to test for doneness.
Sauce the Pork (optional)
- Start basting the meat with a sauce using a brush or mop for the last 1 ½ hours at about 180 degrees F. Then mop it every 30 minutes after that.
Inject the Pork with BBQ Sauce (optional)
- To inject the meat, you may need to pour your sauce into a narrow container so you can suck the sauce up inside the needle. Once the injector is full of sauce, that is where all the fun begins! Insert the needle and go all the way to the center. Press the plunger slowly and ease the needle out. Insert the needle again about every 1 ½-inches apart and leave behind about 1-ounce of sauce per pound. Some sauce will almost always follow the needle out of the hole, but if it comes spurting out like it hit an artery, use less pressure. You want to avoid pockets of liquid and have the sauce evenly distributed inside the meat. He usually injects it when he sauces the outside, but only once or twice.
Resting (not optional)
- After the pork is literally about to fall apart and dripping with sauce, remove the meat from the smoker and rest a good 15 to 20 minutes under loosely tented foil.
Slice or Shred and Serve
- Perfectly cooked meat should be moist and juicy. Serve it sliced on a plate or pull it to serve on a pulled pork sandwich. You can also serve it in tacos or burritos. Serve with sauce on the side or drizzled overtop.
Notes
Nutrition
The Mountain Kitchen participates in the Amazon Affiliate Program, an affiliate advertising program designed to provide a means for sites to earn advertising fees by advertising and linking to Amazon.com.
The Mountain Kitchen participates in the Thermoworks Affiliate Program, an affiliate advertising program designed to provide sites to earn advertising fees by advertising and linking to Thermoworks.com.
There is no extra cost to you for clicking! It just helps us afford to do what we do here at TheMountainKitchen.com. Thanks for your support!


Sarah says
I’m drooling! This sounds sooooooo good!
The Mountain Kitchen says
Thanks, Sarah! I’ll gladly give you my portion. I have no idea why I don’t like it…
Max Gillaspie says
That sounds delicious. Ask David to make just one change. Try Stubbs, or Royal Oak charcoal. If He does he will never go back to Kingsford. Its to full of fillers and does not burn well on low and slow cooking. Love the blog and the website!
Max
The Mountain Kitchen says
Hi Max,
Thanks for taking time to comment. I will relay your message to David about the charcoal. I appreciate you taking time to stop by and say hello. Have a great weekend!
Debbie
Patrons of the Pit says
Well I’ll be! Look at that. How the heck did I miss this! Congrats to David, half a year belated!
The Mountain Kitchen says
His pride and joy! Only pork has adorned it. I’m waiting for more…
Ace says
I gotta say that technique does sound quite tasty but while reading I was having a hard time getting my mind past the fact that he has a woman that doesn’t want him to have a cheap smoker, was concerned about how he sat it up and even into it enough to write a short article on it for him. Sounds like David is one lucky man with a woman that wants to give him happiness. Jealous I am.
The Mountain Kitchen says
So nice of you to say, Ace. Hope you enjoy the pork! 🙂
Stu willey says
I’m trying this method …pork picnic been on grill almost 11 hrs..internal temp I only 137 degrees..I have a pork picnic little over five lbs…I have charcoal grill with smoker box….temp about 250 to 275….so why so long. If u do it in 5 hrs…
Stu willey says
BTW. It’s looking very yummy…BBQ glaze looking good…just taking long time
The Mountain Kitchen says
Hi Stu! What is your source of fuel if you are using the firebox? Also, are you using thermometers on the grill? There are lots of variables that come into play. Let us know. ~ David
Brenda says
I found your website while I was looking for a recipe. Did you use a pork picnic that still has the skin on it? That is what I have but I can’t tell if that is what you are using.
The Mountain Kitchen says
Hi Brenda! Yes, the skin is still on. It also helps to score the skin lightly with a sharp knife in a crosshatch pattern, making sure not to puncture the meat. I hope this helps. Enjoy!
Shenanigator says
My partner and I made this yesterday. We’re both noobs to smoking and it took 12 hours (because we’re getting used to our tools and it was bloody cold when the sun went down so keeping the temp where it needed to be was… challenging). At 3 am we were snacking on smoked pork butt. My partner said, “I have /never/ tasted food like this. I think I’m having a spiritual experience!” When he was telling a friend about it he said, “Dude, I /saw/ things. It was like an acid flashback in my mouth!”
Thank you so much for such a delicious recipe and great instructions!
The Mountain Kitchen says
Awesome! Glad it was worth the wait. Cold temps outside sure do affect your smoker!